
The car models covered in this manual are equipped with an additional security system (SRS). Before doing any work near the airbag units, steering column, dashboard, front seats, turn off the SRS to avoid injury if it is accidentally triggered (see chapter Onboard electrical equipment). SRS circuit wiring is easily identified by the yellow color of the insulation.
Elements of fixing the contact connectors of the electrical wiring of the front seat
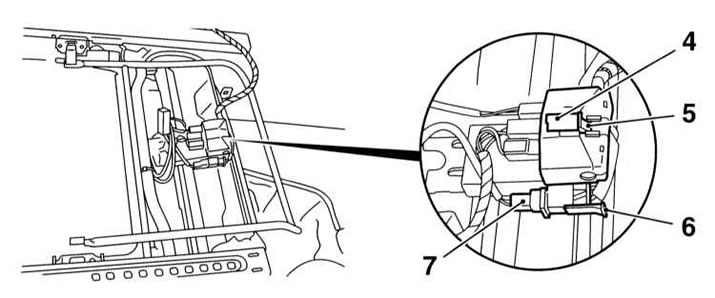
4 - Nose of the connector retainer
5 - Red connector pin
6 - Safety pin
7 - Side airbag connector
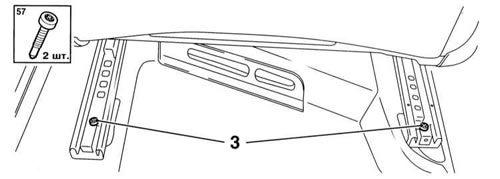
Front seat bolts
Removing
1. Disconnect the negative cable from the battery. Wait at least one minute for the SRS self-contained power supply capacitor to discharge before proceeding with the work ahead.
2. If necessary, in order to expand the working space, unscrew the fixing screws and remove the overhead box from the side panel.
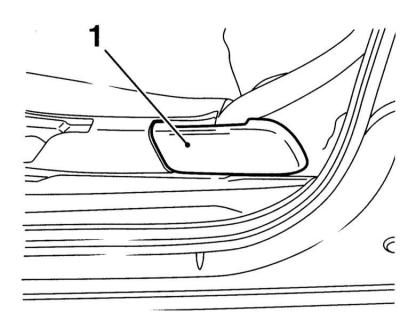
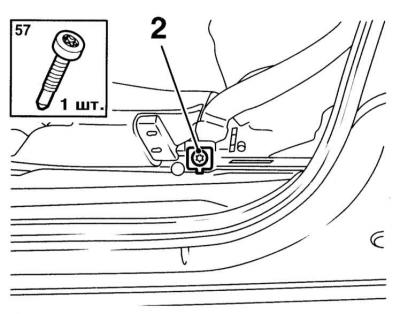
3. Gently prying, remove the plastic cover installed on the outside of the seat, then unscrew the fixing screw.
4. Detach the seat belt anchor from the seat.
5. Move the seat all the way back, if equipped, disconnect the electrical wiring from the emergency belt tensioner module, from the side airbag module, from the seat heating element and from the seat occupied sensor. To disconnect the connector, pull out the red tab and squeeze the latch (see illustration Elements of fixing the contact connectors of the electrical wiring of the front seat).
6. Remove the front bolts securing the seat to the base frame - the bolts are located at the front of both guide rails (see illustration Front seat bolts).
7. Slide the seats all the way forward and remove the rear mounting bolts.
8. With the help of a second person, gently lift the seat and remove it from the vehicle.
9. If necessary, unscrew the fasteners and remove the seat base frame from the floor.
Installation
Installation is carried out in the reverse order to the dismantling of the components.
1. Before screwing in, the threaded part of the fixing bolts should be lubricated with an anaerobic fixing sealant. Make sure all fasteners are tightened to the correct torque.
Visitor comments