


Contents: Electronic control unit ⬇ Door Lock Activators ⬇ Trunk/Tailgate Lock Activators ⬇ Fuel filler door lock actuator…⬇ Fuel filler door lock actuator…⬇
Electronic control unit
The block has a built-in shock sensor. When replacing the block, it should be programmed using special equipment at an Opel service station.
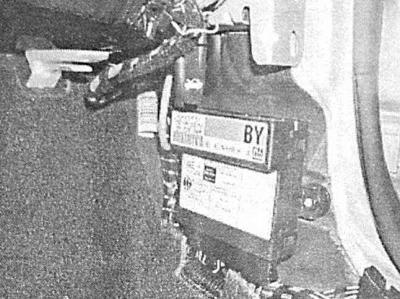
The control unit is installed under the decorative trim on the right front door sill.
1. Disconnect the negative cable from the battery.
2. Remove the side decorative trim of the right front door sill (see Removal and installation of interior trim panels).
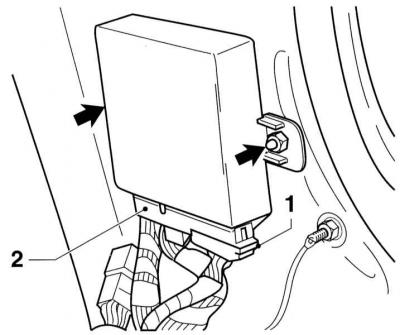
3. Disconnect the two electrical wiring connectors.
4. Remove the mounting nuts (shown by arrows) and remove the block.
5. Installation is carried out in reverse order.
Door Lock Activators
The activators are built into the lock assemblies, for a description of the removal and installation procedures, see. Removal and installation door locks.
Trunk/Tailgate Lock Activators
1. Remove the trim panel from the inside of the tailgate/trunk lid.
2. On Sedan models, remove the lock cylinder cover.
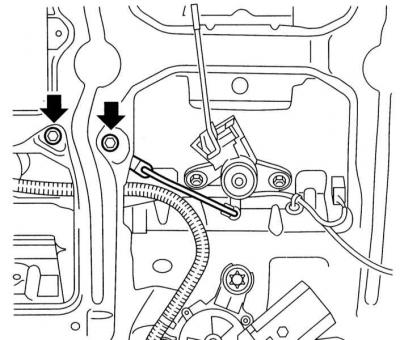
3. Release the plastic retainer and disconnect the actuator control rod from the lock.
4. Disconnect the electrical wiring from the activator.
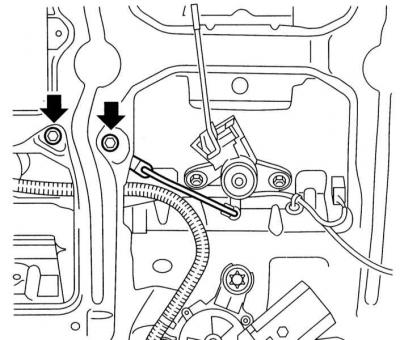
5. Remove the mounting screws and remove the actuator from the tailgate/trunk lid.
Tailgate Lock Activator Fastening Screws (the control rod is visible on the right)
6. Installation is carried out in reverse order.
Fuel filler door lock actuator (sedan and Hatchback models)
1. Remove the carpet in the luggage compartment.
2. Remove the rear decorative panel (see Removal and installation of interior trim panels).
3. Disconnect the electrical wiring from the activator.
4. Open the filler cap and remove the fastening screws (shown by arrows).
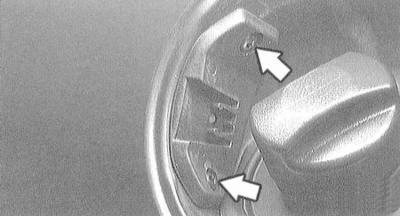
5. Remove the activator (1) with the drive element (2).
6. Installation is carried out in reverse order.
Fuel filler door lock actuator (models Station wagon and Zafira)
1. At the rear of the luggage compartment, release the plastic clips and open the activator access cover.
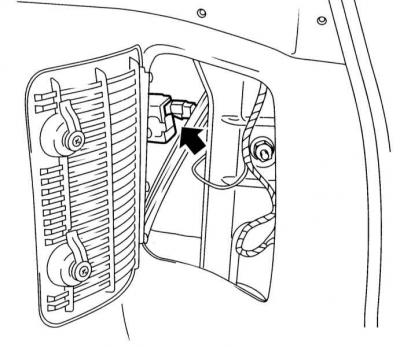
2. Disconnect the electrical wiring from the activator.
3. Open the filler cap, unscrew the mounting screws and remove the activator.
4. Installation is carried out in reverse order.
Visitor comments