
Comment. For clarity, the operation is shown on the removed selector.
Examination
1. We prepare the car for work (see «Preparing the car for maintenance and repair»).
2. Remove the lining of the floor tunnel (see «Parking brake lever - replacement»).
3. Set the selector to position P, turn on the ignition and press the brake pedal. With a tester in voltmeter mode, we check the presence of voltage at the solenoid terminals.
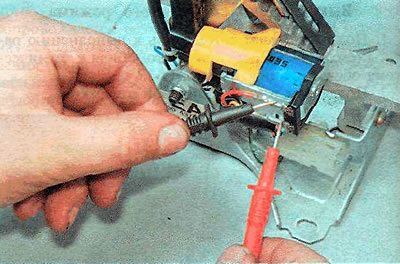
The voltage should be 12 V. If there is voltage, the solenoid is faulty, it must be replaced (see below).
4. If there is no voltage, we check the presence of voltage with a tester in voltmeter mode (the conditions for checking the previous paragraph must also be met) between the contact with the yellow wire and the contact jumper.
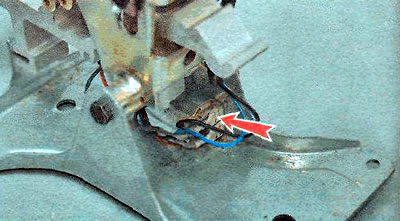
The voltage should be 12V. If there is no voltage, the brake light switch is faulty (see «Brake light switch - check and replace»), wiring (see «Checking and repairing electrical circuits») or automatic transmission control unit (see «Automatic transmission electronic control unit - replacement»).
5. With a tester in ohmmeter mode, we check the presence of a circuit (minimum resistance value) between contact with red wire and contact jumper (selector must be in position P). If the resistance is infinitely high, the microswitch is faulty (see «Automatic transmission selector position microswitches - check and replacement») or wiring (see «Checking and repairing electrical circuits»).
Replacement
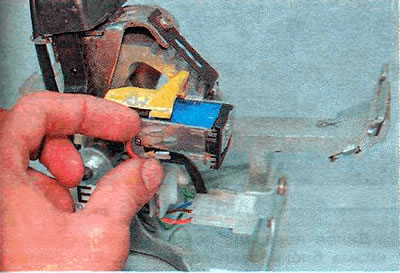
1. Disconnect the two connectors from the solenoid.
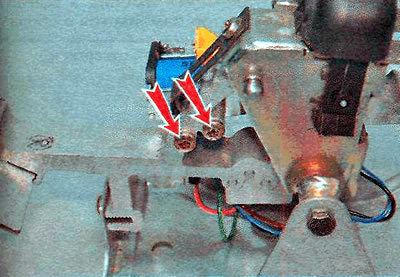
2. Using the TORX T25 key, unscrew the two mounting bolts and remove the solenoid.
3. Install the parts in reverse order.
Visitor comments