
2. Disconnect the protection of the front wheel arches from the front bumper trim (see Section 7), on diesel models, unscrew the bolts securing the crankcase protection to the lining, and fold the protection down.
3. On the models equipped with fog lamps, disconnect an electroconducting from headlights. If you have headlight washers, disconnect the supply hoses from the washers.
4. Open the hood, unscrew the fastening bolts and press out the 6 front bumper cover clips (see resist. illustration).
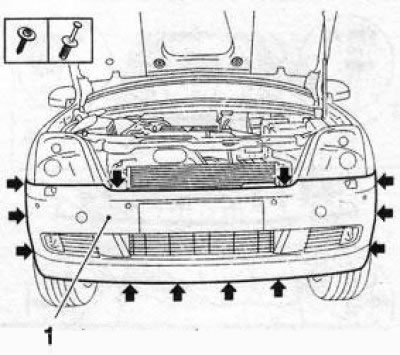
5.4 Mounting bolts and clips of the front bumper lining are indicated by arrows: A. Mounting bolts for protecting the rear wheel arches; B. Lower holders; C. Top mounting bolts
5. Press the side faces of the bumper lining in the direction indicated by arrow A and release the lining from the side guides (see resist. illustration).

5.5 Directions for pushing and removing the front bumper cover
6. Release the bumper cover from the front guide located on the bumper beam between the headlights, and with the help of an assistant, remove the cover (arrow B) (see illustration 5.5).
7. Remove 8 bolts and loosen 4 nuts (see resist. illustration) and remove the front bumper beam from the frame.
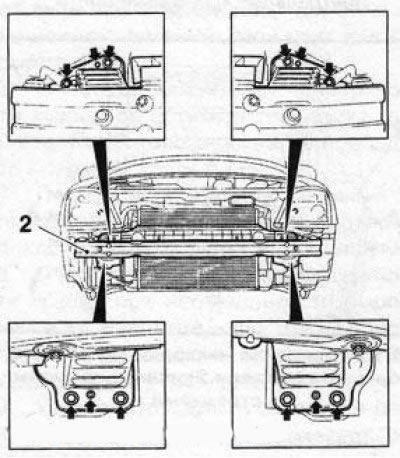
5.7 Points (indicated by arrows) front bumper mounts (2)
8. When installing the beam, you must use new mounting bolts and nuts. The flange of the bumper beam after tightening the bolts for protection should be sealed with wax.
9. Further installation is carried out in the reverse order of removal. New rivets are used to fasten the front rail, while the rail must be exposed to the central hole.
Visitor comments