
Removing
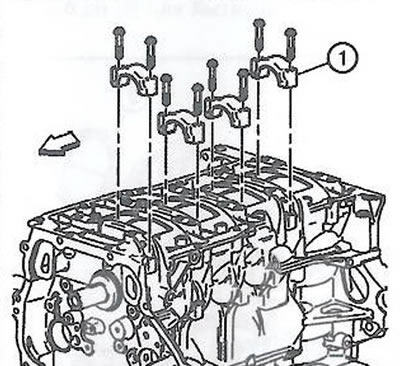
1. Remove the cylinder head.
2. Remove the oil pan.
3. Turn the crankshaft so that the connecting rod bolts are most accessible.
4. Mark the connecting rods and connecting rod caps with respect to the cylinder number. Also note the direction of their installation. This will ensure that the connecting rods and connecting rod caps are properly seated during reassembly.
5. Remove carbon from the top of the cylinder bore to prevent damage to the piston rings.
6. Unscrew the connecting rod bolts.
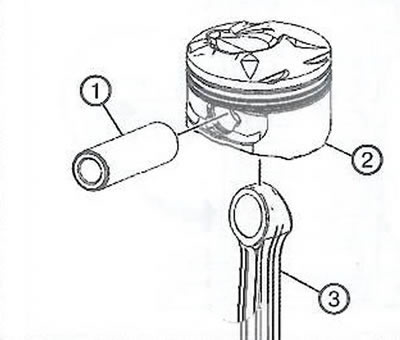
7. Remove connecting rod caps (1).
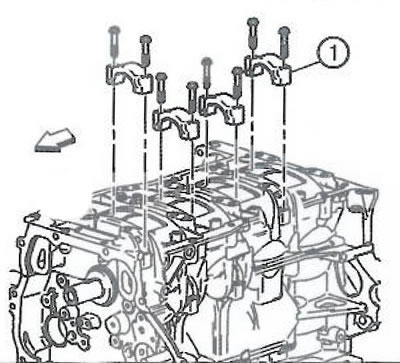
8. Install guides EN-43966-1 before removing the piston with connecting rod (1) on the connecting rod bolts.
9. Remove piston with connecting rod assembly (2) from the cylinder.
Disassembly
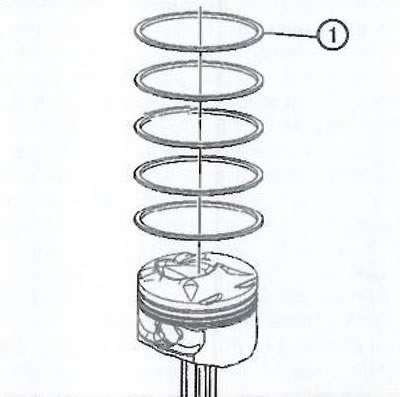
1. Using the piston ring plier, remove the piston rings from the piston. Piston rings must not be reused.
Attention. Handle the piston carefully. Worn piston rings have sharp edges that can cause injury.
Note. The piston pin is held in place by two circlips. Do not use special tools to remove the piston pin. Make sure the piston pin is not damaged. Do not reuse circlips.
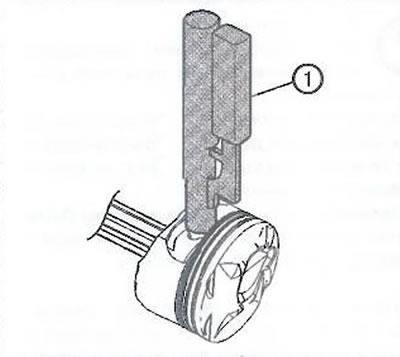
2. Remove the piston pin circlips using tool EN-46745 (1) and adapter EN-46745-4.
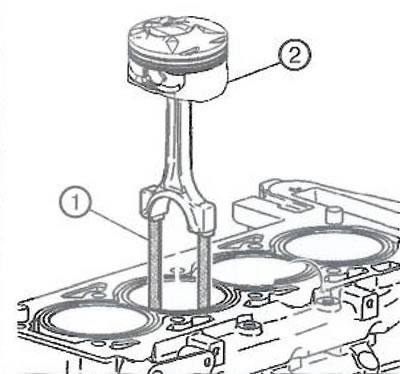
3. Remove piston pin (1) and connecting rod (3) from a piston (2).
Assembly
1. Assemble the piston (1) with connecting rod (2).
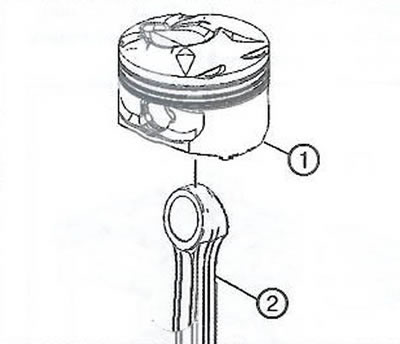
Note. Install the piston on the connecting rod with the arrow pointing towards the front of the engine.
2. To install the piston pin and its circlips, do the following:
- Lubricate the piston pin with oil.
- Using fixture EN-46745 (1) and EN-46745-4 adapter, install the piston pin circlip on one side of the piston into the matching groove.

Attention. The piston pin circlips must be properly installed in the grooves to prevent damage to the engine.
- Install the connecting rod and piston pin. Press the piston pin until it rests on the retaining ring installed in the piston.
- Using tool EN-46745 and adapter EN-46745-4, install the second piston pin circlip.
- Make sure the piston moves freely.
Attention. To install the piston rings, it is necessary to use special devices for unclenching them. Piston rings can be damaged if they are unclenched more than necessary.
3. Install the following oil scraper ring components:
- expansion ring (4).
- Lower oil scraper disc (5).
- Upper oil scraper disc (3).
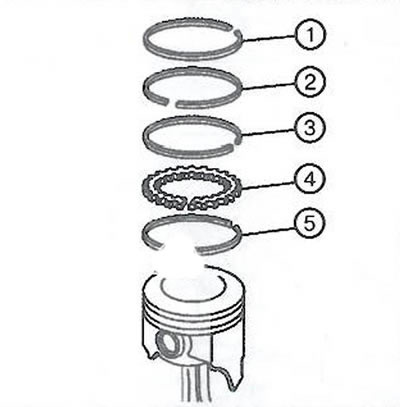
4. Install the lower compression ring (2) (second ring). The manufacturer's mark on the ring should be facing up.
5. Install the top compression ring (1).
Installation
1. Install new connecting rod bearings:
- Install the bearing shells into the connecting rod and connecting rod cap.
- Lubricate the connecting rod bearings with engine oil.
2. Install rails EN-43966-1 (1) into the holes for the connecting rod bolts. This will protect the crankshaft journal when installing the piston and connecting rod assembly.
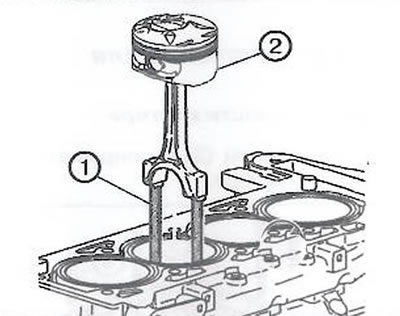
3. Install the EN-43953 piston ring compressor, then insert the piston (2) with a connecting rod to the corresponding cylinder:
- Position the piston ring locks evenly around the piston circumference and ensure that they are not disturbed in the future.
- Lubricate the piston and piston rings with engine oil.
- The piston must be installed so that the mark on the piston crown points towards the front of the engine.
- Insert the piston into the corresponding engine cylinder.
- Hold the EN-43953 piston ring compressor on the cylinder block until all piston rings are seated in the cylinder.
- Remove the connecting rod guides from the connecting rod bolt holes.
4. Install the connecting rod cap (1).
Note. Always use new connecting rod bolts.
5. Install new connecting rod bolts and tighten to 25 Nm, then tighten by another 100°.
6. Install the remaining pistons with connecting rods in the same way.
7. Install the oil pan.
8. Install the cylinder head.
Visitor comments