


Removal the lower part of the crankcase
1. Loosen the bolts (3) around the perimeter of the lower part of the crankcase.
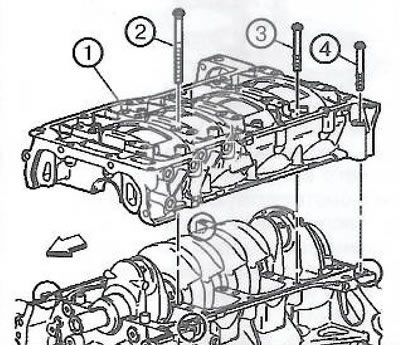
Note: Don't forget the two bolts (4) on the outside at the back.
2. Unscrew and discard the crankshaft main bearing bolts (2).
3. Using a suitable tool as a lever, separate the upper and lower parts of the crankcase evenly.
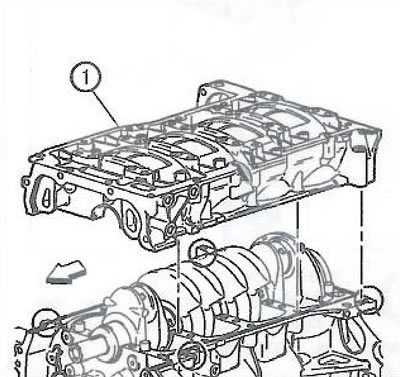
4. Remove the lower part of the crankcase (1).
Removal the crankshaft
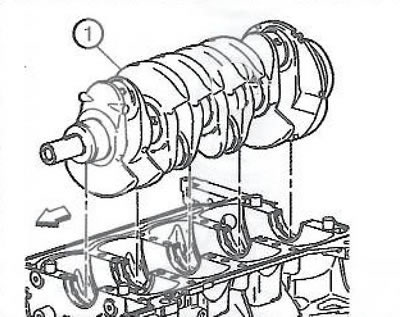
1. Remove the crankshaft (1) from the cylinder block.
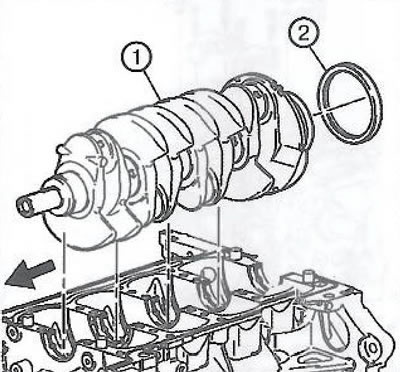
2. Remove the rear crankshaft oil seal (2).
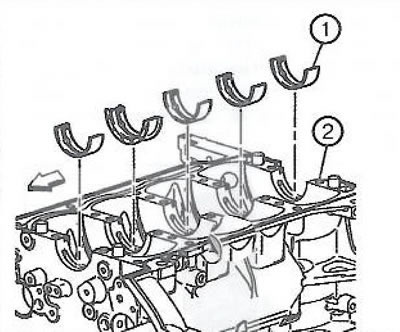
3. Remove the main bearing shells (1) from the cylinder block (2).
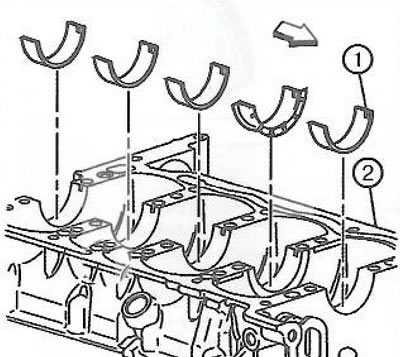
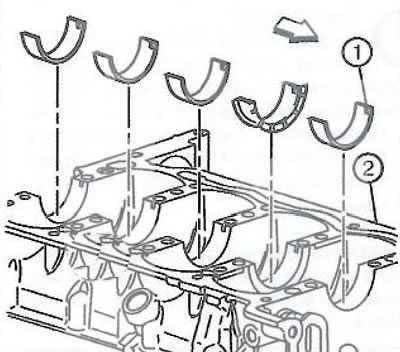
4. Remove the main bearing shells (1) from the lower part of the crankcase (2).
5. Remove oil, sediment and carbon deposits.
6. Check the oil channels for blockages.
7. Check the condition of the thread.
Installing the crankshaft
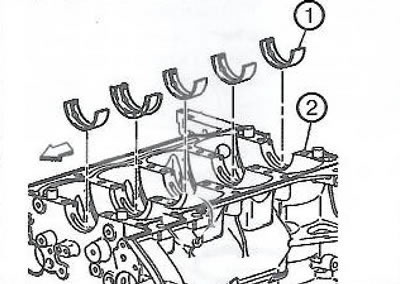
1. Install the upper crankshaft main bearing shells (1) into the cylinder block (2) and lubricate their surface with engine oil.
2. Install the crankshaft (I) on the main bearings.
3. Install the lower main bearing shells (1) without oil grooves into the lower part of the crankcase (2). Apply oil to the surfaces of the shells.
Note.
- The surface of the cylinder block should not have any remnants of old sealant.
- Installation of the lower crankcase onto the cylinder block must be completed within twenty minutes of applying the sealant.
- The lower part of the crankcase must be finally tightened within an hour from the moment of applying the sealant.
4. Apply a bead of sealant with a diameter of "a" = 4.25 mm directly into the groove of the contact surface of the cylinder block with the lower part of the crankcase.
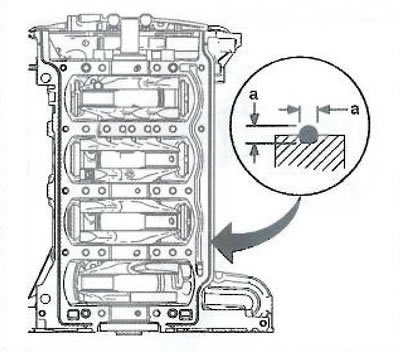
5. Install the lower crankcase (1). If necessary, carefully adjust the position of the lower crankcase by tapping it with a suitable tool. Make sure that the lower crankcase is correctly seated on the dowel pins.
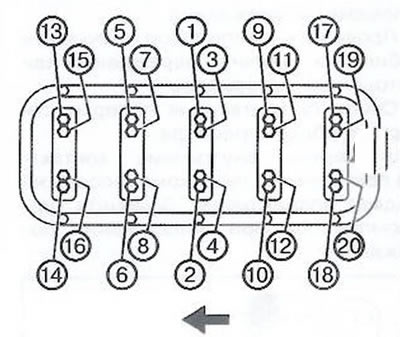
6. Install new crankshaft main bearing bolts and hand tighten in the sequence shown.
Original posted on the website: opelbook.ru
7. Tighten the crankshaft main bearing bolts in the following sequence:
- Tighten the bolts to 20 Nm.
- Using the EN-45059 tool, tighten the bolts another 70°.
8. Install the bolts around the perimeter of the lower part of the crankcase and tighten in the specified sequence to a torque of 25 Nm.
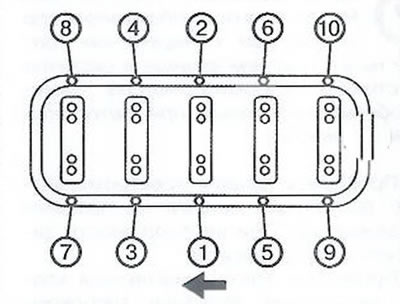
Note: Don't forget the two bolts on the outside at the back.
Visitor comments