
Removing
Note. This case describes the removal of the windshield using the removal system BO-46974.
Attention! To avoid injury to eyes and hands, put on work gloves and goggles before starting work.
Note. Park the vehicle on a level surface and align the front wheels.

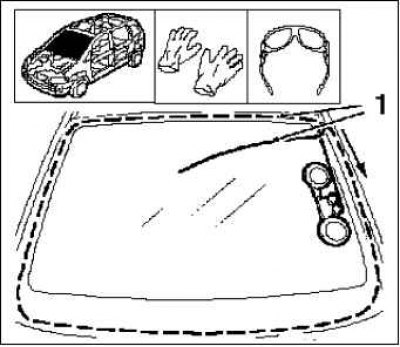
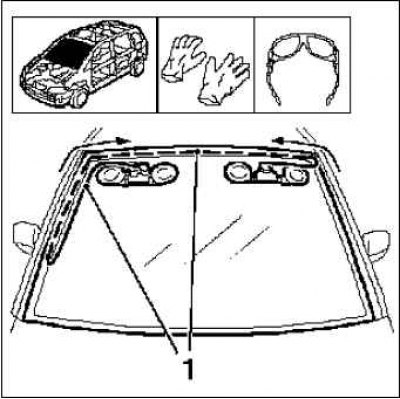
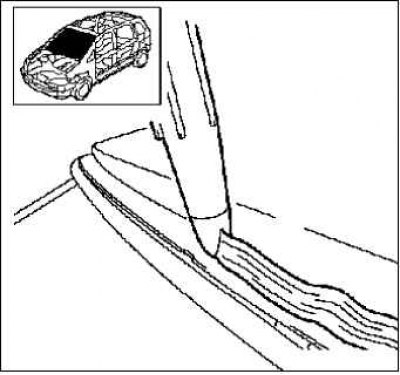
Remove both wiper arms.
Remove 2 protective caps.
Loosen 2 nuts.
Remove wiper arms 1.
Completely dismantle the water repellent.
Remove the engine compartment seal 4.
Unscrew the 2 screws securing the water repellent 2 (arrows).
Pull off the fuel injector hose 3.
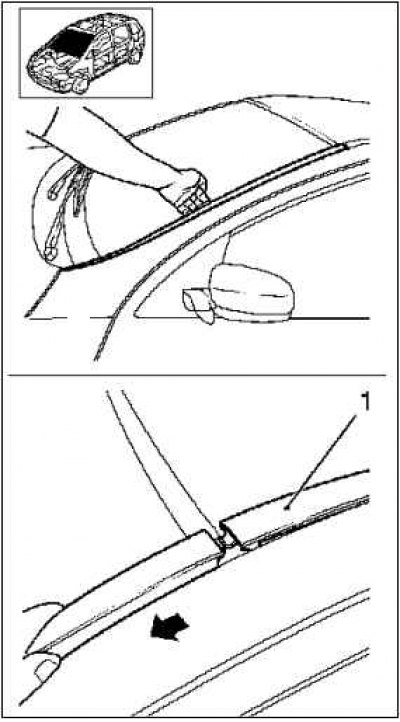
Remove both windshield trims.
Pull off a decorative lath of a windshield from side of an A-pillar.
Pull 1 windshield trim strip from the side of the ceiling strip and remove it.
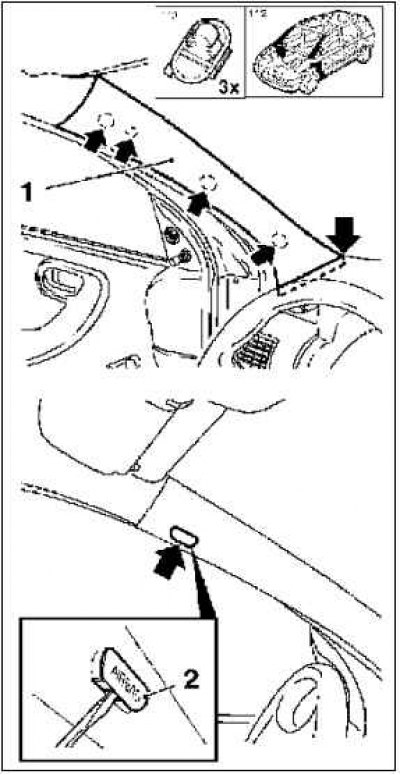
Remove both A-pillar inner trims at the top 1.
Note. For vehicles with a head airbag, the A-pillar inner lining at the top is additionally reinforced with a frame. This frame 2 is labeled Airbag.
Release 3 clips.
Remove the trim.
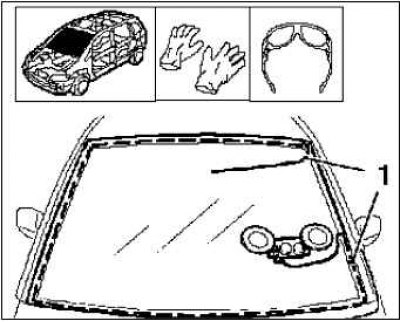
Remove the interior rearview mirror.
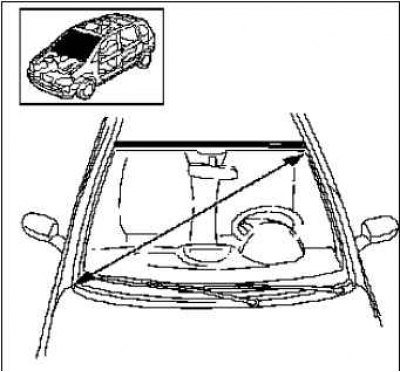
Measure the glass diagonally, cut the string.
Cut the string to four times the length of 5600 mm.
Poke holes with an awl.
Insert the string and pull towards the middle of the glass.
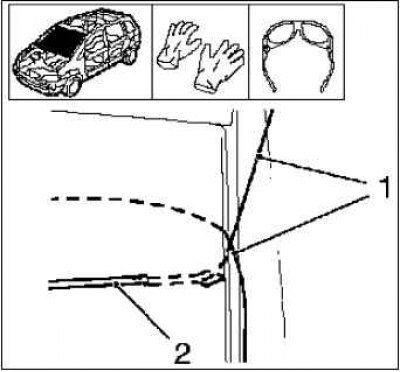
Lay string cutter 1 around the perimeter.
Secure with fiber tape.
Punch a hole for the second end of the string.
Using awl 2, pull the other end of the string into the car interior.
Note. The string cutter must overlap.
Fix the front glass.
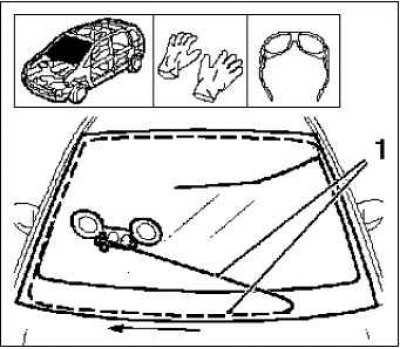
Move the cutting tool.
Bring the gate with 2 coils to the left side of the windshield.
Insert string cutter.
Attach string cutter 1 to the gate.
Switch the ratchet and pretension the cutter string.
Note. Make sure that the cutter string is correctly positioned on the guide roller of the gate.
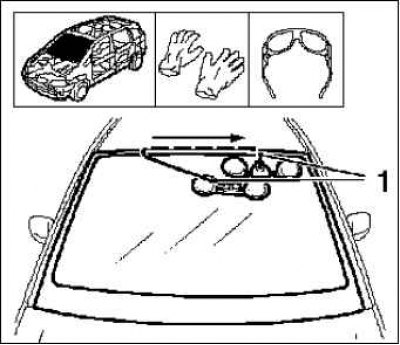
Cut out the front glass.
Cut the front glass with a winch and 2 spools until the string cutter is at the height of the spool.
The arrow shows the direction of cutting with a wire cutter.
Move the cutting tool.
Move the 2-coil collar to the lower left side of the windshield.
Switch the ratchet and pretension the cutter string 1.
Note. Make sure that the cutter string is correctly positioned on the guide roller of the gate.
Cut out the front glass.
Note. Use grease for the guide roller, the rounding of the front glass must be cut with increased force.
Cut the front glass with a winch and 2 spools until the string cutter is at the height of the spool.
The arrow shows the direction of cutting with a wire cutter.
Move the cutting tool.
Install the gate with 2 coils to the lower right side of the windshield.
Switch the ratchet and pretension the cutter string 1.
Note. Make sure that the cutter string is correctly positioned on the guide roller of the gate.
Cut out the front glass.
Cut the front glass with a winch and 2 spools until the string cutter is at the height of the spool.
The arrow shows the direction of cutting with a wire cutter.
Move the cutting tool.
Install the gate with 2 coils to the right side of the windshield.
Switch the ratchet and pretension the cutter string 1.
Note. Make sure that the cutter string is correctly positioned on the guide roller of the gate.
Cut out the front glass.
Note. Use grease for the guide roller, the rounding of the front glass must be cut with increased force.
Cut the front glass with a winch and 2 spools until the string cutter is at the height of the spool.
The arrow shows the direction of cutting with a wire cutter.
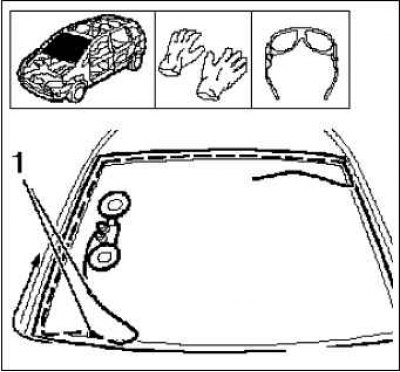
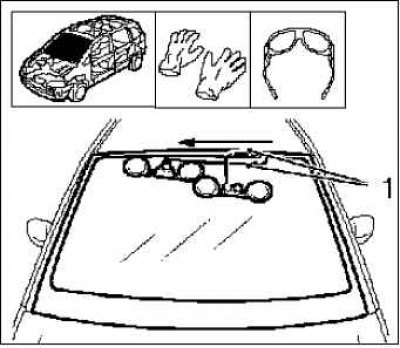
Move the cutting tool.
Install the gate with 2 coils to the right upper part of the windshield.
Install the 1 coil gate to the top left of the windshield.
Insert the other end of the string and fix it.
Switch the ratchet and pretension the cutter string 1.
Note. Make sure that the cutter string is correctly positioned on the guide roller of the gate.
Cut out the front glass.
Note. Use grease for the guide roller, the rounding of the front glass must be cut with increased force.
Cut the front glass with a winch and 2 spools until the string cutter is at the height of the spool.
Cut the front glass with a winch and 1 spool until the string cutter is at the height of the spool.
The arrows show the direction of cutting with the wire cutter.
Move the cutting tool.
Install the 2 coil windlass to the left side of the windshield under the coil windlass.
Switch the ratchet and pretension the cutter string 1.
Note. Make sure that the cutter string is correctly positioned on the guide roller of the gate.
Cut out the front glass.
Cut the front glass with a winch and 2 spools until the string cutter is at the height of the spool.
The arrow shows the direction of cutting with a wire cutter.
Move the cutting tool.
Install the 1 coil gate to the top right side of the windshield.
Note. The string cutter must overlap.
Switch the ratchet and pretension the cutter string 1.
Note. Make sure that the cutter string is correctly positioned on the guide roller of the gate.
Cut out the front glass.
Cut further until the string cutter has completely cut through the glue bead.
Remove cutting tools.
The arrow shows the direction of cutting with a wire cutter.
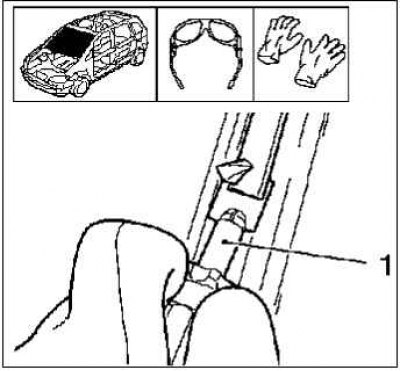
Attach tool MKM-641.
Remove the front glass.
Remove tool MKM-641.
Remove glass pieces.
Cut off the adhesive bead from the windshield.
Remove the adhesive bead using the supplied tool 1 until approx. 1 mm thick.
Cut the adhesive bead off the vehicle.
Remove the adhesive bead using the supplied tool 1 until approx. 1 mm thick.
Repair damaged paintwork.
Installation
Apply primer.
Note. Apply primer only to new glass.
Apply a glue roller.
Cut the tip of the tube so that you get a bead of approx. 13 mm.
Insert the glass using tool MKM-641.
Secure the glass with fiber tape.
Observe the holding time.
Install the rearview mirror.
Establish an internal covering of a forward rack at the top at the left and on the right.
Insert trim.
Fasten 3 clips.
Install both windshield trims.
Install the water repellent.
Tighten the 2 fixing screws.
Attach the fuel injector hose.
Install the engine compartment seal.
Install both wiper arms.
Tighten 2 nuts.
Install 2 protective caps.
Visitor comments