
Gasoline engines
Removing
1. Apply the parking brake, jack up the front of the vehicle and place it on jack stands, then remove the right front wheel. Turn out the fixing screws, release the clamps and remove the wheel arch protection locker and (with appropriate equipment) engine crankcase protection.
2. Remove the air cleaner housing and intake duct assembly with air mass sensor (see chapter Power and exhaust systems).
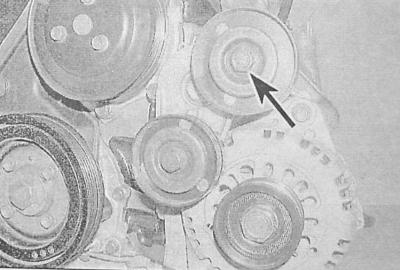
3. Loosen the belt tension, - turn the tensioner lever, overcoming the resistance of the spring. Remove the belt from the pulleys (see chapter Current service).
4. If the belt is to be reused, mark the original direction of rotation with paint or a marker.
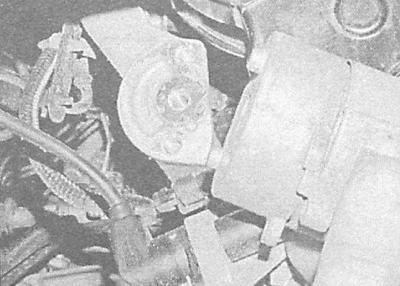
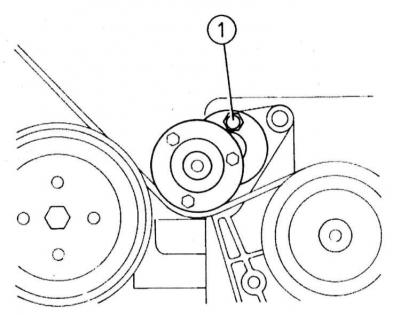
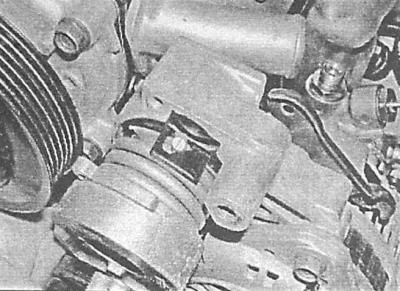
5. Remove the center mounting bolt and remove the tensioner assembly from the support bracket.
On some models, the tensioner assembly can be attached with two bolts.
Installation
1. Install the tensioner assembly on the support bracket, - make sure that the protrusions on the mating surface of the tensioner fall into the reciprocal selections in the bracket. Screw fixing bolts and tighten them with the required effort.
On models with two tensioner mounting bolts, there are no protrusions on the mating surface.
2. Keeping the tensioner spring cocked, place the belt over the pulleys (see chapter Current service).
3. Reinstall the locker and crankcase, then lower the vehicle to the ground and tighten the wheel bolts to specification.
Diesel models
Removing
Models with 1.7L SOHC engine
1. The alternator drive belt tensioner is equipped with air-conditioned models only. On other models, the belt is tensioned by turning the alternator (see chapter Current service).
2. Set the parking brake, jack up the front of the vehicle and place it on jack stands, then remove the right front wheel. If equipped, unscrew the fixing screws and remove the engine crankcase protection.
3. Remove the air cleaner housing and intake duct assembly with air mass sensor (see chapter Power and exhaust systems).
4. If the belt is to be reused, mark the original direction of rotation with paint or a marker.
5. Turn the head of the tensioner bolt clockwise to loosen the belt tension.
6. Remove the belt from the pulleys (see chapter Current service).
7. Remove the fixing bolts and remove the tensioner assembly from the A/C compressor support bracket. The compilers of this manual do not recommend further disassembly of the tensioner.
Models with 1.7L DOHC engine
1. Apply the parking brake, jack up the front of the vehicle and place it on jack stands, then remove the right front wheel. If equipped, unscrew the fixing screws and remove the engine crankcase protection.
2. If the belt is to be reused, mark the original direction of rotation with paint or a marker.
3. While holding the tensioner spring in the cocked state, remove the belt from the pulleys (see chapter Current service).
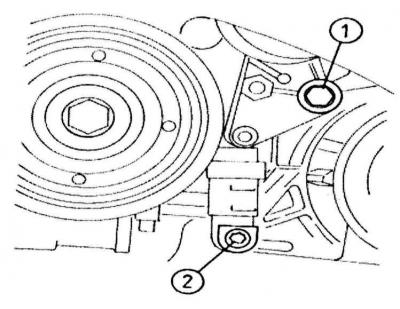
4. Turn out a fixing bolt and remove an intermediate roller.
5. Remove the center mounting bolt and remove the tensioner assembly from the alternator support bracket.
6. Turn out the central bolt of fastening and remove knot of a tensioner from an arm of fastening of the generator. The compilers of this manual do not recommend further disassembly of the tensioner.
Models with 2.0L engines
1. Remove the air cleaner and intake ducts (see chapter Power and exhaust systems).
2. Remove the drive belt (see chapter Current service).
3. Turn out a bolt of fastening of a tensioner and a bolt of fastening of its bottom rack.
Installation
Models with 1.7L SOHC engine
1. Place the tensioner assembly on the A/C compressor support bracket. Screw fixing bolts and tighten them with the required effort.
2. Keeping the tensioner spring cocked, place the belt over the pulleys (see chapter Current service).
3. Install the crankcase guard and front wheel. Lower the vehicle to the ground and tighten the wheel bolts to the correct torque.
Models with 1.7L DOHC engine
1. Place the tensioner assembly on the alternator support bracket. Tighten the central bolt to the required torque.
2. Install the intermediate roller and tighten the bolt of its fastening with the required force.
3. While holding the tensioner spring in the cocked position, lay the belt on the pulleys (see chapter Current service).
4. Install the crankcase guard and wheel. Lower the vehicle to the ground and tighten the wheel bolts to the correct torque.
Models with 2.0L engines
1. Install the tensioner and the rack, screw in and tighten the fixing bolts with the required force.
2. Keeping the tensioner spring cocked, place the tensioner on the pulleys (see chapter Current service).
3. Replace the air cleaner and air ducts (see chapter Power and exhaust systems).
Visitor comments