
OpelBook.ru
Cars AvtoVAZ Cars Mitsubishi Cars BMW Cars Mercedes Cars Nissan Cars Toyota Cars Chevrolet
English Русский
Български
Беларускі
Український
Српски
Hrvatski
Română
Polski
Slovenský
Magyar
 |  Sitemap  |  Contacts  |    


Main Astra Corsa Insignia Kadett Omega Vectra Zafira Others Articles
Vectra A (1988-1995, petrol) Vectra A (1988-1995) Vectra B (1995-2002, petrol) Vectra B (1995-2002) Vectra C (2002-2008)
  • Main
  • Vectra
  • Vectra B
  • Transmission
  • Drive shafts
  • Removal and installation the drive shaft

Removal and installation the drive shaft (Opel Vectra B)

            0

Contents: Removal ⬇ Installation ⬇

Removal


Warning: When installing the drive shaft, it is necessary to use a new drive shaft to hub nut and a new drive shaft to gearbox retaining ring.


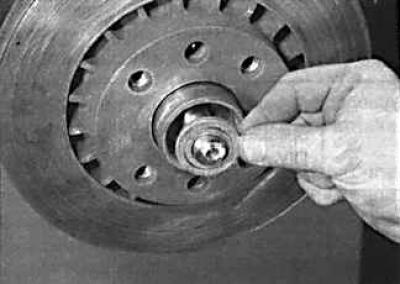
Removal the washer from the drive shaft
Removal the washer from the drive shaft


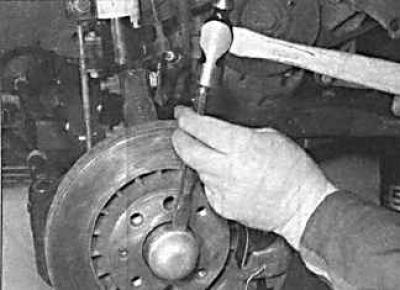
1. Raise the front of the car and secure it on stands. Remove the wheel.
1. Raise the front of the car and secure it on stands. Remove the wheel.


2. Using a chisel or screwdriver, remove the cap from the hub nut.
2. Using a chisel or screwdriver, remove the cap from the hub nut.


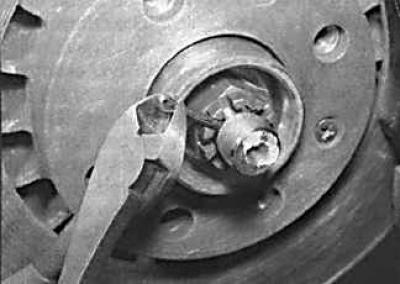
3. Remove the drive shaft mounting nut retaining pin.


3. Remove the drive shaft mounting nut retaining pin.


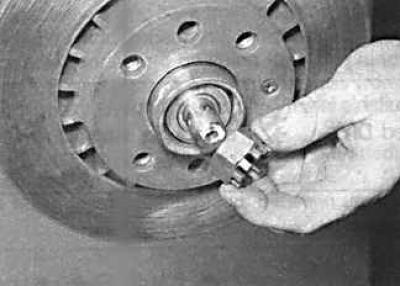
4. Unscrew the nut securing the drive shaft to the hub.

5. Unscrew the nut securing the steering rod to the steering knuckle and, using a ball joint puller, remove the steering rod from the steering knuckle.
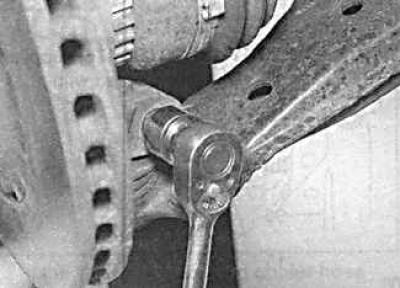
5. Unscrew the nut securing the steering rod to the steering knuckle and, using a ball joint…


[The article was published on the website OpelBook]

6. Remove the clamp bolt securing the lower control arm to the steering knuckle. Note that the bolt head is located at the rear of the steering knuckle.
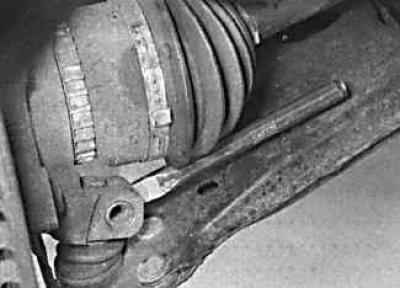
6. Remove the clamp bolt securing the lower control arm to the steering knuckle. Note that the bolt…


7. Using a flat chisel or screwdriver blade as a wedge, pry open the ball joint clamp at the bottom of the steering knuckle.


8. Using a lever, move the lower control arm downward to remove the ball joint from the steering knuckle.
8. Using a lever, move the lower control arm downward to remove the ball joint from the steering…


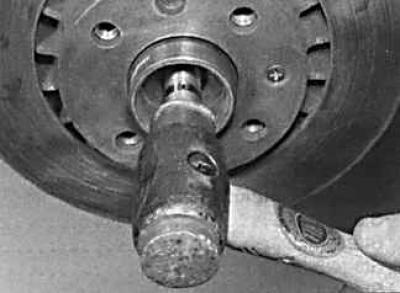
9. Pull the hub away from the vehicle and remove the outer end of the drive shaft from the hub. If the drive shaft is tight in the hub, temporarily thread the hub nut and use a hammer to tap the drive shaft out of the hub while pulling the vehicle wheel outward.
9. Pull the hub away from the vehicle and remove the outer end of the drive shaft from the hub. If…


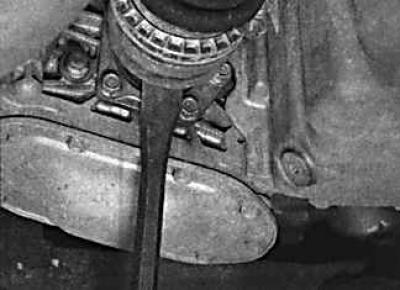
10. Remove the drive shaft from the gearbox. To do this, insert a pry bar between the inner CV joint and the gearbox housing and, while the assistant pulls the drive shaft outward, knock the drive shaft out of engagement in the differential axle gear with a strong, sharp blow to the end of the pry bar. Instead of the removed drive shaft, insert plastic or wooden plugs into the gearbox.


Warning! Never lower the vehicle onto its wheels with one or both drive shafts removed, as this will damage the wheel bearings.
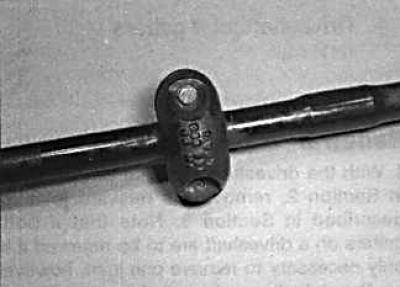

Warning! Never lower the vehicle onto its wheels with one or both drive shafts removed, as this…


11. All models except those with 1.6L engines have a torsional vibration damper mounted on the right-hand drive shaft. If the torsional vibration damper is installed on a new drive shaft, it must be installed in the same location.

Installation


1. Before installing the drive shaft, check the condition of the drive shaft seal ring in the gearbox.

2. Remove the snap ring from the inner end of the drive shaft and install a new snap ring.

3. Clean the drive shaft splines in the hub and gearbox. Apply a thin layer of grease to the sealing ring lips, drive shaft splines and flanges.

4. Install the drive shaft into the differential, aligning the splines of the drive shaft with the grooves of the differential axle gears. Insert the drive shaft into the gearbox until it stops.

5. Align the internal splines of the drive shaft with the slots in the hub and insert the drive shaft into the hub.

6. Insert the lower arm ball joint pin into the steering knuckle and secure with a bolt.


7. Insert the steering rod into the steering knuckle arm and secure with a nut.

8. Install the washer and screw the drive shaft mounting nut onto the hub without tightening it completely.

9. Install the wheel and lower the vehicle.
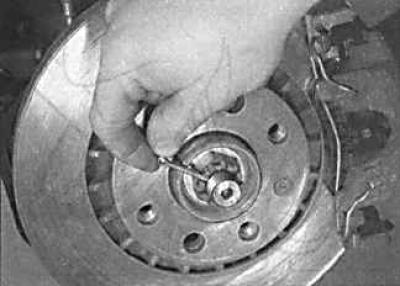
9. Install the wheel and lower the vehicle.


10. Install the pin securing the drive shaft nut to the hub.
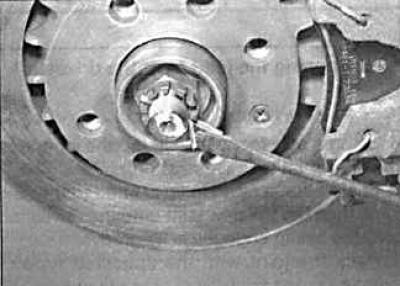
10. Install the pin securing the drive shaft nut to the hub.


11. Bend the pin that secures the drive shaft nut to the hub.


This article is available at russian, bulgarian, belarusian, ukrainian, serbian, croatian, romanian, polish, slovak, hungarian
Checking the article: Pavlovsky Nikolay

Share information:

Previous articles
Opel Vectra B: Drive shafts
Next articles

Technical specifications
Replacing the drive shaft joints
Replacement of constant velocity joint boots


See similar ones from other Opel car manuals:
▶ Drive shaft repair — general information Opel Astra F (1991-1998, petrol)
▶ Drive shaft specifications Opel Corsa C (2000-2006)
▶ Replacing the drive shaft Opel Insignia A (2008-2017)
▶ Replacement of protective covers of wheel drive shaft joints Opel Kadett E (1984-1995)
▶ Final Drive and Drive Shaft Specifications Opel Omega A (1986-1993)
Link to this page in different formats

Visitor comments


No comments yet


How much will 45 + 39 =


Vectra C (2002-2008) 
  • General information
  • User manual
  • Vehicle device
  • Maintenance
  • Troubleshooting
  • Power unit
  • Engine repair
  • Cooling system
  • Power and control system
  • Engine electrics
  • Transmission
  • Clutch
  • Car gearbox
  • Drive shafts
  • Chassis
  • Car suspension
  • Steering
  • Brake system
  • Body
  • Exterior
  • Interior
  • Doors, locks and windows
  • Heating and ventilation
  • Electrical equipment
  • Equipment and devices
  • Headlights and lighting
  • Electrical circuits
Vectra B (1995-2002) 
  • General information
  • User manual
  • Weekly checks
  • Maintenance (gasoline)
  • Maintenance (diesel)
  • Troubleshooting
  • Power unit
  • SOHC gasoline engine
  • DOHC petrol engine
  • Diesel engine 1.7 liter
  • Diesel engine 2.0 liters
  • Engine repair
  • Cooling system
  • Fuel system (gasoline)
  • Fuel system (diesel)
  • Charging system
  • Launch system
  • Ignition and preheat
  • Transmission
  • Clutch
  • Mechanical gearbox
  • Automatic gearbox
  • Drive shafts
  • Chassis
  • Brake system
  • Wheel suspension
  • Steering
  • Body
  • Exterior
  • Interior
  • Doors and windows
  • Heating and ventilation
  • Electrical equipment
  • Equipment and devices
  • Electrical circuits
Vectra B (1995-2002, petrol) 
  • General information
  • Maintenance
  • Help with malfunctions
  • Power unit
  • Engine repair
  • Exhaust system
  • Cooling system
  • Fuel system
  • Multec injection system
  • Four point injection
  • Transmission
  • Clutch
  • Gearbox and drive
  • Chassis
  • Wheel suspension
  • Steering
  • Brake system
  • Wheels and tires
  • Body
  • Exterior
  • Interior
  • Electrical equipment
  • Fuses and electronics
  • Power devices
  • Ignition system
  • Lighting and signaling
  • Equipment and devices
  • Heating and ventilation
  • Electrical circuits
Vectra A (1988-1995) 
  • Power unit
  • Engine repair
  • Ignition system
  • Lubrication system
  • Cooling system
  • Injection system
  • Fuel system (carburetor)
  • Fuel system (diesel)
  • Exhaust system
  • Transmission
  • Clutch
  • Car gearbox
  • Chassis
  • Front suspension
  • Rear suspension
  • Steering
  • Brake system
  • Wheels and tires
  • Body
  • Exterior
  • Interior
  • Electrical equipment
  • Electrical circuits
Vectra A (1988-1995, petrol) 
  • General information
  • User manual
  • Maintenance
  • Power unit
  • SOHC engine
  • DOHC engine
  • Cooling and ventilation
  • Fuel system (carburetor)
  • Fuel system (injector)
  • Exhaust converter
  • Transmission
  • Clutch
  • Mechanical gearbox
  • Automatic gearbox
  • Drive shafts
  • Chassis
  • Brake system
  • Car suspension
  • Steering
  • Body
  • Body elements
  • Electrical equipment
  • Power devices
  • Equipment and devices
  • Electrical circuits
OpelBook.ru © 2017–2026 · Mobile version · · Sitemap: EN BG BY UA RS HR RO PL SK HU · Feedback · Site search
Astra F, petrol · Astra G, petrol · Astra G · Astra H · Astra J, petrol · Corsa B · Corsa C, petrol · Corsa C · Insignia A · Kadett D · Kadett E · Omega A · Omega B · Omega B2 · Vectra A, petrol · Vectra A · Vectra B, petrol · Vectra B · Vectra C · Zafira A, petrol · Frontera A, petrol · Frontera B · Ascona C · Vivaro A ·
We want your visit to be comfortable 🤝! We use cookies 🍪 to make that happen.