
OpelBook.ru
Cars AvtoVAZ Cars Mitsubishi Cars BMW Cars Mercedes Cars Nissan Cars Toyota Cars Chevrolet
English Русский
Български
Беларускі
Український
Српски
Hrvatski
Română
Polski
Slovenský
Magyar
 |  Sitemap  |  Contacts  |    


Main Astra Corsa Insignia Kadett Omega Vectra Zafira Others Articles
Vectra A (1988-1995, petrol) Vectra A (1988-1995) Vectra B (1995-2002, petrol) Vectra B (1995-2002) Vectra C (2002-2008)
  • Main
  • Vectra
  • Vectra A
  • Body
  • Body elements
  • Seats (without belt tensioner) — removal and installation

Seats (without belt tensioner) — removal and installation (Opel Vectra A)

            0

Contents: Front seats ⬇ Rear seat cushion (all SOHC models) ⬇ Rear seat cushion (DOHC models) ⬇ Backrest of the rear seat (solid…⬇ Backrest of the rear seat…⬇
Warning: If seat belt tensioners are installed, refer to Chapter 43.


Front seats


Removal


1. Remove the screw securing the front edge of the seat rail outer trim, then remove the trim (see illustration).
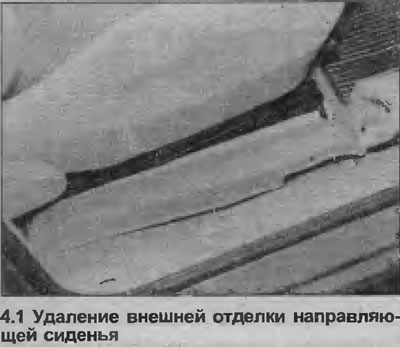
1. Remove the screw securing the front edge of the seat rail outer trim, then remove the trim (see…


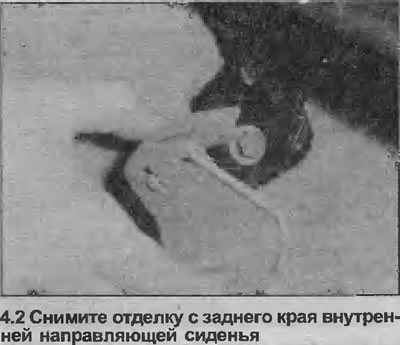
2. Unclip the trim from the rear edge of the inner seat rail (see illustration).

2. Unclip the trim from the rear edge of the inner seat rail (see illustration).

3. Remove the four bolts that secure the seat rails to the floor, then remove the seat and the rails. Remove the washers and support plates (see illustration).
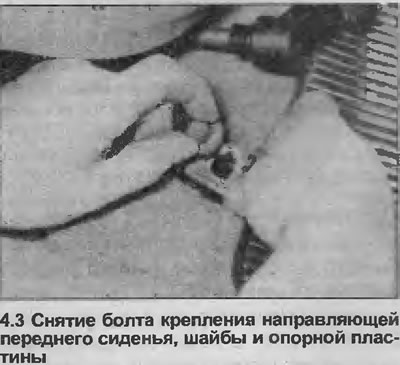
3. Remove the four bolts that secure the seat rails to the floor, then remove the seat and the…


4. If required, the seat can be separated from the guides to access the adjustment mechanism.


Original posted on the website (www.opelbook.ru)

Installation


5. Installation is carried out in the reverse order. Please note that manufacturers recommend using new bolts to secure the seat rails to the floor.

Rear seat cushion (all SOHC models)


Removal


6. Fold the seat cushion forward to access the hinge pins at the front edge of the pad.

7. To remove the pivot pin, remove the retaining ring from the end of the pin and remove the pin from the pivot (see illustration).
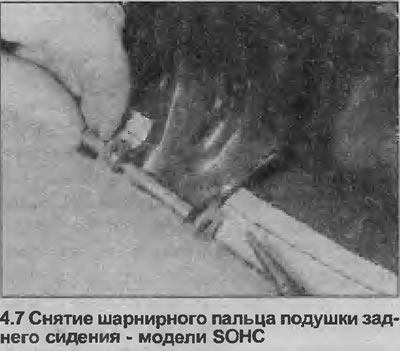
7. To remove the pivot pin, remove the retaining ring from the end of the pin and remove the pin…


8. Once the hinge pins are removed, the seat cushion can be removed from the vehicle.

Installation


9. Installation is carried out in reverse order.

Rear seat cushion (DOHC models)


Removal


10. Reach under the seat cushion and pull the grab handles at both ends to remove the pad from the vehicle floor.

11. Remove the airbag from the vehicle through one of the rear doors.

Installation


12. Installation is carried out in the reverse order. Push the seat cushion into place until the fastener engages.

Backrest of the rear seat (solid type)


Removal


13. Fold forward or remove the rear seat cushion, depending on the model, then fold down the seatback


14. Where applicable, bend back the tabs on the body panel and remove the two rubber straps securing the ends of the seat back to the body panel.

15. Carefully remove the retaining clips and slide the trim covering the hinges on the seat back.

16. Remove the screws securing the hinges to the seat back, then remove the seat back from the vehicle.

Installation


17. Installation is carried out in the reverse order, but ensure that, where applicable, the rubber seat belt mounting pins are bent back against the body panel to avoid the seat cushion collapsing.

Backrest of the rear seat (bifurcated type)


Removal


18. Fold forward or remove the rear seat cushion, depending on the model

19. Where applicable, bend the tab on the body panel and remove the rubber strap securing the corresponding half of the seat back to the body panel (see illustration).
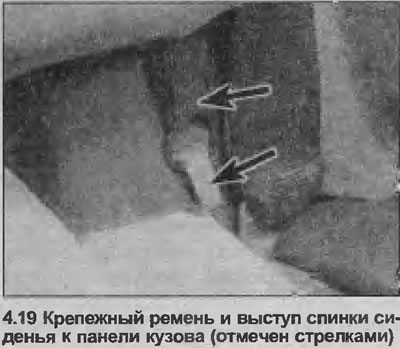
19. Where applicable, bend the tab on the body panel and remove the rubber strap securing the…


20. Carefully remove the retaining clips and slide back the trim covering the hinges on the seat back.

21. Remove the screws securing the hinge to the seat back (see illustration).
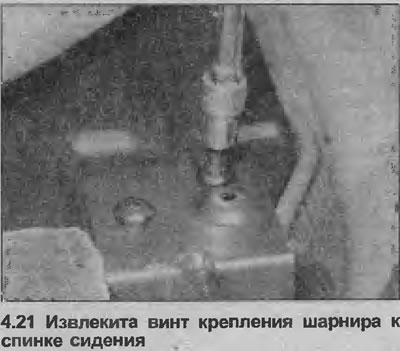
21. Remove the screws securing the hinge to the seat back (see illustration).


22. Working on the center pivot of the seat back in two halves, push the seat cushion away from the center bracket to gain access to the mounting nut and bolt. Note that the bolt goes through both halves of the seat back (see illustration).
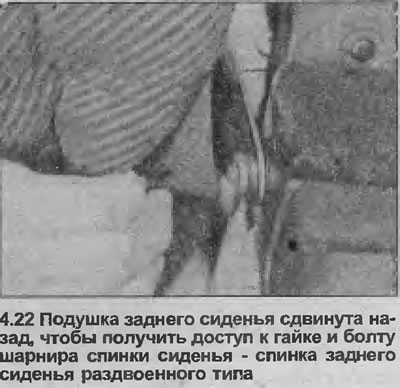


22. Working on the center pivot of the seat back in two halves, push the seat cushion away from the…


23. Unscrew and remove the nut and bolt, then carefully remove the backrest.

Installation


24. Installation is carried out in the reverse order, but make sure that the rubber mounting pins of the belt are bent back against the body panel to avoid folding the seat cushion.


This article is available at russian, bulgarian, belarusian, ukrainian, serbian, croatian, romanian, polish, slovak, hungarian
Checking the article: Chernov Alexander

Share information:

Previous articles
Opel Vectra A: Body elements
Next articles

Interior Trim Components — Removal and Installation
External mirror — removal, adjustment and installation
General description of the body
Body specifications
Front seats (with belt tensioner) — removal and installation


See similar ones from other Opel car manuals:
▶ Removal and installation emergency seat belt tensioner… Opel Astra G (1998-2004)
▶ Seat belt tensioner Opel Corsa B (1993-2000)
▶ Replacing the drive belt tensioner Opel Insignia A (2008-2017)
▶ Sprockets, tensioner and timing belt guide pulleys —… Opel Omega B2 (1999-2003)
▶ Accessory Drive Belt — Tensioner Replacement Opel Zafira A (1999-2005, petrol)
Link to this page in different formats

Visitor comments


No comments yet


How much will 31 + 17 =


Vectra C (2002-2008) 
  • General information
  • User manual
  • Vehicle device
  • Maintenance
  • Troubleshooting
  • Power unit
  • Engine repair
  • Cooling system
  • Power and control system
  • Engine electrics
  • Transmission
  • Clutch
  • Car gearbox
  • Drive shafts
  • Chassis
  • Car suspension
  • Steering
  • Brake system
  • Body
  • Exterior
  • Interior
  • Doors, locks and windows
  • Heating and ventilation
  • Electrical equipment
  • Equipment and devices
  • Headlights and lighting
  • Electrical circuits
Vectra B (1995-2002) 
  • General information
  • User manual
  • Weekly checks
  • Maintenance (gasoline)
  • Maintenance (diesel)
  • Troubleshooting
  • Power unit
  • SOHC gasoline engine
  • DOHC petrol engine
  • Diesel engine 1.7 liter
  • Diesel engine 2.0 liters
  • Engine repair
  • Cooling system
  • Fuel system (gasoline)
  • Fuel system (diesel)
  • Charging system
  • Launch system
  • Ignition and preheat
  • Transmission
  • Clutch
  • Mechanical gearbox
  • Automatic gearbox
  • Drive shafts
  • Chassis
  • Brake system
  • Wheel suspension
  • Steering
  • Body
  • Exterior
  • Interior
  • Doors and windows
  • Heating and ventilation
  • Electrical equipment
  • Equipment and devices
  • Electrical circuits
Vectra B (1995-2002, petrol) 
  • General information
  • Maintenance
  • Help with malfunctions
  • Power unit
  • Engine repair
  • Exhaust system
  • Cooling system
  • Fuel system
  • Multec injection system
  • Four point injection
  • Transmission
  • Clutch
  • Gearbox and drive
  • Chassis
  • Wheel suspension
  • Steering
  • Brake system
  • Wheels and tires
  • Body
  • Exterior
  • Interior
  • Electrical equipment
  • Fuses and electronics
  • Power devices
  • Ignition system
  • Lighting and signaling
  • Equipment and devices
  • Heating and ventilation
  • Electrical circuits
Vectra A (1988-1995) 
  • Power unit
  • Engine repair
  • Ignition system
  • Lubrication system
  • Cooling system
  • Injection system
  • Fuel system (carburetor)
  • Fuel system (diesel)
  • Exhaust system
  • Transmission
  • Clutch
  • Car gearbox
  • Chassis
  • Front suspension
  • Rear suspension
  • Steering
  • Brake system
  • Wheels and tires
  • Body
  • Exterior
  • Interior
  • Electrical equipment
  • Electrical circuits
Vectra A (1988-1995, petrol) 
  • General information
  • User manual
  • Maintenance
  • Power unit
  • SOHC engine
  • DOHC engine
  • Cooling and ventilation
  • Fuel system (carburetor)
  • Fuel system (injector)
  • Exhaust converter
  • Transmission
  • Clutch
  • Mechanical gearbox
  • Automatic gearbox
  • Drive shafts
  • Chassis
  • Brake system
  • Car suspension
  • Steering
  • Body
  • Body elements
  • Electrical equipment
  • Power devices
  • Equipment and devices
  • Electrical circuits
OpelBook.ru © 2017–2026 · Mobile version · · Sitemap: EN BG BY UA RS HR RO PL SK HU · Feedback · Site search
Astra F, petrol · Astra G, petrol · Astra G · Astra H · Astra J, petrol · Corsa B · Corsa C, petrol · Corsa C · Insignia A · Kadett D · Kadett E · Omega A · Omega B · Omega B2 · Vectra A, petrol · Vectra A · Vectra B, petrol · Vectra B · Vectra C · Zafira A, petrol · Frontera A, petrol · Frontera B · Ascona C · Vivaro A ·
We want your visit to be comfortable 🤝! We use cookies 🍪 to make that happen.