
Bulkhead
1. Remove the cylinder head. In 2.0 engines (DOHC), 2.5 and 3.0 liters, remove the camshafts and tappets.
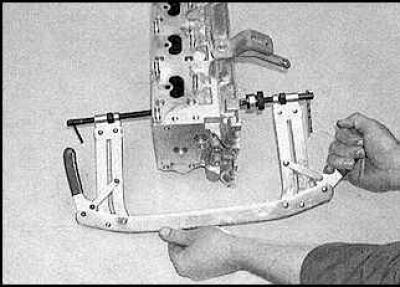
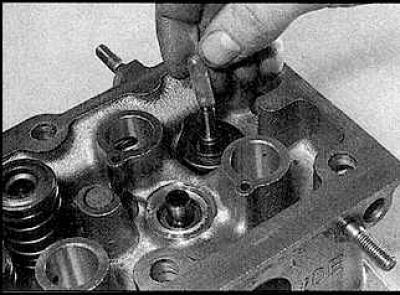
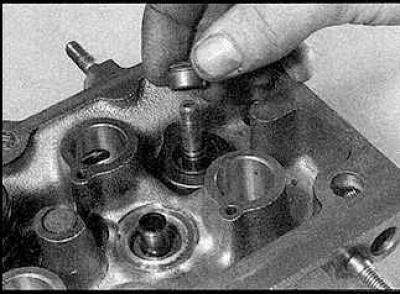
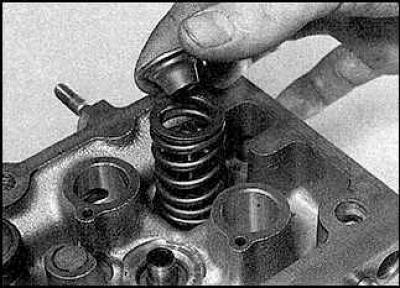
2. Compress the spring of each of the valves in turn with a special tool and remove the conical bushings. Remove spring plates and springs.
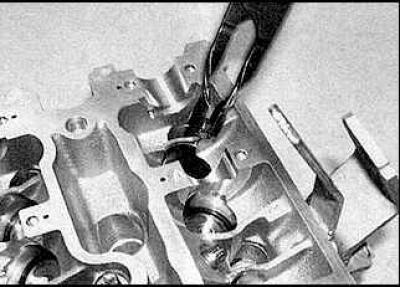
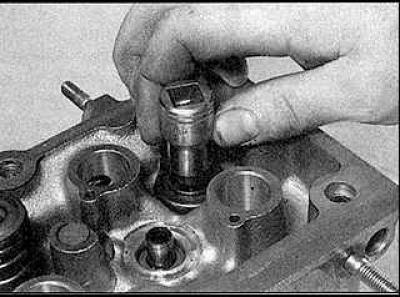
3. Using pliers, remove the valve stem seals and remove the spring seats.
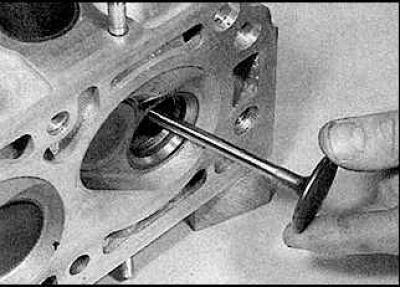
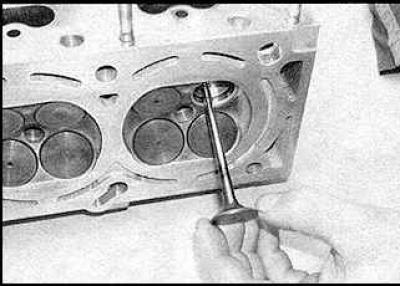
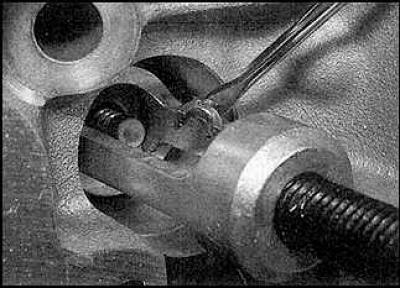
4. Remove valves. Put the valves and their corresponding parts in separate numbered bags.
Thoroughly clean the cylinder head and valve parts.
Cleaning
1. Clean off the remnants of the old gasket from the surface of the head.
2. Clean the carbon deposits from the surfaces of the combustion chambers and flush the head with a solvent. Clean the valves.
3. Clean the internal channels of the head.
Examination
Cylinder head
1. Carefully inspect the head for cracks or other damage. If cracks are found, the head must be replaced.
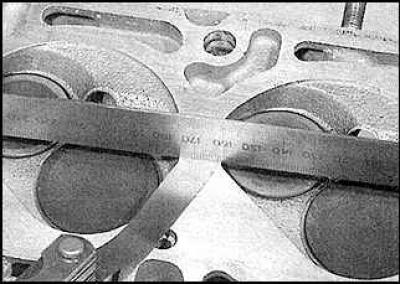
2. Using a ruler and feeler gauge, check the deformation of the surface of the head, if necessary, the head must be machined. To do this, contact the experts.
3. Inspect the valve seats in the combustion chambers. If they are cracked or burned, they must be replaced. To do this, contact a specialist. If the seats are only slightly scratched, it is sufficient to treat them and the valve heads with an abrasive compound.
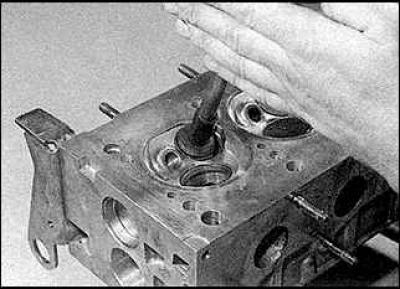
4. If the valve guides are worn, they must be replaced. Measure the valve stem diameters and the inside diameters of the guide bushings. Calculate the gap and compare the resulting value with the technical requirements. If the clearance exceeds the allowable limits, replace the bushings or valves. To do this, contact a specialist.
Valves
1. Inspect the valve heads and seats for wear, scratches, and cracks. Check that the valve stem is not bent. If severe wear is found, the valves must be replaced.
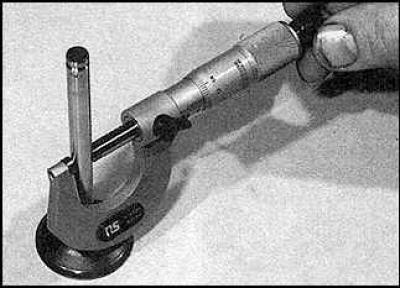
2. Measure the diameters of the valve stems in several places, if the results are very different from each other, this means that the stem is worn and the valve must be replaced.
3. If the heads and seats are slightly burned, they can be sanded with a special abrasive paste. In order to achieve complete tightness between the valve and its seat, it is necessary to grind the mating surfaces of the valve and seat. Apply a special abrasive paste to the valve head, insert it into place and use a special tool to turn it to the sides.
Valve parts
1. Inspect the valve springs for damage and compare their length with the length of the new springs. Replace springs if necessary.
2. Check that the springs are straight.
Assembly
1. Lubricate the valve stems and reinstall the valves.

2. Install the spring seat.
3. Install the gland protector.
4. Install the valve stem seal.
5. Drive the seal into place.
6. Install springs and spring plates.
7. Compress the springs and install the cone bushings.
8. Install the cylinder head.
Visitor comments