
OpelBook.ru
Cars AvtoVAZ Cars Mitsubishi Cars BMW Cars Mercedes Cars Nissan Cars Toyota Cars Chevrolet
English Русский
Български
Беларускі
Український
Српски
Hrvatski
Română
Polski
Slovenský
Magyar
 |  Sitemap  |  Contacts  |    


Main Astra Corsa Insignia Kadett Omega Vectra Zafira Others Articles
Omega A (1986-1993) Omega B (1993-1999) Omega B2 (1999-2003)
  • Main
  • Omega
  • Omega B
  • Power unit
  • Repair of gasoline engines
  • Cylinder block

Cylinder block (Opel Omega B)

            0

Contents: Cleaning ⬇ Examination ⬇

Cleaning


1. Disconnect all external parts and sensors from the unit.

2. Clean off all traces of sealant.
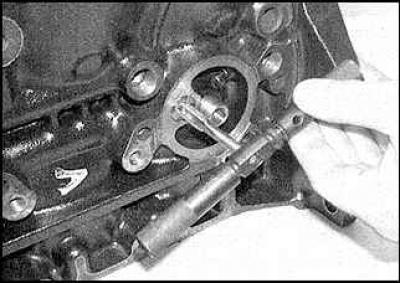
2. Clean off all traces of sealant.


3. Unscrew or drill out the oil channel plugs. Cut an M10 thread in the bypass valve.
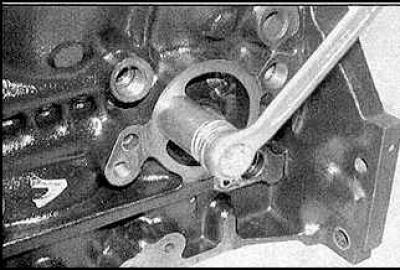
3. Unscrew or drill out the oil channel plugs. Cut an M10 thread in the bypass valve.


4. Screw the bolt into the valve.
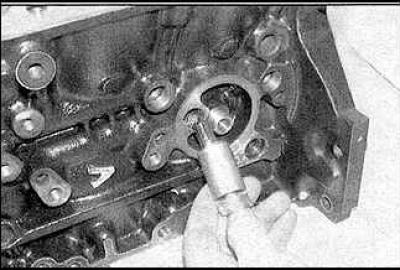
4. Screw the bolt into the valve.


5. Unscrew and remove the bypass valve located behind the oil filter.
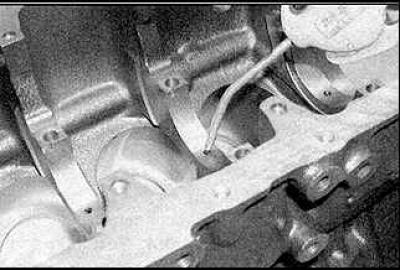


5. Unscrew and remove the bypass valve located behind the oil filter.


6. Clean and flush the oil holes and oil passages with warm water and dry them by blowing them with compressed air.

7. Clean the threads of the cylinder block holes using taps of the appropriate size.

8. Lubricate the block with oil and screw in new plugs, lubricating the plug threads with sealant.

Examination


1. Inspect the block for cracks and traces of corrosion or rust. Inspect the threads of the block holes. If defects are found, the block must be repaired or replaced if possible.

2. Inspect the cylinders.

3. Measure the diameter of each cylinder at the top, middle and bottom, parallel to the crankshaft axis.

4. Measure the diameter of each cylinder at the top, middle and bottom, perpendicular to the crankshaft axis.

5. The taper of a cylinder is calculated as the difference between the upper and lower diameters. The ovality is the difference between parallel and perpendicular measurements.

6. If the results obtained do not match the technical requirements, please contact a specialist.
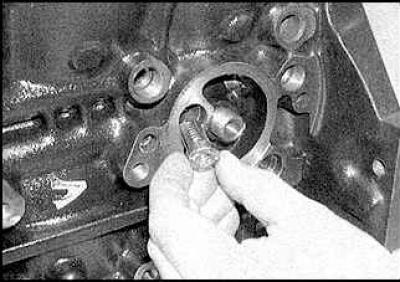
6. If the results obtained do not match the technical requirements, please contact a specialist.


7. After completing the work, insert the new bypass valve into the cylinder block.
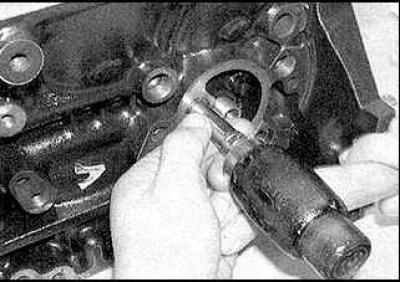


7. After completing the work, insert the new bypass valve into the cylinder block.


8. Hammer the valve into place.


This article is available at russian, bulgarian, belarusian, ukrainian, serbian, croatian, romanian, polish, slovak, hungarian
Checking the article: Fedorova Varvara

Share information:

Previous articles
Opel Omega B: Repair of gasoline engines
Next articles

Crankshaft
Pistons and connecting rods
Cylinder head and valves
Engine overhaul
Removal and installation the engine
Dismantling the power unit — methods and safety precautions
Main and connecting rod bearings
Piston rings
First engine start after overhaul


See similar ones from other Opel car manuals:
▶ Cylinder Block/Crankshaft — Cleaning and Inspection Opel Astra F (1991-1998, petrol)
▶ Cleaning and checking the condition of the cylinder block Opel Corsa B (1993-2000)
▶ Construction of the cylinder block and crank mechanism Opel Insignia A (2008-2017)
▶ Technical characteristics of the cylinder block Opel Kadett E (1984-1995)
▶ Cylinder Block and Channels — Inspection and Maintenance Opel Vectra A (1988-1995, petrol)
Link to this page in different formats

Visitor comments


No comments yet


How much will 23 + 34 =


Omega B2 (1999-2003) 
  • General information
  • User manual
  • Maintenance
  • Troubleshooting
  • Power unit
  • Petrol 4-cylinder
  • Petrol 6-cylinder
  • Engine overhaul
  • Diesel engines 2.0 l
  • Diesel engines 2.5 l
  • Cooling and heating
  • Injection system (gasoline)
  • Fuel system (diesel)
  • Fuel system
  • Exhaust system
  • Ignition system
  • Transmission
  • Clutch
  • Mechanical gearbox
  • Automatic gearbox
  • Main gear and shafts
  • Chassis
  • Brake system
  • Car suspension
  • Steering
  • Body
  • Body elements
  • Electrical equipment
  • Equipment and devices
  • Electrical circuits
Omega B (1993-1999) 
  • General information
  • User manual
  • Tips for the car owner
  • Maintenance (gasoline)
  • Maintenance (diesel)
  • Power unit
  • Petrol engine SOHC 2.0 l
  • Petrol engine DOHC 2.0 l
  • Petrol engines 2.5 and 3.0 l
  • Repair of gasoline engines
  • Diesel engine 2.0 l
  • Diesel engine repair 2.0 l
  • Diesel engine 2.5 l
  • Cooling and heating
  • Power system (petrol)
  • Emission reduction
  • Fuel system (diesel 2.0 l)
  • Fuel system (diesel 2.5 l)
  • Launch system
  • Ignition system
  • Transmission
  • Clutch
  • Mechanical gearbox
  • Automatic gearbox
  • Drive shafts
  • Chassis
  • Brake system
  • Wheel suspension
  • Steering
  • Body
  • Exterior
  • Interior
  • Doors and windows
  • Electrical equipment
  • Equipment and devices
  • Wiring diagrams (early)
  • Wiring diagrams (late)
Omega A (1986-1993) 
  • General information
  • User manual
  • Maintenance
  • Changes and additions
  • Troubleshooting
  • Power unit
  • Gasoline engines
  • Diesel engines
  • Cooling system
  • Fuel system (gasoline)
  • Fuel system (diesel)
  • Ignition system
  • Transmission
  • Clutch
  • Mechanical gearbox
  • Automatic gearbox
  • Cardan shaft
  • Drive shafts
  • Chassis
  • Brake system
  • Car suspension
  • Steering
  • Body
  • Exterior
  • Interior
  • Electrical equipment
  • Power devices
  • Lighting and appliances
  • Electrical circuits
OpelBook.ru © 2017–2026 · Mobile version · · Sitemap: EN BG BY UA RS HR RO PL SK HU · Feedback · Site search
Astra F, petrol · Astra G, petrol · Astra G · Astra H · Astra J, petrol · Corsa B · Corsa C, petrol · Corsa C · Insignia A · Kadett D · Kadett E · Omega A · Omega B · Omega B2 · Vectra A, petrol · Vectra A · Vectra B, petrol · Vectra B · Vectra C · Zafira A, petrol · Frontera A, petrol · Frontera B · Ascona C · Vivaro A ·
We want your visit to be comfortable 🤝! We use cookies 🍪 to make that happen.