
2. Move the generator to a clean workbench and lay it with the pulley down.
3. Turn out fixing screws and remove a plastic cover.
Assembling the Bosch generator
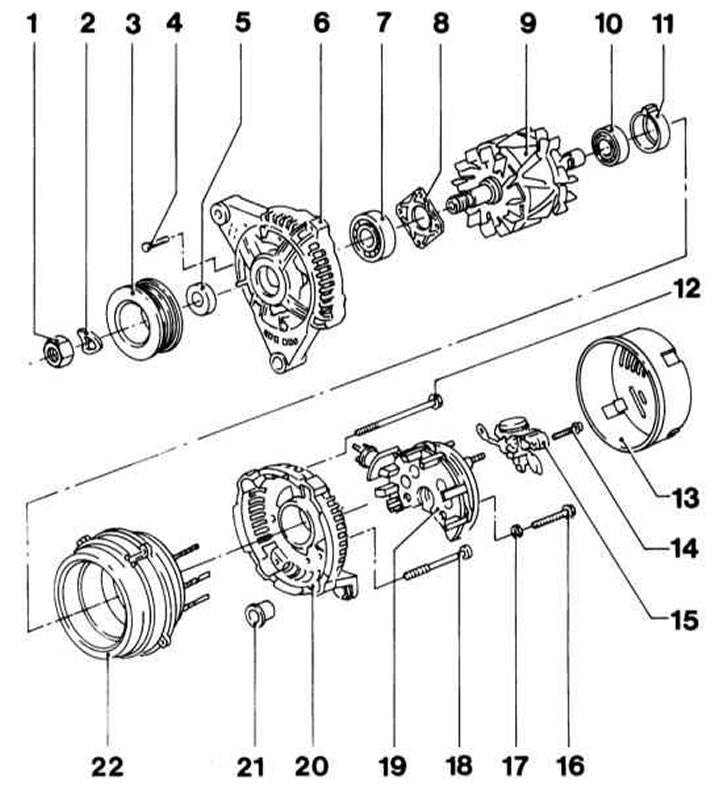
1 - Nut
2 - Figured washer
3 - Pulley
4 - Screw
5 — Remote washer
6 - Front housing
7 - Front bearing
8 - Front bearing cap
9 - Anchor
10 - Rear bearing
11 - duster
12 - Coupling bolt
13 - Cover
14 - fastening bolts
15 - Voltage regulator
16 - Bolt
17 - Nut
18 - Coupling bolt
19 - Rectifier bridge
20 - Rear housing
21 - Bushing
22 - Stator
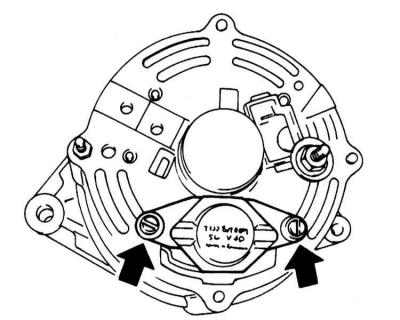
4. Disconnect the electrical wiring and remove the two screws securing the brush assembly.
Screws for fastening the brush assembly
5. If the brushes are worn or damaged, replace the brush assembly.
brush knot
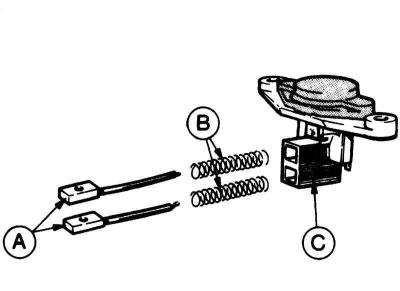
A - Brushes
B - Springs
C - holder
6. Clean and check the condition of the working surface of the rotor rings, in case of signs of excessive wear or mechanical damage, replace the generator assembly.
7. Assembly is carried out in the reverse order to the dismantling of the components.
8. In conclusion, install the generator in its regular place (see Section Removal and installation of the generator).
Visitor comments