


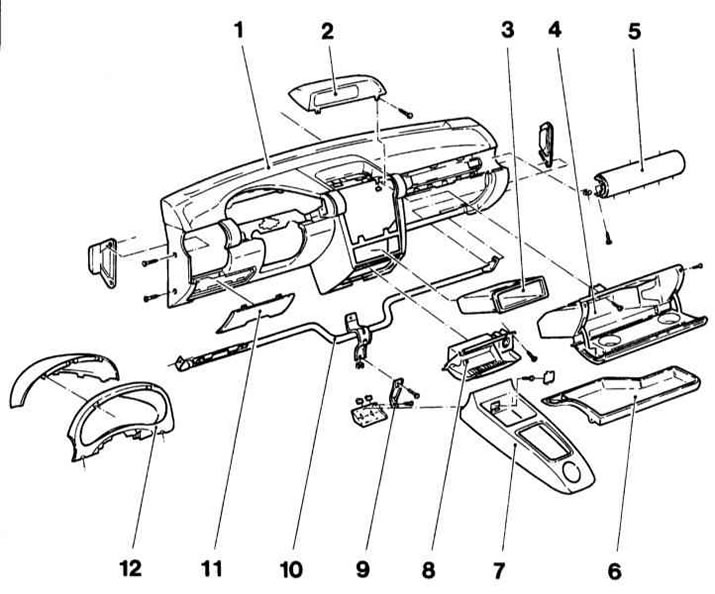
1 — Instrument panel
2 - Display
3 - Opening for radio receiver
4 - Glove box
5 - Overlay
6 - Right pocket
7 - Center console
8 - Ashtray
9 — Holder
10 — Support beam
11 — Fuse box cover
12 — Instrument cluster protective panel
Below are the procedures for removing the instrument cluster for vehicles without a front passenger airbag.
1. Remove the windshield wiper drive.
2. Remove the steering column switches with holders (see Chapter On-board electrical equipment).
3. Remove the instrument panel insert.
4. Remove the radio receiver (see Chapter On-board electrical equipment).
5. Remove the glove box (see section Removal and installation the glove box).
6. Remove the center console (see section Removal and installation the center console).
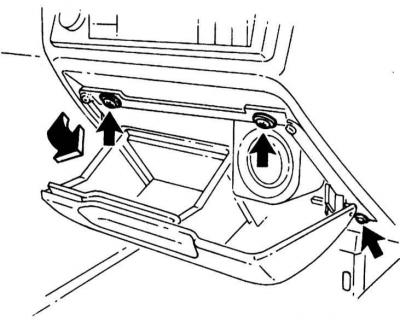
7. Open the ashtray and remove the cigarette lighter. Unscrew the screws (arrows) and remove the ashtray. Disconnect the backlight and cigarette lighter wiring connector from the back.
Removal the ashtray
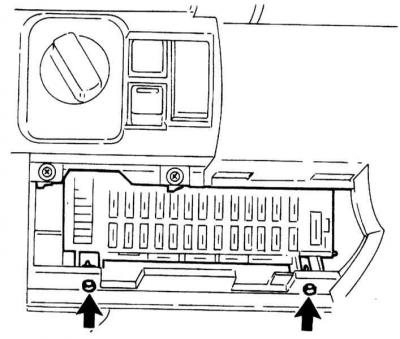
8. Remove the fuse box cover, unscrew the fuse box mounting screws and remove it downwards from the instrument panel.
Removal the fuse box
9. Loosen the mounting screws and remove the anti-theft alarm control unit (with appropriate equipment) and the K/V relay holder from the cutout in the glove compartment.
10. Remove the central air vents and the heater controls (see Chapter Engine cooling, interior heating and air conditioning systems).
11. Loosen the screws securing the side deflectors and remove them.
12. Disconnect the anti-theft alarm wiring connector and remove the display.
13. Remove the brake light bulbs.
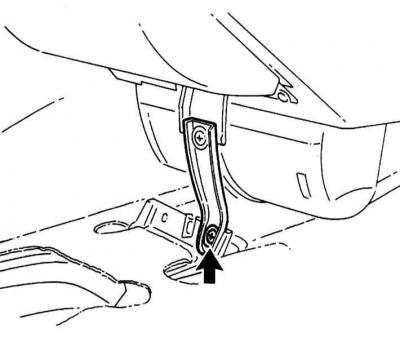
14. Unscrew the mounting screws and remove the central holder.
Removal the central holder
15. Disconnect the antenna and radio connector from the radio bracket. Remove all electrical wiring from the guide on the instrument panel.
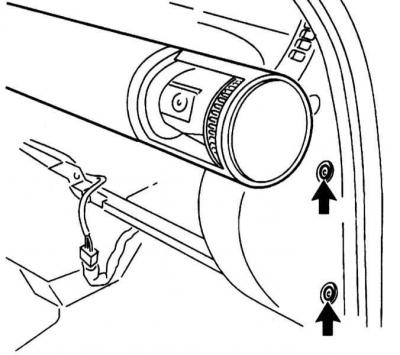
16. Remove the screws securing the instrument panel on the left and right.
Instrument panel mounting screws
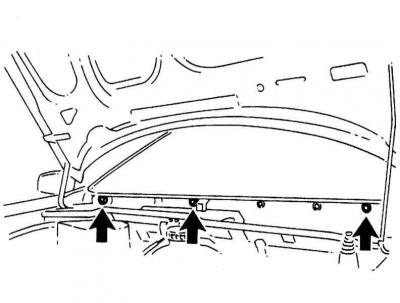
17. Loosen the nuts securing the instrument panel to the drainage channel from the engine compartment.
Instrument panel mounting nuts
18. Installation is performed in the reverse order of removal.
Visitor comments