


Contents: Removal ⬇ Installation ⬇
Removal
1. Remove the center console (see Chapter Body). Move the selector lever to position "P".
2. Using a flat-head screwdriver, release the lock and carefully pry the cable end out of the support bracket, then disconnect the cable from the mounting plate at the front of the actuator arm.
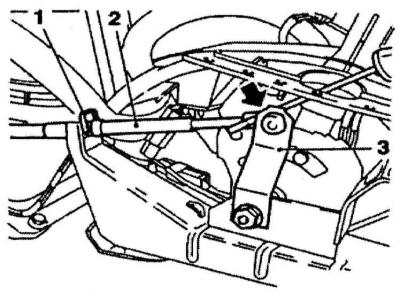
3. Remove the battery with the mounting tray (see Chapter Engine electrical equipment).
4. If equipped, release the lock and carefully separate the cable end from the AT selector lever. Release the cable housing from the support bracket.
5. Walk along the entire length of the transmission cable and release it from all the intermediate fasteners provided, do not remove the rubber grommet from the engine compartment bulkhead.
6. Check the condition of the cable - the cable should move freely in the casing.
A cable removed from a vehicle may look and function perfectly fine, but begin to jam when bent. Replace the cable if necessary.
Installation
1. Bring the cable to its regular place, threading it through the bushing in the engine compartment bulkhead. Secure the cable in the lever plate.
To make it easier to pull the cable through the bushing, first lubricate it with a soap solution.
2. Thread the transmission end of the cable through the support bracket and secure the housing with a clamp. Connect the cable tip to the lever and (with appropriate equipment) secure it with a clamp.
3. In the vehicle interior, secure the cable casing with a clamp and connect the end to the selector lever joint.
4. Adjust the length of the cable (see Adjusting the gear selection mechanism).
5. Install the center console and other removed components.
Visitor comments