
Dismantling decorative panels in the middle of the dashboard
Decoration panel for the heating/ventilation control module: Carefully remove the decoration panel from the clips with a screwdriver.
When mounting, push the panel in until it locks into place.
Switch panel: remove the heating/ventilation control module panel.
Unscrew the fastening screws of the switch panel located under it.
Remove the panel from the latches.
When mounting, insert the panel into the latches and screw it on.
Removing the glove box
Open the drawer.
Use a small screwdriver to pry out the glovebox light cover.
Disconnect plug connections of wires and remove a lantern.
Unscrew the two fixing screws at the top of the glove box.
Also unscrew both bottom screws of the glove box.
With a refrigerated glove box, disconnect the inlet hose.
Remove the glove box from the cutout.
Dismantling of facing of a steering column
On vehicles with a height-adjustable steering column, unscrew the adjustment lever.
Unscrew the three lower mounting screws facing the steering column.
Turn the steering wheel so that it does not cover one of the two plastic protective caps on the front side of the trim.
Press the plastic caps off the fixing screw with a knife blade.
Unscrew the Phillips head screw.
Turn the steering wheel. Squeeze out the opposite plastic cap and unscrew the fixing screw.

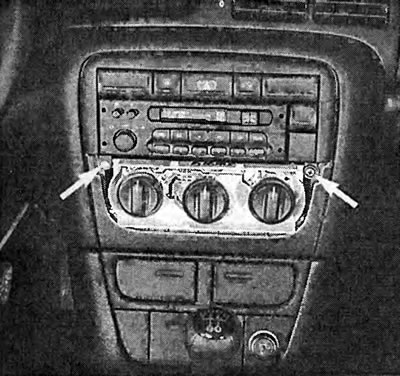
Removing the steering column trim. The photo shows the three bottom mounting screws (arrows) two-piece cladding.
After unscrewing the four fixing screws, the glove box can be removed from the dashboard. Prior to this, remove the glove box light.
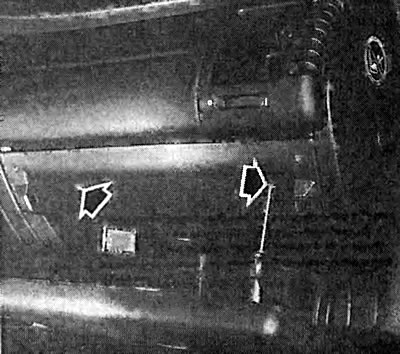
The arrows show both fixing screws that are used to screw the decorative panel of the switch to the dashboard.

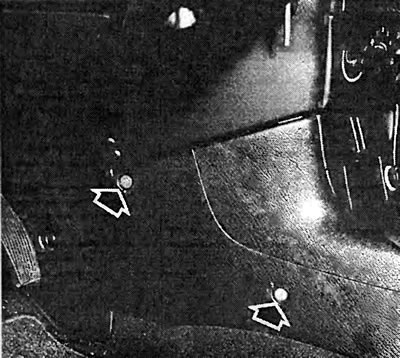
The arrows show both fixing screws of the ashtray/bottle holder. The numbers indicate: 1 - left decorative panel; 2 - ashtray/bottle holder; 3 - steel bracket; 4 - right decorative panel.
Removing the ashtray/bottle holder
Remove the lower facing of a steering column from a rubber ring on the ignition lock.
Turn the steering wheel to a straight position and remove the facing parts from the steering column.
Before installing the steering column trim, remove the rubber ring from the ignition switch.
Install the trim parts and slide the rubber ring over the ignition switch.
On the left and right next to the ashtray, carefully pry out both decorative panels with a screwdriver.
Remove the Phillips head screws underneath.
Remove the center console, see next section.
At the top of the ashtray/bottle holder, pry out the steel clip with a screwdriver.
Remove the ashtray/bottle holder from the cutout.
Disconnect the ashtray and cigarette lighter wire connector.
Disconnect the cigarette lighter multi-pin connector.
The center console is screwed on with two fixing screws on each side, front right and left. Pre-squeeze out the plastic caps with a narrow screwdriver.
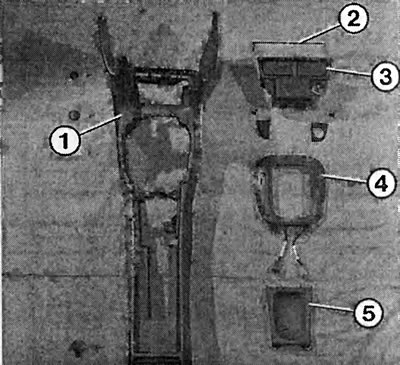
All parts of the middle console. The numbers indicate: 1 - middle console; 2 - steel bracket; 3 - ashtray / bottle holder; 4 - switching console; 5 - bowl handles.
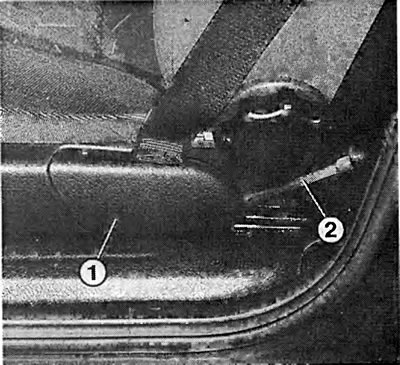
Before the front seat can be removed, the seat belt must be unscrewed from it. To do this, wring out the facing, as shown, with a wide screwdriver.
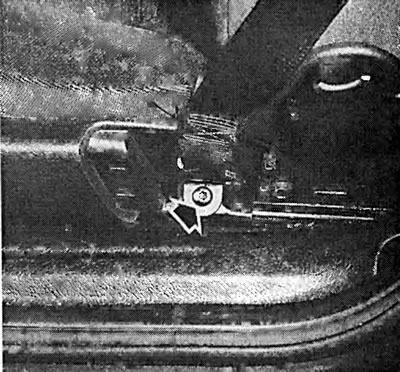
Under the lining is the seat belt mounting screw. Unscrew the screw and remove the belt.
Visitor comments