
OpelBook.ru
Cars AvtoVAZ Cars Mitsubishi Cars BMW Cars Mercedes Cars Nissan Cars Toyota Cars Chevrolet
English Русский
Български
Беларускі
Український
Српски
Hrvatski
Română
Polski
Slovenský
Magyar
 |  Sitemap  |  Contacts  |    


Main Astra Corsa Insignia Kadett Omega Vectra Zafira Others Articles
Vectra A (1988-1995, petrol) Vectra A (1988-1995) Vectra B (1995-2002, petrol) Vectra B (1995-2002) Vectra C (2002-2008)
  • Main
  • Vectra
  • Vectra B
  • Electrical equipment
  • Equipment and devices
  • External Light Bulbs — Replacement

External Light Bulbs — Replacement (Opel Vectra B)

            0

Contents: Headlights ⬇ Front side light ⬇ Front direction indicator ⬇ Front fog light ⬇ Side turn signal repeater ⬇ Rear lights ⬇ License plate light ⬇ High-mounted brake light ⬇
Before replacing an exterior light bulb, check the corresponding electrical circuit and fuse. Do not touch the glass bulb of the bulb with bare hands. The fingerprint evaporates and settles on the reflector, resulting in poor lighting. Always replace defective bulbs with bulbs of the same type. Wipe off any accidental touch marks with a clean, lint-free cloth or alcohol.

Headlights
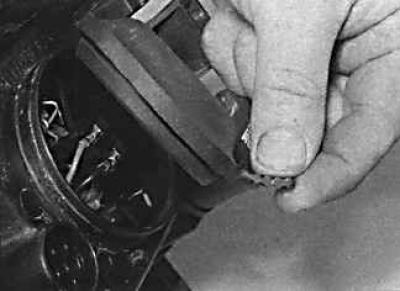


Headlights


1. Open the hood and remove the rear cover from the headlight. Note that the inner headlight is for low beam and the outer headlight is for high beam. When working on the left headlight, you will need to temporarily remove the relay box from the front of the battery.
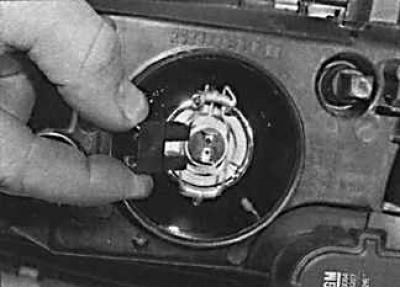
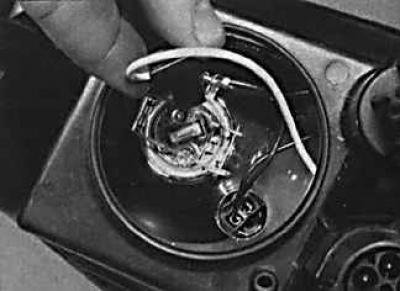
1. Open the hood and remove the rear cover from the headlight. Note that the inner headlight is for…


1. Open the hood and remove the rear cover from the headlight. Note that the inner headlight is for…


2. Remove the electrical connector from the high and low beam headlight bulb.
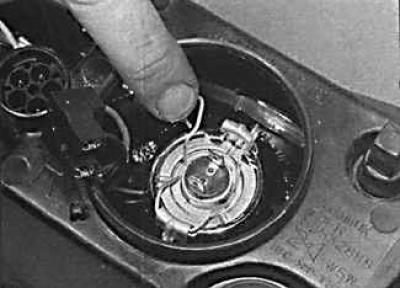


2. Remove the electrical connector from the high and low beam headlight bulb.


3. Compress the spring clips that secure the bulb and move the clips to the side.
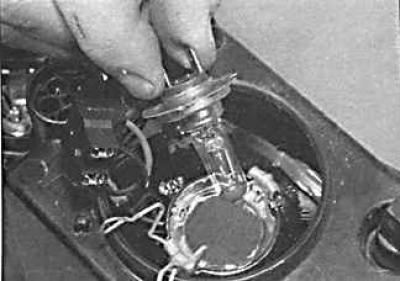
3. Compress the spring clips that secure the bulb and move the clips to the side.


4. Remove the bulb from the high beam headlight.
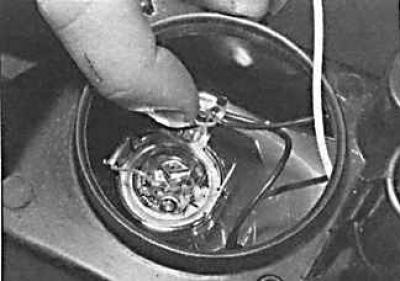
4. Remove the bulb from the high beam headlight.


5. Release the low beam headlight bulb mounting brackets.
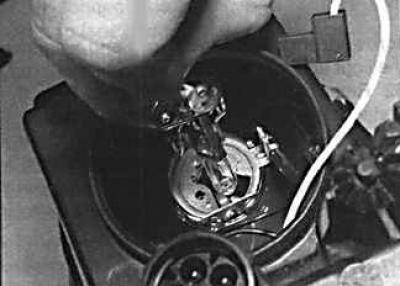
5. Release the low beam headlight bulb mounting brackets.


6. Remove the low beam headlight bulb.


7. Install the new bulb in the reverse order of removal.

Front side light


1. The front side light bulb is located in the high beam headlight. Remove the rear cover from the headlight.
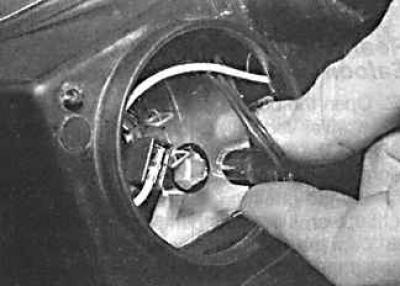
1. The front side light bulb is located in the high beam headlight. Remove the rear cover from the…


2. Remove the socket with the parking light bulb from the rear of the headlight.

3. Remove the light bulb from the socket.

4. Install the new bulb in the reverse order of removal.

Front direction indicator


1. Open the hood and use a screwdriver to release the upper mounting bracket on the outside of the headlight.

2. Remove the front turn signal forward from the slots in the headlight.
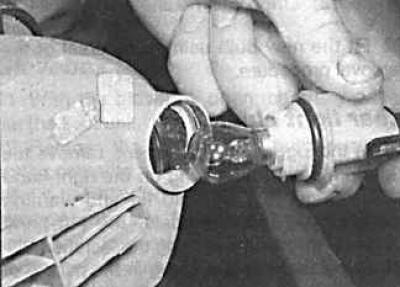
2. Remove the front turn signal forward from the slots in the headlight.


3. Turn the bulb holder and remove it from the front turn signal.
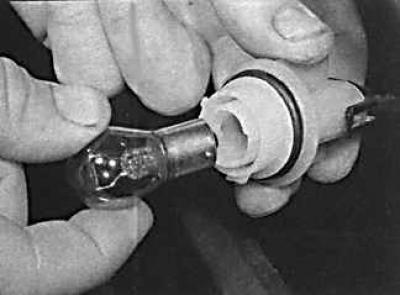
3. Turn the bulb holder and remove it from the front turn signal.


4. Press and twist the bulb to remove it from the socket.


5. Install the new bulb in the reverse order of removal.

Front fog light


1. Remove the cover from the rear of the fog light located in the front bumper.

2. Disconnect the electrical connector, loosen the retaining clip and remove the bulb with the fog lamp.

3. Install the new bulb in the reverse order of removal.

Side turn signal repeater
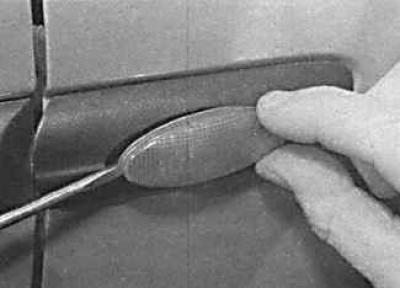


Side turn signal repeater


1. Using a thin screwdriver blade as a lever, remove the side turn signal repeater from the front fender trim.
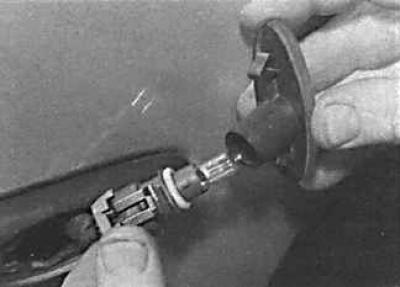
1. Using a thin screwdriver blade as a lever, remove the side turn signal repeater from the front…


2. While holding the bulb holder, turn the side turn signal repeater and remove it from the holder.
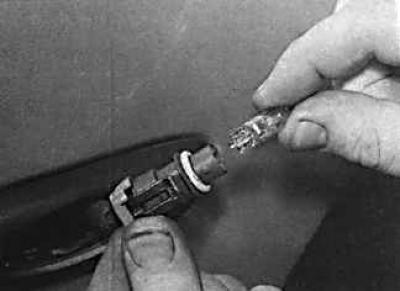
2. While holding the bulb holder, turn the side turn signal repeater and remove it from the holder.


3. Remove the light bulb from the socket by pulling it towards you.


4. Install the new bulb in the reverse order of removal.

Rear lights


1. Remove the luggage compartment trim located opposite the taillights.
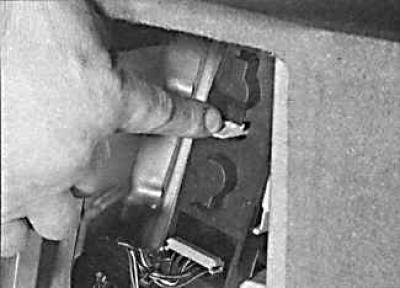
1. Remove the luggage compartment trim located opposite the taillights.


2. Press the locking tab in the middle of the tail light bulb holder and remove the bulb holder from the tail light.
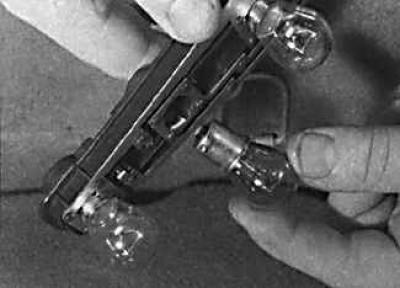
2. Press the locking tab in the middle of the tail light bulb holder and remove the bulb holder…


3. Press and twist the bulb and remove it from the bulb holder.

4. Install the new bulb in the reverse order of removal.

License plate light


1. Open the trunk or tailgate, then insert the blade of a thin screwdriver vertically between the right edge of the license plate light and the rear bumper. Loosen the lock and pull the license plate light up and out of the bumper.

2. Press the retaining clip and remove the lampshade from the license plate light.


3. Press and twist the bulb to remove it from the socket.

4. The installation of a new light bulb is carried out in the reverse order of removal.

High-mounted brake light


1. Open the rear door and remove the rear trim panel.
1. Open the rear door and remove the rear trim panel.


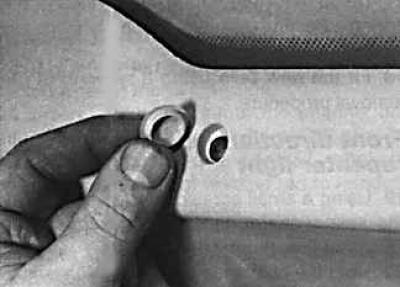
2. Remove the plugs covering the screws.
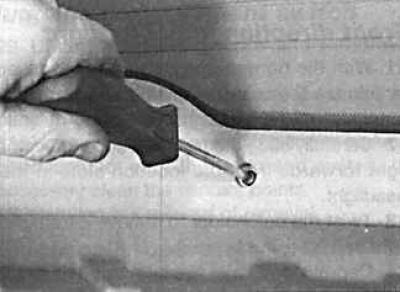
2. Remove the plugs covering the screws.


3. Remove the screws and remove the frame together with the high brake light.
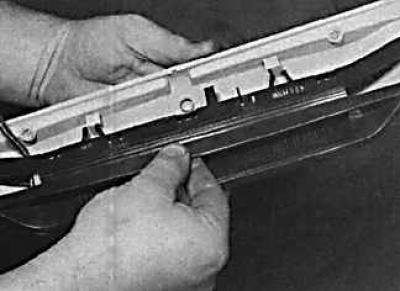
3. Remove the screws and remove the frame together with the high brake light.


4. Separate the brake light from the frame.
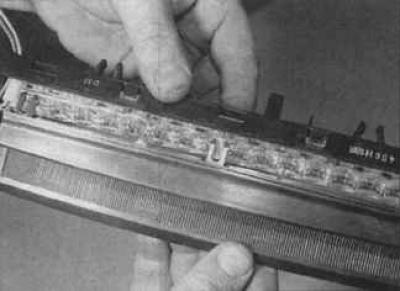


4. Separate the brake light from the frame.


5. Remove the cover from the bulb holder
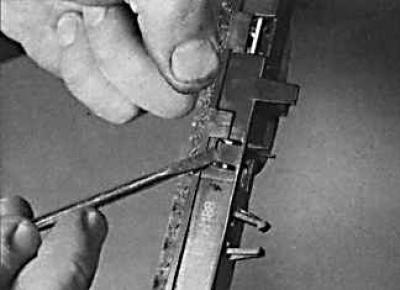
5. Remove the cover from the bulb holder


6. Using a screwdriver, release the clips
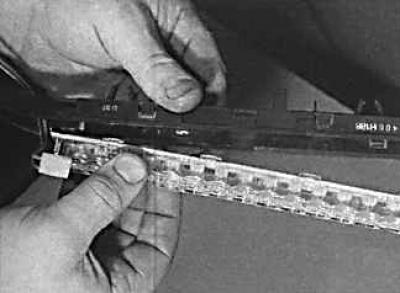
6. Using a screwdriver, release the clips


7. Remove the strip of incandescent bulbs from the holder.
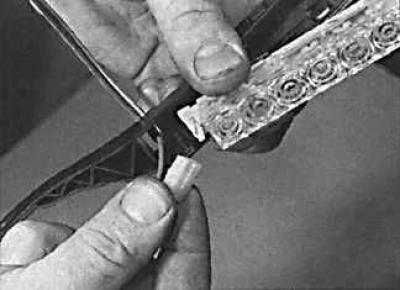
7. Remove the strip of incandescent bulbs from the holder.


8. Disconnect the electrical connector and remove the strip with the bulbs.


9. Installation is carried out in the reverse order of removal.

(Article posted on Internet portal opelbook)


This article is available at russian, bulgarian, belarusian, ukrainian, serbian, croatian, romanian, polish, slovak, hungarian
Checking the article: Pavlovsky Nikolay

Share information:

Previous articles
Opel Vectra B: Equipment and devices
Next articles

Switches — removal and installation
Fuses and relays
Open Circuit Detection
Electrical circuits
Technical specifications
General information and precautions
Interior Light Bulbs — Replacement
External lighting devices
Headlight adjustment
Instrument cluster — removal and installation
Windscreen wiper arms
Windscreen wiper motor and rods — removal and installation


See similar ones from other Opel car manuals:
▶ Replacing the front interior light / bulbs Opel Corsa C (2000-2006, petrol)
▶ Tail light bulbs Opel Insignia A (2008-2017)
▶ Replacing tail light bulbs Opel Kadett D (1979-1984)
▶ Checking the light bulbs Opel Omega B2 (1999-2003)
▶ Replacing light bulbs Opel Vivaro A (2001-2014)
Link to this page in different formats

Visitor comments


No comments yet


How much will 11 + 47 =


Vectra C (2002-2008) 
  • General information
  • User manual
  • Vehicle device
  • Maintenance
  • Troubleshooting
  • Power unit
  • Engine repair
  • Cooling system
  • Power and control system
  • Engine electrics
  • Transmission
  • Clutch
  • Car gearbox
  • Drive shafts
  • Chassis
  • Car suspension
  • Steering
  • Brake system
  • Body
  • Exterior
  • Interior
  • Doors, locks and windows
  • Heating and ventilation
  • Electrical equipment
  • Equipment and devices
  • Headlights and lighting
  • Electrical circuits
Vectra B (1995-2002) 
  • General information
  • User manual
  • Weekly checks
  • Maintenance (gasoline)
  • Maintenance (diesel)
  • Troubleshooting
  • Power unit
  • SOHC gasoline engine
  • DOHC petrol engine
  • Diesel engine 1.7 liter
  • Diesel engine 2.0 liters
  • Engine repair
  • Cooling system
  • Fuel system (gasoline)
  • Fuel system (diesel)
  • Charging system
  • Launch system
  • Ignition and preheat
  • Transmission
  • Clutch
  • Mechanical gearbox
  • Automatic gearbox
  • Drive shafts
  • Chassis
  • Brake system
  • Wheel suspension
  • Steering
  • Body
  • Exterior
  • Interior
  • Doors and windows
  • Heating and ventilation
  • Electrical equipment
  • Equipment and devices
  • Electrical circuits
Vectra B (1995-2002, petrol) 
  • General information
  • Maintenance
  • Help with malfunctions
  • Power unit
  • Engine repair
  • Exhaust system
  • Cooling system
  • Fuel system
  • Multec injection system
  • Four point injection
  • Transmission
  • Clutch
  • Gearbox and drive
  • Chassis
  • Wheel suspension
  • Steering
  • Brake system
  • Wheels and tires
  • Body
  • Exterior
  • Interior
  • Electrical equipment
  • Fuses and electronics
  • Power devices
  • Ignition system
  • Lighting and signaling
  • Equipment and devices
  • Heating and ventilation
  • Electrical circuits
Vectra A (1988-1995) 
  • Power unit
  • Engine repair
  • Ignition system
  • Lubrication system
  • Cooling system
  • Injection system
  • Fuel system (carburetor)
  • Fuel system (diesel)
  • Exhaust system
  • Transmission
  • Clutch
  • Car gearbox
  • Chassis
  • Front suspension
  • Rear suspension
  • Steering
  • Brake system
  • Wheels and tires
  • Body
  • Exterior
  • Interior
  • Electrical equipment
  • Electrical circuits
Vectra A (1988-1995, petrol) 
  • General information
  • User manual
  • Maintenance
  • Power unit
  • SOHC engine
  • DOHC engine
  • Cooling and ventilation
  • Fuel system (carburetor)
  • Fuel system (injector)
  • Exhaust converter
  • Transmission
  • Clutch
  • Mechanical gearbox
  • Automatic gearbox
  • Drive shafts
  • Chassis
  • Brake system
  • Car suspension
  • Steering
  • Body
  • Body elements
  • Electrical equipment
  • Power devices
  • Equipment and devices
  • Electrical circuits
OpelBook.ru © 2017–2026 · Mobile version · · Sitemap: EN BG BY UA RS HR RO PL SK HU · Feedback · Site search
Astra F, petrol · Astra G, petrol · Astra G · Astra H · Astra J, petrol · Corsa B · Corsa C, petrol · Corsa C · Insignia A · Kadett D · Kadett E · Omega A · Omega B · Omega B2 · Vectra A, petrol · Vectra A · Vectra B, petrol · Vectra B · Vectra C · Zafira A, petrol · Frontera A, petrol · Frontera B · Ascona C · Vivaro A ·
We want your visit to be comfortable 🤝! We use cookies 🍪 to make that happen.