
OpelBook.ru
Cars AvtoVAZ Cars Mitsubishi Cars BMW Cars Mercedes Cars Nissan Cars Toyota Cars Chevrolet
English Русский
Български
Беларускі
Український
Српски
Hrvatski
Română
Polski
Slovenský
Magyar
 |  Sitemap  |  Contacts  |    


Main Astra Corsa Insignia Kadett Omega Vectra Zafira Others Articles
Astra F (1991-1998, petrol) Astra G (1998-2004, petrol) Astra G (1998-2004) Astra H (2004-2009) Astra J (2009-2015, petrol)
  • Main
  • Astra
  • Astra J
  • Chassis
  • Wheels and tires
  • Tubeless tire repair

Tubeless tire repair (Opel Astra J)

            0

A tubeless tire has great durability. It is able to maintain its tightness even if it is damaged through and through. With a foreign body stuck in the tread, you can often drive many kilometers without even knowing it.

However, the need for repairs may still arise. In many cases, minor repairs to a tubeless tire can be done on your own while on the road, and sometimes even without removing the wheel from the car.

For independent minor repairs of tubeless tires on the road, there are special kits available for sale.
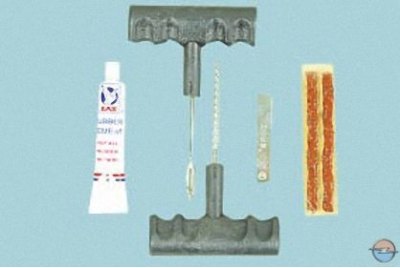
For independent minor repairs of tubeless tires on the road, there are special kits available for…


The kit includes a special needle, a rasp, a container with glue, a knife, and a tourniquet for filling punctures.
The kit includes a special needle, a rasp, a container with glue, a knife, and a tourniquet for…


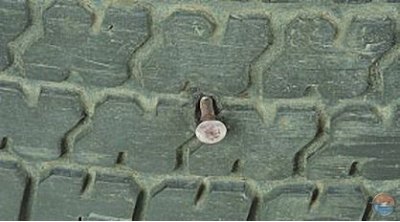
1. Inspect the tire and locate the damaged area.
1. Inspect the tire and locate the damaged area.


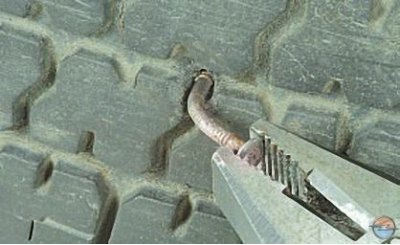
2. Remove the foreign object from the tread.


2. Remove the foreign object from the tread.


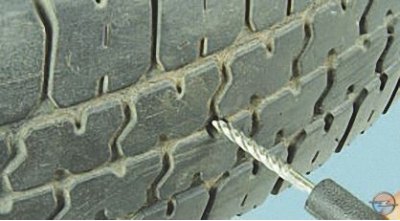
3. Rasp the inside surface of the hole. After processing, the surface will be cleaned of dirt, rust and have smooth edges.
3. Rasp the inside surface of the hole. After processing, the surface will be cleaned of dirt, rust…


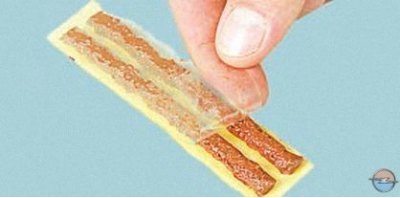
4. Remove the protective film from the sections of the tourniquet from the kit…
4. Remove the protective film from the sections of the tourniquet from the kit…


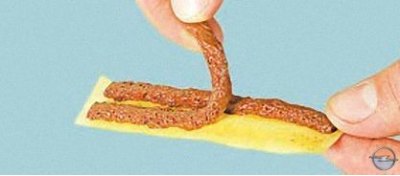
5. …and separate the tourniquet from the backing.
5. …and separate the tourniquet from the backing.


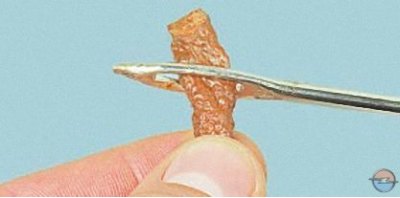
6. Pass the end of the tourniquet through the eye of a special needle…


6. Pass the end of the tourniquet through the eye of a special needle…


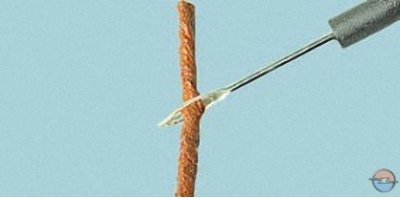
7. …and stretch it to the middle of the segment.
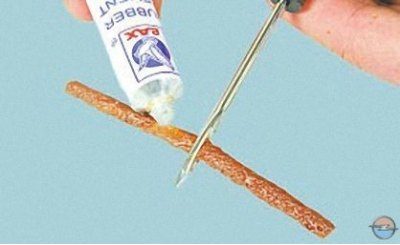
7. …and stretch it to the middle of the segment.


8. Apply a layer of glue from the kit to the tourniquet. Also treat the surface of the hole in the tire with glue.
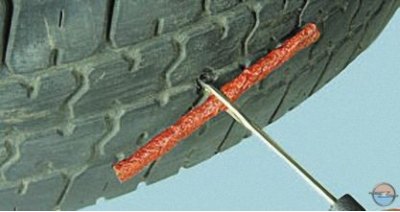
8. Apply a layer of glue from the kit to the tourniquet. Also treat the surface of the hole in the…


9. Insert the tip of the needle into the hole.
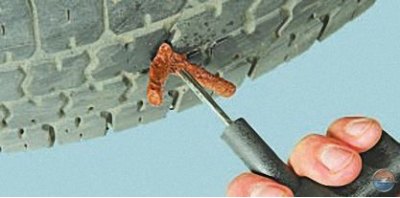
9. Insert the tip of the needle into the hole.


10. Press the needle handle to push the tourniquet into the hole so that both ends of the tourniquet, approximately 10 mm long, remain outside.
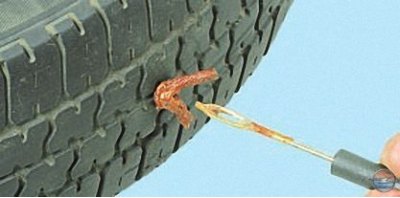


10. Press the needle handle to push the tourniquet into the hole so that both ends of the…


11. Pull the needle out of the hole quickly.
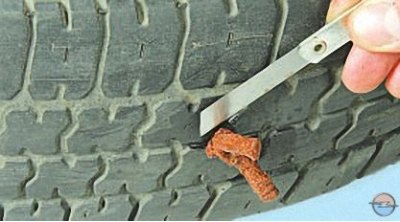
11. Pull the needle out of the hole quickly.


12. Trim the remaining ends of the tourniquet flush with the protector.
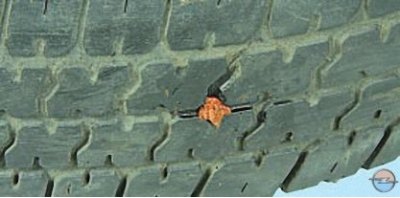
12. Trim the remaining ends of the tourniquet flush with the protector.


The article was published on the website opelbook

13. Wait for the time specified in the instructions included with the repair kit for the glue to polymerize, and inflate the wheel to the recommended pressure.

The described repair method does not replace professional repair in a specialized workshop. It is only a way to solve a problem that has arisen on the road and safely complete the trip. However, after a high-quality independent repair, in many cases the wheel can be used until it is completely worn out.


This article is available at russian, bulgarian, belarusian, ukrainian, serbian, croatian, romanian, polish, slovak, hungarian
Checking the article: Trifonova Emilia

Share information:

Previous articles
Opel Astra J: Wheels and tires
Next articles

Tips for choosing tires
Tire markings
Classification of tires
Features of tire design
Checking the radial and lateral runout of the disc
Wheel rim markings
Tips for using wheels
Wheel storage


See similar ones from other Opel car manuals:
▶ Wheel and tire repair Opel Corsa C (2000-2006, petrol)
▶ Tire repair kit Opel Insignia A (2008-2017)
▶ General requirements for car repair Opel Kadett E (1984-1995)
▶ Engine — preparation for first start after major repair Opel Omega A (1986-1993)
▶ Camshafts, repair dimensions for models C16NZ2, 1.8 and 2.0… Opel Vectra A (1988-1995, petrol)
Link to this page in different formats

Visitor comments


No comments yet


How much will 50 + 10 =


Astra J (2009-2015, petrol) 
  • General information
  • Vehicle device
  • User manual
  • Faults en route
  • Maintenance
  • Power unit
  • Engine repair
  • Cooling and lubrication system
  • Engine power system
  • Exhaust system
  • Transmission
  • Clutch
  • Car gearbox
  • Drive shafts
  • Chassis
  • Front suspension
  • Rear suspension
  • Steering
  • Brake system
  • Wheels and tires
  • Body
  • Exterior
  • Interior
  • Doors and windows
  • Body Care
  • Heating and air conditioning
  • Security systems
  • Electrical equipment
  • Equipment and devices
  • Lighting and signaling
  • Power devices
  • Electrical circuits
Astra H (2004-2009) 
  • General information
  • Introduction to the guide
  • Troubleshooting
  • User manual
  • Maintenance
  • Power unit
  • Engine repair
  • Cooling and heating
  • Power and exhaust system
  • Ignition system
  • Launch and charge system
  • Transmission
  • Mechanical gearbox
  • Automatic gearbox
  • Drive shafts
  • Chassis
  • Brake system
  • Car suspension
  • Steering
  • Body
  • Interior
  • Exterior
  • Electrical equipment
  • Equipment and devices
  • Electrical circuits
Astra G (1998-2004) 
  • General information
  • Introduction to manual
  • User manual
  • Maintenance
  • Power unit
  • SOHC gasoline engines
  • DOHC gasoline engines
  • Diesel engines 1.7 and 2.0
  • Engine repair
  • Cooling system
  • Supply system
  • Injection system (gasoline)
  • Injection system (diesel)
  • Exhaust system
  • Charge and launch system
  • Ignition system (gasoline)
  • Preheat system (diesel)
  • Transmission
  • Manual gearbox
  • Automatic gearbox
  • Clutch
  • Drive shafts
  • Chassis
  • Brake system
  • Wheel suspension
  • Steering
  • Body
  • Exterior
  • Interior
  • Doors and windows
  • Ventilation and heating
  • Electrical equipment
  • Equipment and devices
  • Electrical circuits
Astra G (1998-2004, petrol) 
  • General information
  • User manual
  • Car care
  • Maintenance
  • Power unit
  • Single shaft engines
  • Twin shaft engines
  • Engine repair
  • Cooling and heating
  • Fuel and exhaust systems
  • Starting and charging system
  • Ignition system
  • Transmission
  • Clutch
  • Mechanical gearbox
  • Automatic gearbox
  • Drive shafts
  • Chassis
  • Brake system
  • Car suspension
  • Steering
  • Body
  • Interior
  • Exterior
  • Electrical equipment
  • Equipment and devices
  • Wiring diagrams Opel Astra
  • Wiring diagrams Opel Zafira
Astra F (1991-1998, petrol) 
  • General information
  • Maintenance
  • Power unit
  • Engine in car
  • Engine removed
  • Cooling system
  • Heating and ventilation
  • Fuel supply (carburetor)
  • Fuel supply (injector)
  • Emission control
  • Ignition system
  • Transmission
  • Clutch
  • Mechanical gearbox
  • Automatic gearbox
  • Drive shafts
  • Chassis
  • Brake system
  • Car suspension
  • Steering
  • Body
  • Exterior
  • Interior
  • Electrical equipment
  • Equipment and devices
  • Electrical circuits
OpelBook.ru © 2017–2026 · Mobile version · · Sitemap: EN BG BY UA RS HR RO PL SK HU · Feedback · Site search
Astra F, petrol · Astra G, petrol · Astra G · Astra H · Astra J, petrol · Corsa B · Corsa C, petrol · Corsa C · Insignia A · Kadett D · Kadett E · Omega A · Omega B · Omega B2 · Vectra A, petrol · Vectra A · Vectra B, petrol · Vectra B · Vectra C · Zafira A, petrol · Frontera A, petrol · Frontera B · Ascona C · Vivaro A ·
We want your visit to be comfortable 🤝! We use cookies 🍪 to make that happen.