
Attention. You must not exceed the speed of 80 km/h. Do not use the repaired wheel for a long time, the handling and driving performance of the car may deteriorate.
In case of tire damage:
- Apply the parking brake, select first gear, reverse gear or place the gear selector in position P.
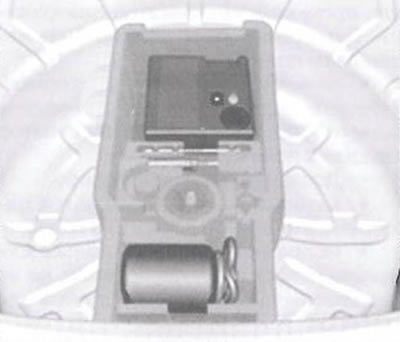
The tire repair kit is located in the compartment under the floor cover in the trunk or in the storage box under the seat.
Take the tire repair kit out of the drawer.
Remove the compressor.
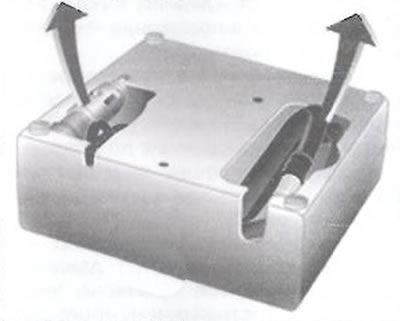
Remove the connecting electrical wire and air hose from their storage compartments under the compressor.
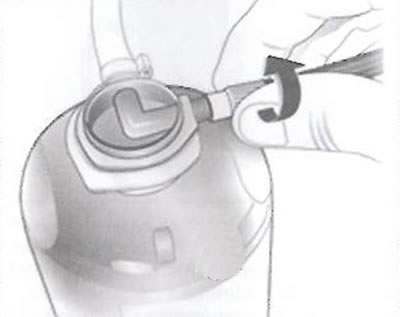
Screw the compressor air hose onto the fitting of the sealant bottle.
Attach the sealant bottle to the compressor holder.
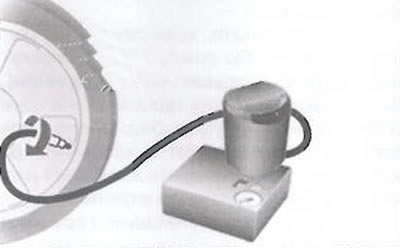
Install the compressor next to the tire so that the sealant bottle is vertical.
Unscrew the valve cap of the damaged tire.
Screw the free end of the hose onto the tire valve.
The compressor switch must be set to «ABOUT».
Plug the compressor power plug into an accessory socket or cigarette lighter.
To avoid battery discharge, it is recommended to start the engine.
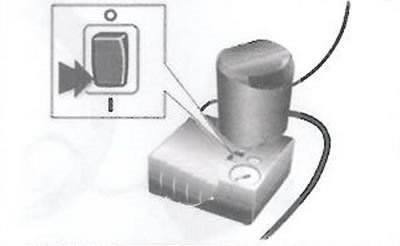
Set the compressor switch to the position «I». The tire will fill with sealant.
If the sealant in the tank runs out, the compressor pressure gauge will briefly (about 30 seconds) indicates pressure up to 6 bar.
Then the pressure starts to drop. This means that all the sealant has been pumped into the tire.
After that, the tire must be inflated with air. The operating pressure in the tire will be established in about 10 minutes. When the desired pressure is reached, turn off the compressor.
If after 10 minutes the specified pressure is not established, remove the tire repair kit. Move the car so that the wheels make a full turn. Reinstall the tire repair kit and continue to inflate the tire for another 10 minutes. If the required pressure is still not set, then the tire is badly damaged. Contact a service station for help.
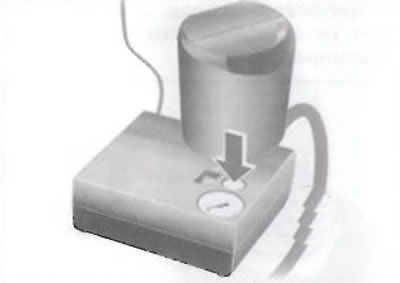
Relieve excess tire pressure using the button on the pressure gauge.
Run the compressor for no more than 10 minutes.
Disconnect the tire repair kit. To remove the sealant bottle, push the grip on the bracket. Screw the tire inflation hose onto the free fitting of the sealant bottle. This will keep the sealant in the bottle. Store the tire repair kit in the luggage compartment.
Remove the exposed sealant with a cloth.
Remove the sticker from the sealant bottle, which indicates the maximum allowable speed, and stick it in the field of view of the gel.
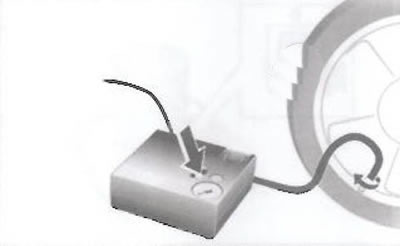
Continue driving immediately to allow the sealant to spread evenly over the tire. After covering a distance of approximately 10 km (but not longer than 10 minutes) you should stop and check the air pressure in the tires. To do this, wind the compressor air hose directly onto the tire valve and compressor.
Note. If the pressure is greater than 1.3 bar, bring the pressure up to the required value. Repeat the procedure until the pressure stops dropping. If the pressure drops below 1.3 bar, the vehicle cannot be driven. In this case, contact a workshop for assistance.
Stow the tire repair kit in the luggage compartment.
Note.
- This repair significantly reduces driving performance, so this tire should be replaced as soon as possible. If there are unusual sounds or if the compressor becomes very hot, it should be turned off for at least 30 minutes. The built-in safety valve opens at 7 bar.
- Check the expiration date of the year d guests kit. After the indicated expiration date, the manufacturer cannot guarantee the effective elimination of the puncture. Read the storage information on the sealant bottle carefully. Replace the used bottle. Dispose of the cylinder in accordance with legal requirements.
The compressor and sealant can be used down to -30°C. The supplied adapters can be used to inflate balls, air mattresses, inflatable boats, etc. They are stored at the bottom of the compressor. To remove the adapter, wind the compressor air hose onto it and pull.
Visitor comments