


44. Checking the ATF level can be done with the transmission warmed up to normal operating temperature (15 + 20 km, 72 + 80°C) or with a "cold" transmission (after approximately 1 minute of engine idling after a long period of standing).
Caution: Do not check the ATF level immediately after driving the vehicle at high speeds, in hot weather in the city, or after towing a trailer - allow the fluid to cool down for about 30 minutes first!
45. Park the car on a flat, horizontal surface with a hard surface, firmly set the parking brake. If the engine is cold, start it and warm it up at idle speed. With the engine running, press the foot brake pedal and move the AT selector lever through all positions in turn, finally returning it to the "P" position.
46. Without turning off the engine, remove the dipstick. Use your fingers to remove any traces of ATF from the dipstick blade and assess its condition by touch.
Warning: If checking is done after the ride, be careful not to burn your fingers!
Note: A more detailed description of the procedure for checking the condition and replacing the AT working fluid is given in Chapter 7.
47. Wipe the blade thoroughly with a clean cloth and insert the probe back into the guide tube, firmly fitting the cap onto the neck.
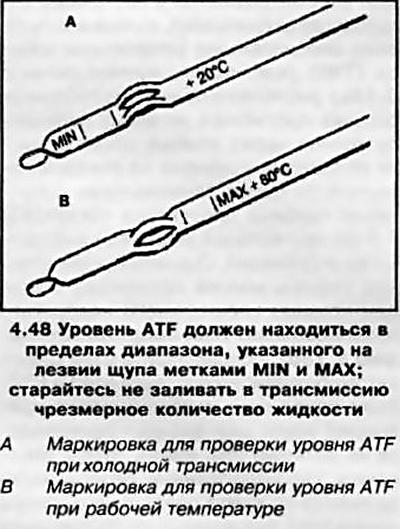
48. Remove the dipstick from the filler neck again and use the length of the wetted section of the blade to determine the ATF level in the transmission housing (see accompanying illustration). If necessary, make the appropriate adjustments by adding the required grade of fluid to the transmission through a funnel.
Attention: Before filling, shake the liquid in the packaging container well and mix it thoroughly. Failure to do so may result in foam formation and transmission failure while the vehicle is moving!
49. To raise the ATF level from the lower limit of the dipstick's working range to the upper limit, approximately 0.6 l of fluid is required - add ATF in small portions in several steps, checking the level each time.
Visitor comments