
Comment. The operation is shown on the example of the left protective cover of the steering rod. The right protective cover is replaced in the same way.
Execution sequence
1. We prepare the car for work (see «Preparing the car for maintenance and repair»).
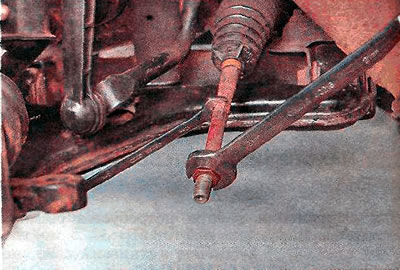
2. We mark the position of the lock nut and the tip on the steering rod so that during assembly it does not violate the wheel alignment angles, and loosen the lock nut of the steering rod tip (see «Tie Rod End - Replacement»).
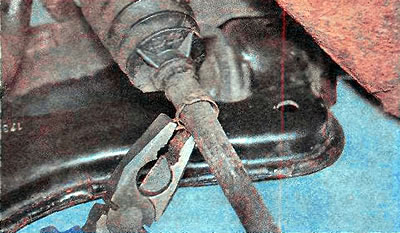
3. We squeeze the paws of the outer clamp with pliers and remove it from the protective cover of the steering rod.
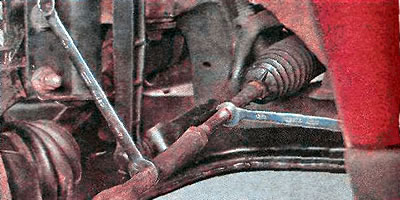
4. Using a 13 mm wrench, we unscrew the steering rod from the tip, holding the tip with a 14 mm wrench.
5. With a 21 mm wrench, we twist the tip locknut from the steering rod, holding the rod from turning with a 13 mm wrench, and remove the clamp.
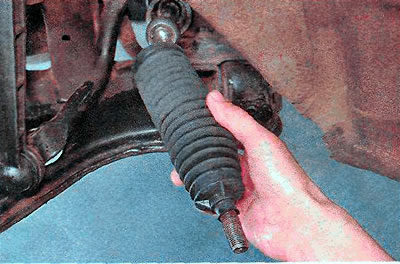
6. We bite the second clamp of the protective cover with side cutters.
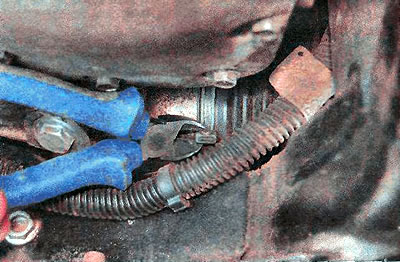
7. Remove the protective cover from the steering rod.
8. We clean the ball joint from the dirt of the old grease. Apply new lubricant.
9. Install a new protective cover in reverse order. When installing the tip, we screw it up to the mark or by the number of revolutions calculated during removal. If necessary, we adjust the angles of the wheels at the service station.
Visitor comments