OpelBook.ru
Cars AvtoVAZ Cars Mitsubishi Cars BMW Cars Mercedes Cars Nissan Cars Toyota Cars Chevrolet
English Русский
Български
Беларускі
Український
Српски
Hrvatski
Română
Polski
Slovenský
Magyar
 |  Sitemap  |  Contacts  |    


Main Astra Corsa Insignia Kadett Omega Vectra Zafira Others Articles
Omega A (1986-1993) Omega B (1993-1999) Omega B2 (1999-2003)
  • Main
  • Omega
  • Omega B2
  • Chassis
  • Steering
  • Steering rods — removal and installation

Steering rods — removal and installation (Opel Omega B2)

            0

Contents: Removal ⬇ Installation ⬇

Removal


1. Apply the handbrake, jack up the front of the car and place it on axle stands. Remove the front wheels.

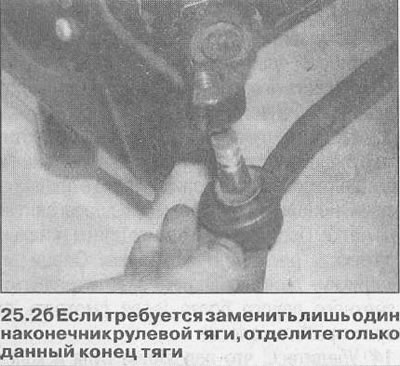
2. To remove the lateral tie rod, unscrew the nuts and push out the ball joints using a ball joint puller (see illustrations). If only one tie rod end needs to be replaced, remove only that end of the rod.
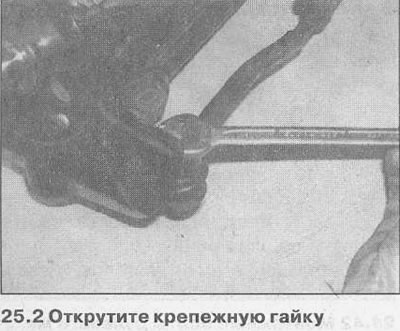
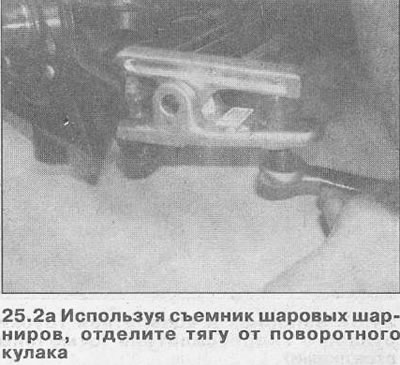
2. To remove the lateral tie rod, unscrew the nuts and push out the ball joints using a ball joint…


2. To remove the lateral tie rod, unscrew the nuts and push out the ball joints using a ball joint…


2. To remove the lateral tie rod, unscrew the nuts and push out the ball joints using a ball joint…


3. Loosen the clamp bolts and unscrew the ends from the steering rod, counting the number of turns required to do this.


4. To remove the central steering rod, it is necessary to separate the side rods from it (see point 2). Remember the correct location of the central rod: the light rubber casing is located near the pendulum lever, the darker one is facing the steering gear lever.

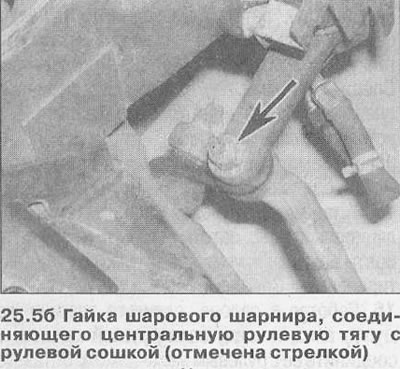
5. Remove the nuts and separate the center rod from the steering arm and swing arm using a ball joint puller (see illustration).
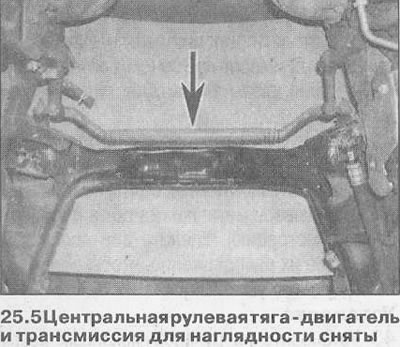
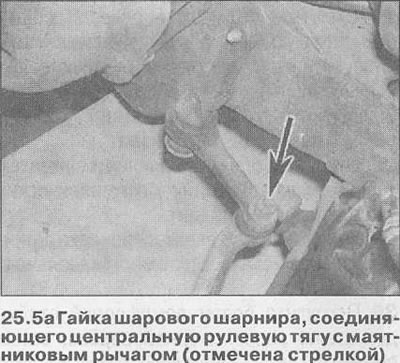
5. Remove the nuts and separate the center rod from the steering arm and swing arm using a ball…


5. Remove the nuts and separate the center rod from the steering arm and swing arm using a ball…


5. Remove the nuts and separate the center rod from the steering arm and swing arm using a ball…


Installation


6. Install in the reverse order. Screw the ends onto the steering rod by the number of turns counted during removal. Use new self-locking nuts. Tighten the nuts and bolts with the tightening force specified Specifications (see illustration). Finally, check and, if necessary, adjust the front wheel alignment (see Chapter 27).

Text copied from an internet website: www.opelbook.ru
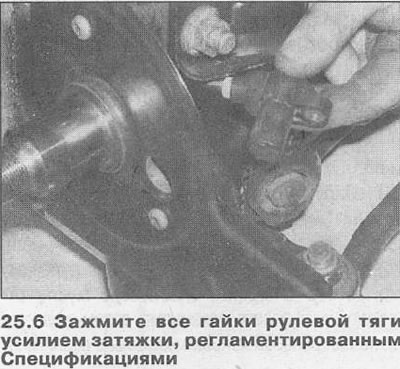
6. Install in the reverse order. Screw the ends onto the steering rod by the number of turns…


This article is available at russian, bulgarian, belarusian, ukrainian, serbian, croatian, romanian, polish, slovak, hungarian
Checking the article: Shapovalov Yaroslav

Share information:

Previous articles
Opel Omega B2: Steering
Next articles

Steering gear — removal and installation
Ignition/Steering Column Lock — Removal and Installation
Steering column — removal and installation
Steering wheel — removal and installation
Steering Specifications
Pendulum arm — removal and installation
Power steering pump — removal and installation
Wheel alignment angles — checking and adjusting


See similar ones from other Opel car manuals:
▶ Steering rods — removal and installation Opel Astra G (1998-2004, petrol)
▶ Steering gear / steering rods Opel Corsa C (2000-2006, petrol)
▶ Removal and installation of steering rods Opel Kadett D (1979-1984)
▶ Removal and installation of steering rods Opel Vectra A (1988-1995)
▶ Steering rods Opel Frontera B (1998-2004)
Link to this page in different formats

Visitor comments


No comments yet


How much will 34 + 44 =


Omega B2 (1999-2003) 
  • General information
  • User manual
  • Maintenance
  • Troubleshooting
  • Power unit
  • Petrol 4-cylinder
  • Petrol 6-cylinder
  • Engine overhaul
  • Diesel engines 2.0 l
  • Diesel engines 2.5 l
  • Cooling and heating
  • Injection system (gasoline)
  • Fuel system (diesel)
  • Fuel system
  • Exhaust system
  • Ignition system
  • Transmission
  • Clutch
  • Mechanical gearbox
  • Automatic gearbox
  • Main gear and shafts
  • Chassis
  • Brake system
  • Car suspension
  • Steering
  • Body
  • Body elements
  • Electrical equipment
  • Equipment and devices
  • Electrical circuits
Omega B (1993-1999) 
  • General information
  • User manual
  • Tips for the car owner
  • Maintenance (gasoline)
  • Maintenance (diesel)
  • Power unit
  • Petrol engine SOHC 2.0 l
  • Petrol engine DOHC 2.0 l
  • Petrol engines 2.5 and 3.0 l
  • Repair of gasoline engines
  • Diesel engine 2.0 l
  • Diesel engine repair 2.0 l
  • Diesel engine 2.5 l
  • Cooling and heating
  • Power system (petrol)
  • Emission reduction
  • Fuel system (diesel 2.0 l)
  • Fuel system (diesel 2.5 l)
  • Launch system
  • Ignition system
  • Transmission
  • Clutch
  • Mechanical gearbox
  • Automatic gearbox
  • Drive shafts
  • Chassis
  • Brake system
  • Wheel suspension
  • Steering
  • Body
  • Exterior
  • Interior
  • Doors and windows
  • Electrical equipment
  • Equipment and devices
  • Wiring diagrams (early)
  • Wiring diagrams (late)
Omega A (1986-1993) 
  • General information
  • User manual
  • Maintenance
  • Changes and additions
  • Troubleshooting
  • Power unit
  • Gasoline engines
  • Diesel engines
  • Cooling system
  • Fuel system (gasoline)
  • Fuel system (diesel)
  • Ignition system
  • Transmission
  • Clutch
  • Mechanical gearbox
  • Automatic gearbox
  • Cardan shaft
  • Drive shafts
  • Chassis
  • Brake system
  • Car suspension
  • Steering
  • Body
  • Exterior
  • Interior
  • Electrical equipment
  • Power devices
  • Lighting and appliances
  • Electrical circuits
OpelBook.ru © 2017–2026 · Mobile version · · Sitemap: EN BG BY UA RS HR RO PL SK HU · Feedback · Site search
Astra F, petrol · Astra G, petrol · Astra G · Astra H · Astra J, petrol · Corsa B · Corsa C, petrol · Corsa C · Insignia A · Kadett D · Kadett E · Omega A · Omega B · Omega B2 · Vectra A, petrol · Vectra A · Vectra B, petrol · Vectra B · Vectra C · Zafira A, petrol · Frontera A, petrol · Frontera B · Ascona C · Vivaro A ·
We want your visit to be comfortable 🤝! We use cookies 🍪 to make that happen.