
OpelBook.ru
Cars AvtoVAZ Cars Mitsubishi Cars BMW Cars Mercedes Cars Nissan Cars Toyota Cars Chevrolet
English Русский
Български
Беларускі
Український
Српски
Hrvatski
Română
Polski
Slovenský
Magyar
 |  Sitemap  |  Contacts  |    


Main Astra Corsa Insignia Kadett Omega Vectra Zafira Others Articles
Kadett D (1979-1984) Kadett E (1984-1995)
  • Main
  • Kadett
  • Kadett E
  • Transmission
  • Gearbox F16 and F20
  • Gearbox assembly

Gearbox assembly (Opel Kadett E)

            0

Contents: When assembling a 4-speed gearbox ⬇ When assembling a 5-speed gearbox ⬇
Below are listed only the assembly features of the "F16" type gearbox compared to the "F10" type gearbox. The remaining operations are described in the section "Gearboxes of the "F10" and "F13" types".

Note: Parts installed in the gearbox must be lubricated with gearbox oil.


When assembling a 4-speed gearbox


  • place a roller bearing on the secondary shaft with the small diameter of the separator towards the drive gear. Insert thrust half rings and a lock washer into the shaft groove. Install a single-row needle bearing on the shaft and place the fourth gear gear on the bearing;
  • install the synchronizer locking ring on the 4th gear;
  • heat the hub assembly with the sliding sleeve of the III-IV gear synchronizer to a temperature of 100°C, monitoring the heating temperature with a thermochromic pencil. Press the hub assembly with the sliding sleeve onto the shaft. Lock the hub of the synchronizer sleeve with a new locking ring, making sure that the crackers enter the grooves of the synchronizer locking ring. Install the thrust washer;
  • install a double-row split needle bearing on the secondary shaft and put the third gear on it. Place the thrust half rings in the groove of the shaft and secure them with a retaining ring;
  • install the needle bearing on the shaft and put the 2nd gear on the bearing.
  • heat the hub assembly with the 1st-2nd gear synchronizer clutch to a temperature of 100°C and press it onto the shaft with the straight-toothed gear towards the 1st gear. Lock the synchronizer clutch hub with a new retaining ring;
  • install a locking ring on the synchronizer of the 1st and 2nd gears, put a needle bearing on the secondary shaft and install the 1st gear gear,
  • install thrust needle bearing;
  • install a retaining ring on the secondary shaft to secure it in the rear cover. Heat the washer to 100°C and press it onto the shaft with a larger diameter to the thrust needle bearing;
  • install the ball bearing on the secondary shaft with the closed end facing outward and place a new retaining ring on the bearing;
  • place a new retaining ring on the rear end of the primary shaft to ensure its fixation in the rear cover of the gearbox;
  • press the rear primary shaft ball bearing on, with the closed side of the bearing facing outwards. Install the washer and new snap ring;
  • press the primary shaft into the gear block with the small diameter towards the bearing.
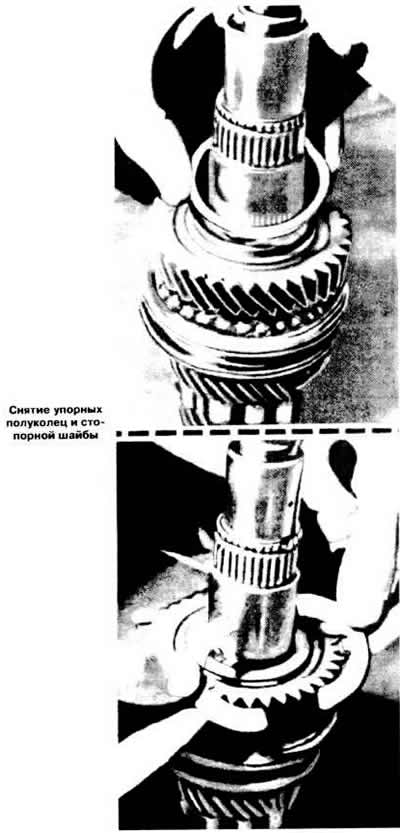
press the primary shaft into the gear block with the small diameter towards the bearing.
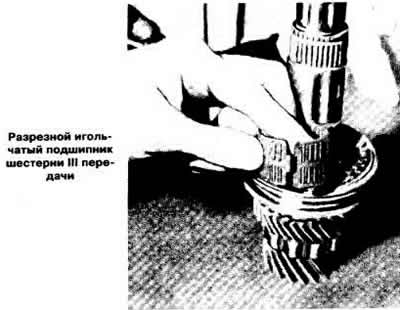

press the primary shaft into the gear block with the small diameter towards the bearing.
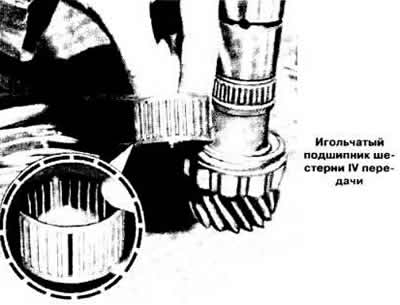

press the primary shaft into the gear block with the small diameter towards the bearing.


When assembling a 5-speed gearbox


  • install the primary shaft gear block retaining ring into the intermediate case annular groove;
  • install the primary and secondary shafts;
  • install the rod and fork for switching the 5th gear into the intermediate housing, and then the rod and fork for switching the 3rd-4th gears;
  • install a retaining bracket on the intermediate housing, screw in new bolts with heads that have capsules with a locking compound, and tighten them;
  • install the 5th gear shift fork bracket with the stopper on the intermediate housing so that one of the locking protrusions of the stopper is located opposite the cutout of the 3rd-4th gear shift rod, install and tighten new mounting bolts with heads that have capsules with a locking compound.


This article is available at russian, bulgarian, belarusian, ukrainian, serbian, croatian, romanian, polish, slovak, hungarian
Checking the article: Shapovalov Yaroslav

Share information:

Previous articles
Opel Kadett E: Gearbox F16 and F20
Next articles

The device of the 5-speed gearbox type «F16»
Differential assembly
Disassembling the differential
The device of the 4-speed gearbox type «F16»
Disassembling the gearbox
Removal and installation the gearbox
Adjusting the gear shift drive
Removal and installation the gear shift lever
Gear shift and differential drive device of the F16 gearbox
Gear shift drive device of the F20 type gearbox


See similar ones from other Opel car manuals:
▶ Gearbox Oil — Draining and Filling Opel Astra F (1991-1998, petrol)
▶ Easytronic gearbox Opel Corsa C (2000-2006, petrol)
▶ Replacing transmission oil in a manual gearbox M32-6 Opel Insignia A (2008-2017)
▶ Manual gearbox — removal and installation Opel Omega A (1986-1993)
▶ Removal and installation the gearbox Opel Vectra A (1988-1995)
Link to this page in different formats

Visitor comments


No comments yet


How much will 29 + 15 =


Kadett E (1984-1995) 
  • General information
  • Vehicle description
  • Operation and maintenance
  • OHV power unit
  • Engine design
  • Check and repair
  • Engine work
  • OHC power unit
  • Engine design
  • Engine repair
  • Ignition system
  • Cooling and lubrication
  • Supply system
  • Fuel injection «LE-Jetronic»
  • Fuel injection «LE3-Jetronic»
  • Motronic ML4.1 system
  • Motronic M1.5 system
  • Motronic M2.5 system
  • Transmission
  • Clutch
  • Gearbox F10 and F13
  • Gearbox F16 and F20
  • Automatic gearbox
  • Drive shafts
  • Chassis
  • Front suspension
  • Rear suspension
  • Steering
  • Brake system
  • Electrical equipment
  • Equipment and devices
  • Electrical circuits
Kadett D (1979-1984) 
  • General information
  • Car care
  • Maintenance
  • Power unit
  • Gasoline engines
  • Lubrication system
  • Cooling system
  • Power system (gasoline)
  • Carburetor Solex 35 PDSI
  • Carburetor Varajet II
  • Carburetor 1B1
  • Fuel injection (gasoline)
  • Diesel engines
  • Fuel system (diesel)
  • Transmission
  • Clutch
  • Manual gearbox
  • Chassis
  • Front suspension
  • Rear suspension
  • Steering
  • Brake system
  • Wheels and tires
  • Body
  • Body elements
  • Doors and windows
  • Electrical equipment
  • Equipment and devices
  • Lighting system
  • Power devices
  • Ignition system
  • Electrical circuits
OpelBook.ru © 2017–2026 · Mobile version · · Sitemap: EN BG BY UA RS HR RO PL SK HU · Feedback · Site search
Astra F, petrol · Astra G, petrol · Astra G · Astra H · Astra J, petrol · Corsa B · Corsa C, petrol · Corsa C · Insignia A · Kadett D · Kadett E · Omega A · Omega B · Omega B2 · Vectra A, petrol · Vectra A · Vectra B, petrol · Vectra B · Vectra C · Zafira A, petrol · Frontera A, petrol · Frontera B · Ascona C · Vivaro A ·
We want your visit to be comfortable 🤝! We use cookies 🍪 to make that happen.