
Attention. The oil in the differential clutch is under very high pressure. To prevent personal injury, wait at least ten minutes before removing any parts of the differential clutch.
Note. The following procedures require the vehicle to be level.
1. Raise and secure the vehicle.
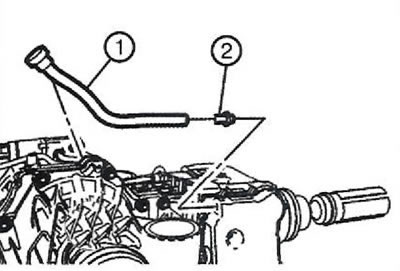
2. Remove connector (2) ventilation hose from the differential clutch cover.
Attention. It is very important to ensure maximum cleanliness when working on the differential clutch. Dirt particles can cause serious damage and shorten the life of the differential clutch.
3. Remove the differential clutch cover to drain the fluid.
Note. Do not use an old gasket. Always replace it with a new one.
4. Install the differential clutch cover.
5. Ventilation hose removed (1).
6. Install differential cover bolts and tighten to 6 Nm in diagonal sequence. Re-tighten the bolts to ensure that the accumulator and filter are properly sealed.
Attention. The working fluids of the differential clutch and the final drive of the rear axle are different from each other. Do not mix working fluids as this can cause serious damage to the vehicle.
7. Pour 350 ml of the installed working fluid into the differential clutch through the opening of the ventilation hose connector.
8. Install the ventilation hose connector (2) and tighten to 14 Nm.
9. Install ventilation hose (1).
10. Lower the car.
11. In order for the oil level to stabilize, let the car stand for ten minutes with the ignition off.
12. Check the oil level in the differential clutch as described in the previous section.
Visitor comments