
OpelBook.ru
Cars AvtoVAZ Cars Mitsubishi Cars BMW Cars Mercedes Cars Nissan Cars Toyota Cars Chevrolet
English Русский
Български
Беларускі
Український
Српски
Hrvatski
Română
Polski
Slovenský
Magyar
 |  Sitemap  |  Contacts  |    


Main Astra Corsa Insignia Kadett Omega Vectra Zafira Others Articles
Astra F (1991-1998, petrol) Astra G (1998-2004, petrol) Astra G (1998-2004) Astra H (2004-2009) Astra J (2009-2015, petrol)
  • Main
  • Astra
  • Astra J
  • General information
  • Maintenance
  • Checking the level and adding oil to the lubrication system

Checking the level and adding oil to the lubrication system (Opel Astra J)

            0

Consumption of engine oil during vehicle operation is a completely normal phenomenon, so you should check the engine oil level regularly. Be sure to check the oil level before a long trip.

Engine oil consumption depends on driving style, climate and road conditions. Normal oil consumption can be up to 1 l per 1000 km. An unrun-in engine may consume slightly more.

You will need: motor oil, a funnel, a clean rag.

Recommendations:
  • Motor oil plays a vital role in ensuring the performance and longevity of the engine. Use only high-quality oil.
  • The manufacturer recommends using API SL quality oil of viscosity grade SAE 0W-30 or API SL viscosity grade SAE 0W-40 (depending on climatic conditions). It is permissible to use oils with viscosity 5W-30, 5W-40.


Attention!
  • Before checking the oil level after driving, turn off the engine and wait 5-10 minutes for the oil to drain into the oil pan.
  • Top up with oil of the same brand, viscosity and quality class as previously used.
  • The oil level in the engine crankcase should not exceed the maximum mark, otherwise leaks through gaskets and seals, as well as increased oil consumption are possible. In addition, when the oil level is too high, it is intensively shaken by the crankshaft counterweights, forming foam. Foam that gets into the internal cavities of the oil pump disrupts its operation.
  • Check the level by placing the vehicle on a flat, horizontal surface.

Check the level by placing the vehicle on a flat, horizontal surface.


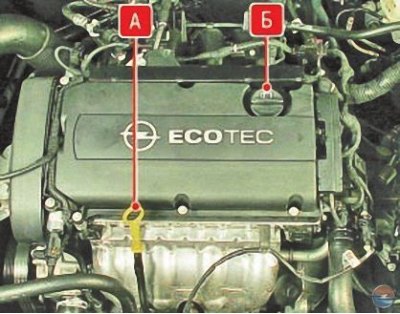
Pointer A oil level (oil dipstick) located at the front of the cylinder block. Plug B the oil filler neck is located on the cylinder head cover.


Pointer A oil level (oil dipstick) located at the front of the cylinder block. Plug B the oil…


Text copied from a web portal [OpelBook.ru]

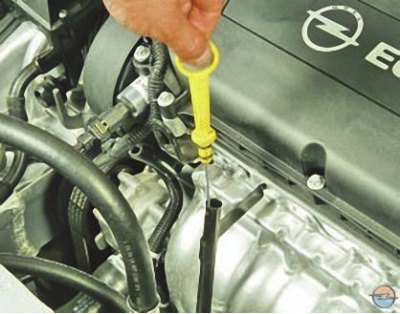
1. Remove the oil level indicator (oil dipstick)…
1. Remove the oil level indicator (oil dipstick)…


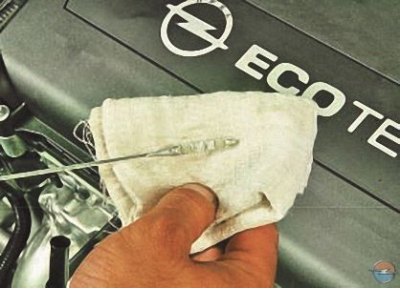
2. …wipe it with a clean cloth…
2. …wipe it with a clean cloth…


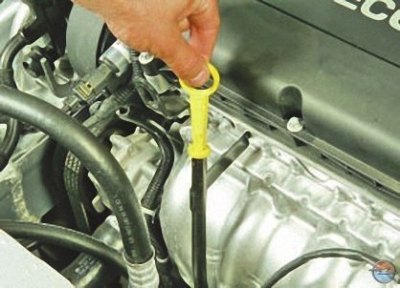
3. …and put it back in place.
3. …and put it back in place.


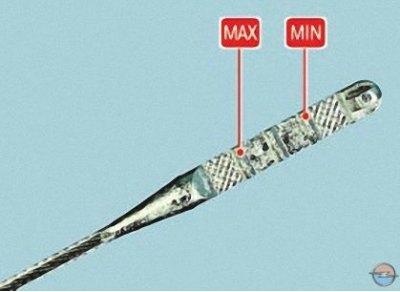
4. Remove the pointer (dipstick) again. The oil film level must be between the MIN and MAX marks. If the oil level is close to or below the MIN mark, top up the oil.


Note. The MIN and MAX marks in the photo are applied conditionally. They are not on the oil level indicator, they correspond to the lower and upper marks, respectively.

Note. The MIN and MAX marks in the photo are applied conditionally. They are not on the oil level…


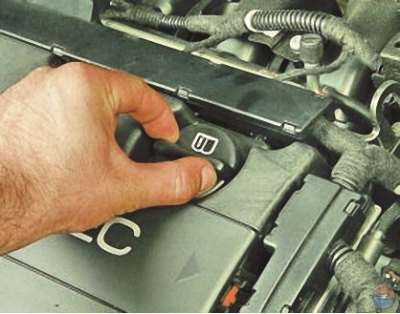
5. To add oil, turn the oil filler cap counterclockwise…
5. To add oil, turn the oil filler cap counterclockwise…


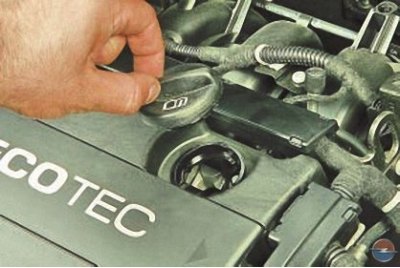
6. …and take it off.
6. …and take it off.


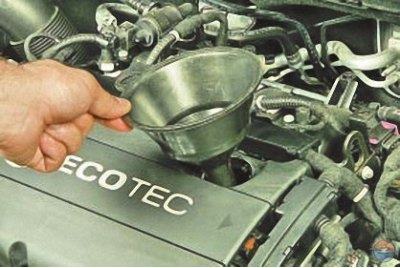
7. Insert the funnel into the oil filler neck…
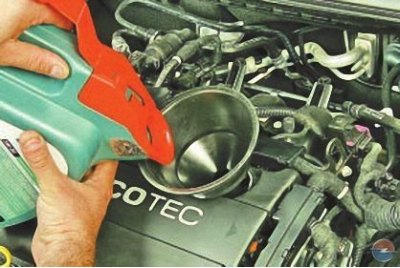
7. Insert the funnel into the oil filler neck…


8. …and pour oil into the engine, monitoring the oil level using the dipstick. Before removing the dipstick, wait 2–3 minutes to allow the oil to drain into the crankcase.

9. Once the oil level reaches the required level, tighten the filler cap.


This article is available at russian, bulgarian, belarusian, ukrainian, serbian, croatian, romanian, polish, slovak, hungarian
Checking the article: Trifonova Emilia

Share information:

Previous articles
Opel Astra J: Maintenance
Next articles

Checking wheels and tires
Safety rules for maintenance
Maintenance schedule
Checking the level and adding coolant
Checking and topping up brake fluid in the brake and clutch reservoir
Checking the level and adding fluid to the washer reservoir
Checking external lighting fixtures


See similar ones from other Opel car manuals:
▶ Checking the brake fluid level in the hydraulic reservoir… Opel Corsa C (2000-2006, petrol)
▶ Checking the rear suspension level control system Opel Vectra A (1988-1995, petrol)
▶ Lubrication system — checking oil pressure Opel Zafira A (1999-2005, petrol)
▶ Checking the oil level in the rear main gear of the… Opel Insignia A (2008-2017)
▶ Lubrication system of a carburetor engine Opel Kadett E (1984-1995)
Link to this page in different formats

Visitor comments


No comments yet


How much will 48 + 31 =


Astra J (2009-2015, petrol) 
  • General information
  • Vehicle device
  • User manual
  • Faults en route
  • Maintenance
  • Power unit
  • Engine repair
  • Cooling and lubrication system
  • Engine power system
  • Exhaust system
  • Transmission
  • Clutch
  • Car gearbox
  • Drive shafts
  • Chassis
  • Front suspension
  • Rear suspension
  • Steering
  • Brake system
  • Wheels and tires
  • Body
  • Exterior
  • Interior
  • Doors and windows
  • Body Care
  • Heating and air conditioning
  • Security systems
  • Electrical equipment
  • Equipment and devices
  • Lighting and signaling
  • Power devices
  • Electrical circuits
Astra H (2004-2009) 
  • General information
  • Introduction to the guide
  • Troubleshooting
  • User manual
  • Maintenance
  • Power unit
  • Engine repair
  • Cooling and heating
  • Power and exhaust system
  • Ignition system
  • Launch and charge system
  • Transmission
  • Mechanical gearbox
  • Automatic gearbox
  • Drive shafts
  • Chassis
  • Brake system
  • Car suspension
  • Steering
  • Body
  • Interior
  • Exterior
  • Electrical equipment
  • Equipment and devices
  • Electrical circuits
Astra G (1998-2004) 
  • General information
  • Introduction to manual
  • User manual
  • Maintenance
  • Power unit
  • SOHC gasoline engines
  • DOHC gasoline engines
  • Diesel engines 1.7 and 2.0
  • Engine repair
  • Cooling system
  • Supply system
  • Injection system (gasoline)
  • Injection system (diesel)
  • Exhaust system
  • Charge and launch system
  • Ignition system (gasoline)
  • Preheat system (diesel)
  • Transmission
  • Manual gearbox
  • Automatic gearbox
  • Clutch
  • Drive shafts
  • Chassis
  • Brake system
  • Wheel suspension
  • Steering
  • Body
  • Exterior
  • Interior
  • Doors and windows
  • Ventilation and heating
  • Electrical equipment
  • Equipment and devices
  • Electrical circuits
Astra G (1998-2004, petrol) 
  • General information
  • User manual
  • Car care
  • Maintenance
  • Power unit
  • Single shaft engines
  • Twin shaft engines
  • Engine repair
  • Cooling and heating
  • Fuel and exhaust systems
  • Starting and charging system
  • Ignition system
  • Transmission
  • Clutch
  • Mechanical gearbox
  • Automatic gearbox
  • Drive shafts
  • Chassis
  • Brake system
  • Car suspension
  • Steering
  • Body
  • Interior
  • Exterior
  • Electrical equipment
  • Equipment and devices
  • Wiring diagrams Opel Astra
  • Wiring diagrams Opel Zafira
Astra F (1991-1998, petrol) 
  • General information
  • Maintenance
  • Power unit
  • Engine in car
  • Engine removed
  • Cooling system
  • Heating and ventilation
  • Fuel supply (carburetor)
  • Fuel supply (injector)
  • Emission control
  • Ignition system
  • Transmission
  • Clutch
  • Mechanical gearbox
  • Automatic gearbox
  • Drive shafts
  • Chassis
  • Brake system
  • Car suspension
  • Steering
  • Body
  • Exterior
  • Interior
  • Electrical equipment
  • Equipment and devices
  • Electrical circuits
OpelBook.ru © 2017–2026 · Mobile version · · Sitemap: EN BG BY UA RS HR RO PL SK HU · Feedback · Site search
Astra F, petrol · Astra G, petrol · Astra G · Astra H · Astra J, petrol · Corsa B · Corsa C, petrol · Corsa C · Insignia A · Kadett D · Kadett E · Omega A · Omega B · Omega B2 · Vectra A, petrol · Vectra A · Vectra B, petrol · Vectra B · Vectra C · Zafira A, petrol · Frontera A, petrol · Frontera B · Ascona C · Vivaro A ·
We want your visit to be comfortable 🤝! We use cookies 🍪 to make that happen.