
OpelBook.ru
Cars AvtoVAZ Cars Mitsubishi Cars BMW Cars Mercedes Cars Nissan Cars Toyota Cars Chevrolet
English Русский
Български
Беларускі
Український
Српски
Hrvatski
Română
Polski
Slovenský
Magyar
 |  Sitemap  |  Contacts  |    


Main Astra Corsa Insignia Kadett Omega Vectra Zafira Others Articles
Astra F (1991-1998, petrol) Astra G (1998-2004, petrol) Astra G (1998-2004) Astra H (2004-2009) Astra J (2009-2015, petrol)
  • Main
  • Astra
  • Astra J
  • Body
  • Interior
  • Removal and installation the floor tunnel lining

Removal and installation the floor tunnel lining (Opel Astra J)

            0

You will need: 7 mm socket head, flat and Phillips blade screwdrivers.

1. Disconnect the wire from the negative terminal of the battery.
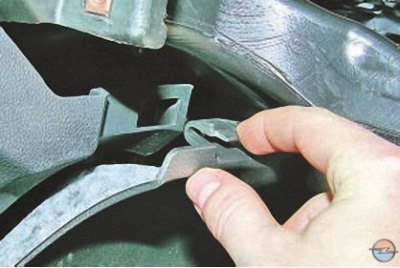
1. Disconnect the wire from the negative terminal of the battery.


2. Press down the retainer on the right lower part of the floor tunnel trim…
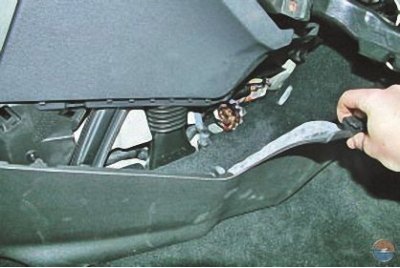
2. Press down the retainer on the right lower part of the floor tunnel trim…


3. …and remove it, overcoming the elastic resistance of the six holders.
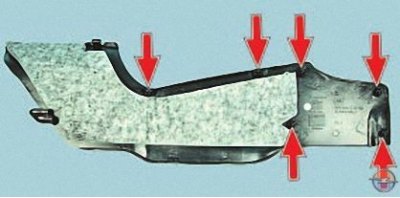
3. …and remove it, overcoming the elastic resistance of the six holders.


Note: This is how the bottom right side of the floor tunnel trim holders are positioned.
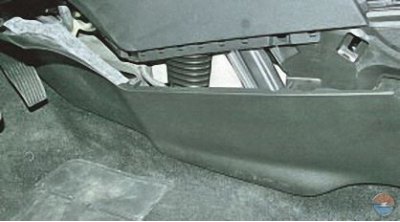


Note: This is how the bottom right side of the floor tunnel trim holders are positioned.


4. Similarly, remove the left lower part of the floor tunnel lining.
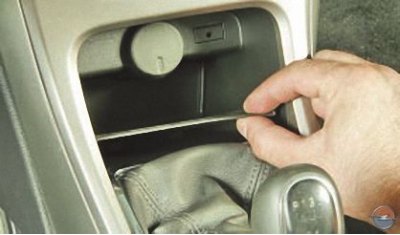
4. Similarly, remove the left lower part of the floor tunnel lining.


5. Pry up the edge of the soundproofing insert of the niche for small items…
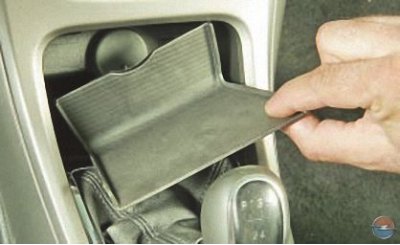
5. Pry up the edge of the soundproofing insert of the niche for small items…


6. …and remove the insert from the niche.
6. …and remove the insert from the niche.


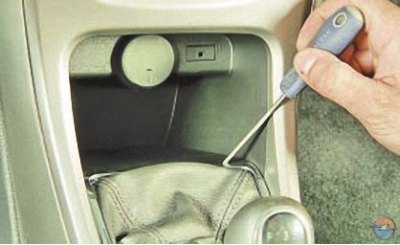
7. Use a screwdriver to pry up the edge of the base of the niche for small items…


7. Use a screwdriver to pry up the edge of the base of the niche for small items…


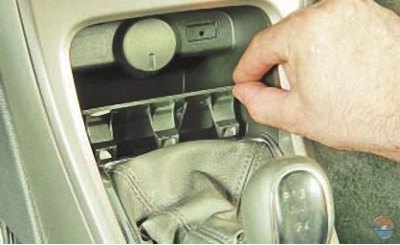
8. …detach the base from the floor tunnel lining, overcoming the elastic resistance of the holders…
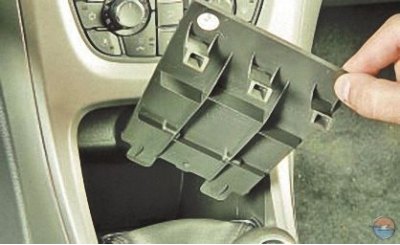
8. …detach the base from the floor tunnel lining, overcoming the elastic resistance of the holders…


9. …and remove the base from the cladding socket.
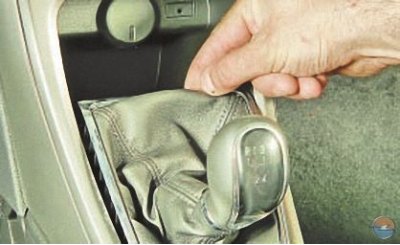
9. …and remove the base from the cladding socket.


10. Pry up the edge of the gearshift lever boot frame…
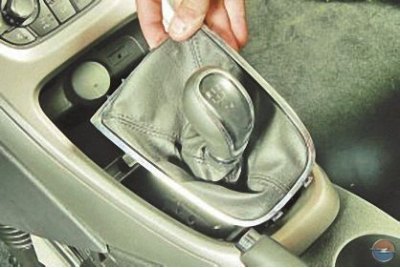
10. Pry up the edge of the gearshift lever boot frame…


11. … remove the frame from the socket in the decorative trim of the instrument panel console, overcoming the elastic resistance of its holders…
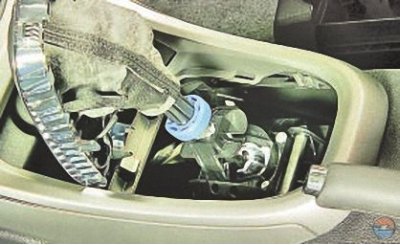


11. … remove the frame from the socket in the decorative trim of the instrument panel console,…


12. …and lift the cover along the lever, turning it inside out.
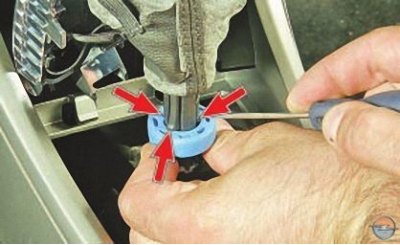
12. …and lift the cover along the lever, turning it inside out.


13. Use a screwdriver to press the three locking ring latches of the gearshift lever handle…
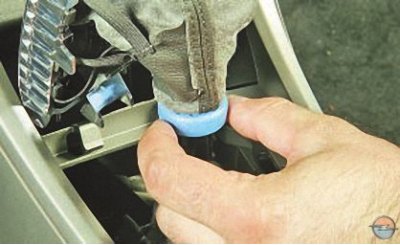
13. Use a screwdriver to press the three locking ring latches of the gearshift lever handle…


14. …slide the ring up…
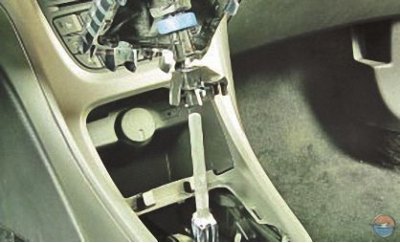
14. …slide the ring up…


15. …and remove the handle from the lever together with the cover.


15. …and remove the handle from the lever together with the cover.


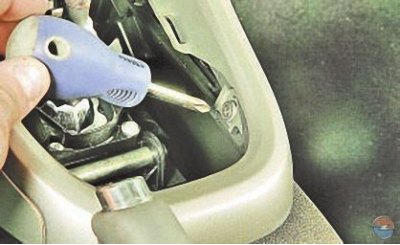
16. Remove the two screws securing the rear decorative trim panel of the instrument panel console (the photo shows the right screw, the left screw is located symmetrically relative to the longitudinal axis of the car)…
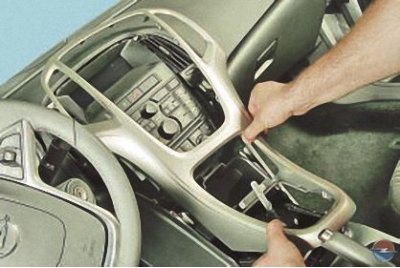
16. Remove the two screws securing the rear decorative trim panel of the instrument panel console…


17. …and remove the cover, overcoming the elastic resistance of its holders.
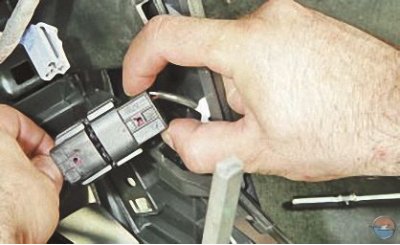
17. …and remove the cover, overcoming the elastic resistance of its holders.


18. Disconnect the wiring harness connector by pressing its lock.
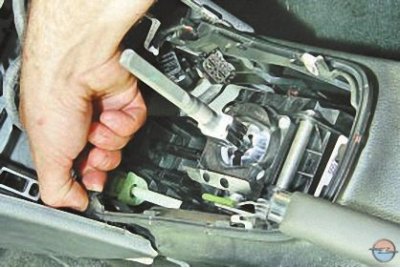


18. Disconnect the wiring harness connector by pressing its lock.


19. Press the wire harness bracket retainer…
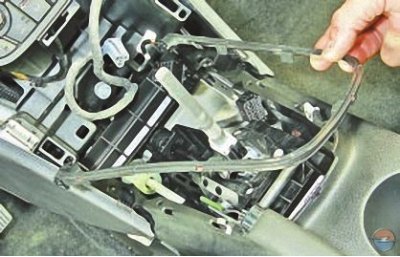
19. Press the wire harness bracket retainer…


20. …and remove the bracket together with the harness, overcoming the elastic resistance of its holders.
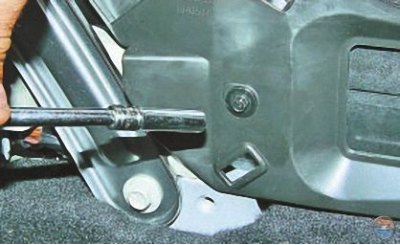
20. …and remove the bracket together with the harness, overcoming the elastic resistance of its…


21. On the left and right sides of the floor tunnel trim, unscrew one bolt of its front fastening to the instrument panel brackets.
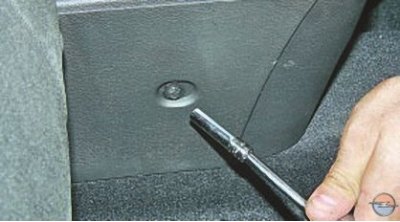
21. On the left and right sides of the floor tunnel trim, unscrew one bolt of its front fastening…


22. Similarly, unscrew the two bolts of the rear fastening of the floor tunnel trim.
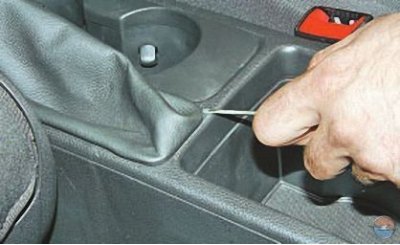


22. Similarly, unscrew the two bolts of the rear fastening of the floor tunnel trim.


23. Use a screwdriver to pry up the edge of the parking brake lever boot frame…
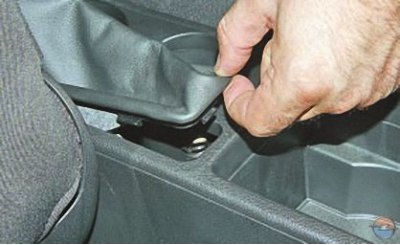
23. Use a screwdriver to pry up the edge of the parking brake lever boot frame…


24. … remove the frame from the socket in the floor tunnel lining, overcoming the elastic resistance of its holders…
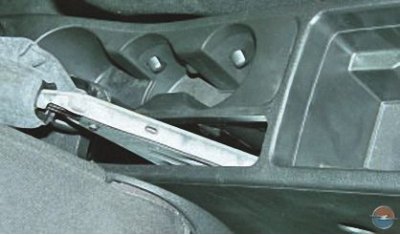
24. … remove the frame from the socket in the floor tunnel lining, overcoming the elastic…


25. …and lift the cover up the lever.
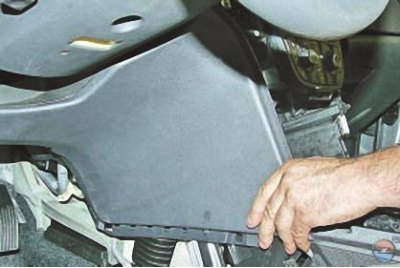
25. …and lift the cover up the lever.


26. Disconnect the upper left part of the floor tunnel lining from it…
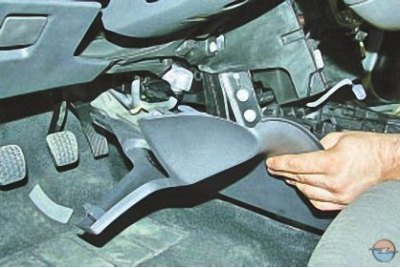


26. Disconnect the upper left part of the floor tunnel lining from it…


27. …and take it off.

28. Remove the right upper part of the floor tunnel lining in the same way.
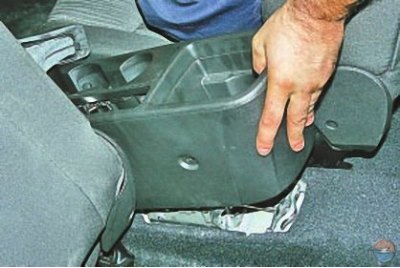
28. Remove the right upper part of the floor tunnel lining in the same way.


29. Lift the floor tunnel lining…
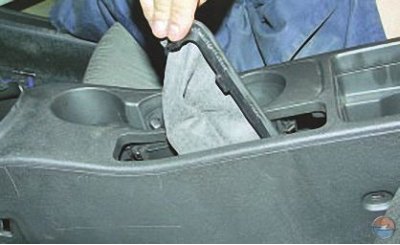
29. Lift the floor tunnel lining…


30. …pass the parking brake lever cover through its hole and remove the trim.
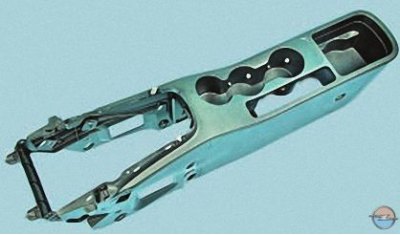
30. …pass the parking brake lever cover through its hole and remove the trim.


31. Install the floor tunnel lining and all removed parts in the reverse order of removal.


This article is available at russian, bulgarian, belarusian, ukrainian, serbian, croatian, romanian, polish, slovak, hungarian
Checking the article: Trifonova Emilia

Share information:

Previous articles
Opel Astra J: Interior
Next articles

Removal and installation the rear seat
Removal and installation the front seat
Removal and installation the interior mirror
Features of the instrument panel design
Removal and installation storage boxes
Replacing handrails in the cabin
Replacing sun visors


See similar ones from other Opel car manuals:
▶ Replacing the rear wheel arch lining (Corsa and Combo… Opel Corsa B (1993-2000)
▶ Replacing the front floor console Opel Insignia A (2008-2017)
▶ Rear brakes (on models manufactured before 1984) — lining Opel Ascona C (1981-1988)
Link to this page in different formats

Visitor comments


No comments yet


How much will 16 + 49 =


Astra J (2009-2015, petrol) 
  • General information
  • Vehicle device
  • User manual
  • Faults en route
  • Maintenance
  • Power unit
  • Engine repair
  • Cooling and lubrication system
  • Engine power system
  • Exhaust system
  • Transmission
  • Clutch
  • Car gearbox
  • Drive shafts
  • Chassis
  • Front suspension
  • Rear suspension
  • Steering
  • Brake system
  • Wheels and tires
  • Body
  • Exterior
  • Interior
  • Doors and windows
  • Body Care
  • Heating and air conditioning
  • Security systems
  • Electrical equipment
  • Equipment and devices
  • Lighting and signaling
  • Power devices
  • Electrical circuits
Astra H (2004-2009) 
  • General information
  • Introduction to the guide
  • Troubleshooting
  • User manual
  • Maintenance
  • Power unit
  • Engine repair
  • Cooling and heating
  • Power and exhaust system
  • Ignition system
  • Launch and charge system
  • Transmission
  • Mechanical gearbox
  • Automatic gearbox
  • Drive shafts
  • Chassis
  • Brake system
  • Car suspension
  • Steering
  • Body
  • Interior
  • Exterior
  • Electrical equipment
  • Equipment and devices
  • Electrical circuits
Astra G (1998-2004) 
  • General information
  • Introduction to manual
  • User manual
  • Maintenance
  • Power unit
  • SOHC gasoline engines
  • DOHC gasoline engines
  • Diesel engines 1.7 and 2.0
  • Engine repair
  • Cooling system
  • Supply system
  • Injection system (gasoline)
  • Injection system (diesel)
  • Exhaust system
  • Charge and launch system
  • Ignition system (gasoline)
  • Preheat system (diesel)
  • Transmission
  • Manual gearbox
  • Automatic gearbox
  • Clutch
  • Drive shafts
  • Chassis
  • Brake system
  • Wheel suspension
  • Steering
  • Body
  • Exterior
  • Interior
  • Doors and windows
  • Ventilation and heating
  • Electrical equipment
  • Equipment and devices
  • Electrical circuits
Astra G (1998-2004, petrol) 
  • General information
  • User manual
  • Car care
  • Maintenance
  • Power unit
  • Single shaft engines
  • Twin shaft engines
  • Engine repair
  • Cooling and heating
  • Fuel and exhaust systems
  • Starting and charging system
  • Ignition system
  • Transmission
  • Clutch
  • Mechanical gearbox
  • Automatic gearbox
  • Drive shafts
  • Chassis
  • Brake system
  • Car suspension
  • Steering
  • Body
  • Interior
  • Exterior
  • Electrical equipment
  • Equipment and devices
  • Wiring diagrams Opel Astra
  • Wiring diagrams Opel Zafira
Astra F (1991-1998, petrol) 
  • General information
  • Maintenance
  • Power unit
  • Engine in car
  • Engine removed
  • Cooling system
  • Heating and ventilation
  • Fuel supply (carburetor)
  • Fuel supply (injector)
  • Emission control
  • Ignition system
  • Transmission
  • Clutch
  • Mechanical gearbox
  • Automatic gearbox
  • Drive shafts
  • Chassis
  • Brake system
  • Car suspension
  • Steering
  • Body
  • Exterior
  • Interior
  • Electrical equipment
  • Equipment and devices
  • Electrical circuits
OpelBook.ru © 2017–2026 · Mobile version · · Sitemap: EN BG BY UA RS HR RO PL SK HU · Feedback · Site search
Astra F, petrol · Astra G, petrol · Astra G · Astra H · Astra J, petrol · Corsa B · Corsa C, petrol · Corsa C · Insignia A · Kadett D · Kadett E · Omega A · Omega B · Omega B2 · Vectra A, petrol · Vectra A · Vectra B, petrol · Vectra B · Vectra C · Zafira A, petrol · Frontera A, petrol · Frontera B · Ascona C · Vivaro A ·
We want your visit to be comfortable 🤝! We use cookies 🍪 to make that happen.