
Steering column adjustment
The steering column must only be adjusted when the vehicle is stationary!
The lever for releasing the steering column position lock is located on the underside of the casing of the latter.
1. Insert the key into the ignition lock and unlock the steering column.
2. Pull down the lock release lever, bring the steering wheel to a comfortable position, then re-lock the column by returning the lever to the up position.

Seat adjustment
Front seats
Seat adjustment must only be carried out when the vehicle is stationary!
1. Section Elements of car security systems contains important information on safety and correct adjustment of the seats, their backs and head restraints - before driving, adjust the seat accordingly.
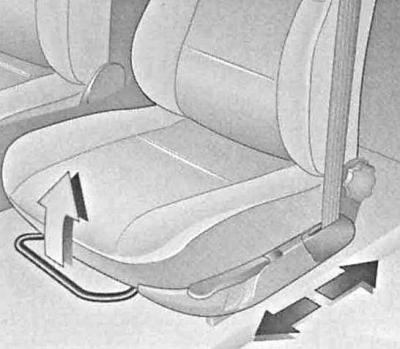
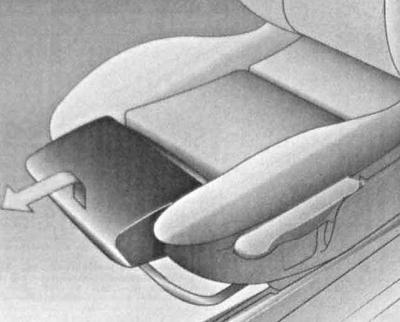
2. To adjust the position of the seat in the longitudinal direction, pull up the latch bracket located under the front edge of the cushion. While holding the brace up, slide the seat assembly forward or backward to a comfortable position, then release the latch. To check if the seat is secure, try moving it back and forth.
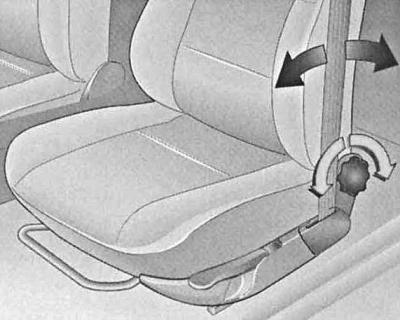
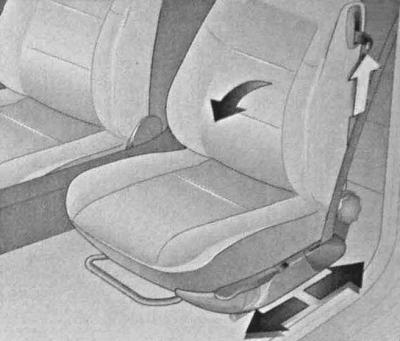
3. Adjustment of the angle of inclination of the seatback is carried out using the rotary handle located on the outer side surface of the backrest.
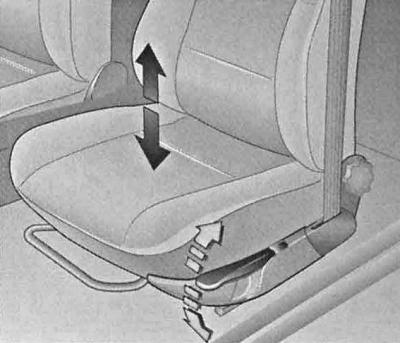
4. The seat cushion height adjustment lever is located at the outer front corner of the cushion. Pulling the lever up raises the cushion, pushing it down lowers it.
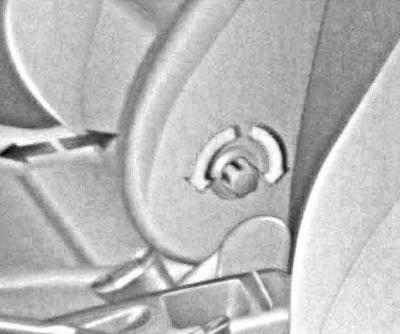
5. On some models, the design of the back of the driver's seat also allows you to adjust the position of its lumbar. Adjustment is carried out using a rotary knob located on the side surface of the seat back, with an internal (Coupe, Convertible and 3-door Hatchback models), or from the outside (Sedan, 5-door Hatchback and Estate models) his side.
6. Some models are equipped with seats with hip rest adjustment - lift the front section of the cushion and move it forward.
7. The lever for releasing the backrest lock, allowing it to be folded, is placed in the upper part of the outer wall of the backrest. To fold the backrest, pull the lever up.
Headrests
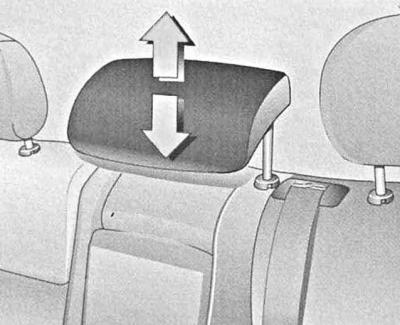
Head restraints help prevent neck and head injuries in a rear-end collision. In order for head restraints to perform their protective functions effectively, they must be properly adjusted. Adjust the height of the head restraints so that the top of the head restraint cushion is flush with the top edge of the ear. If this is not possible for tall passengers, the head restraint should be set to the highest possible position.
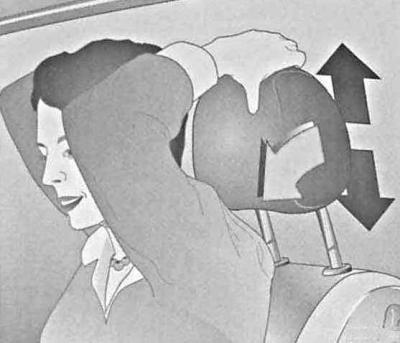
On some modifications of the car, it is possible to adjust the headrests in height. The head restraint is adjusted with both hands at the same time, so do not attempt to adjust the head restraint while the vehicle is moving. To raise the head restraint, tilt it forward to release the lock, then pull it up/down.
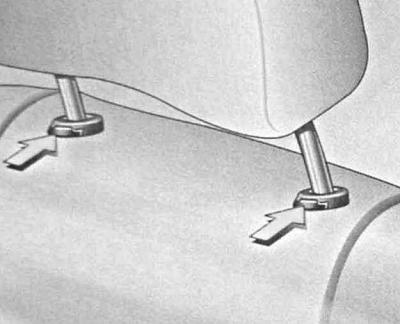
To remove the head restraint for cleaning or replacement, proceed as follows: lift the head restraint up to the stop, then press the release buttons and release the fixing rods from the seat back.
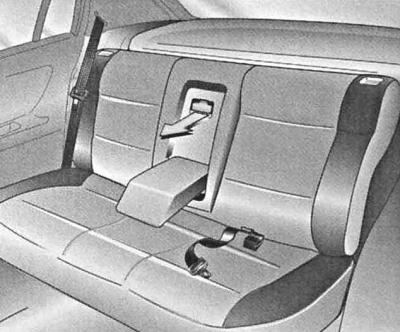
Backseat
Rear center armrest
On some models, the rear seat is equipped with a center armrest. The armrest is located in the central part of the seat and unfolds by removing it from a niche in the backrest and lowering it to a horizontal position.
On Hatchback, Sedan and Coupe models, a cover equipped with a locking handle is placed under the armrest, the lowering of which allows small-sized long items to be carried in the luggage compartment (e.g. skis).
The technology for expanding the volume of the luggage compartment for the transportation of small-sized long items on Convertible models is somewhat different from that described above. Here, the armrest is attached to the back of the seat by means of a strap equipped with a holder. The armrest is moved to a horizontal position by pulling it out by a specially provided loop.
To completely dismantle the armrest, release the holder of the fastening belt, then from the inside of the luggage compartment, pull down the latch handle and lower the cover. When closing the cover, lift it up and lock the latch.
Folding the rear seatbacks
The rear seatback is split in two and can be folded forward to provide direct access to the luggage compartment and allow for the transport of bulky, long items.
Each of the two sections of the rear seatback can be folded forward independently of the other. The release buttons for the backrests are located on the outer sides of their upper edges.
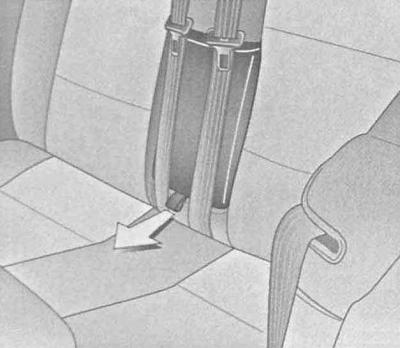
1. To fix the seatback in an upright position, press it firmly against the rear storage shelf until the locks click into place - do not forget to first release the seat belt tape from under the backrest. Make sure that the backrest is securely fixed in a vertical position by pulling it towards you by the upper edge.
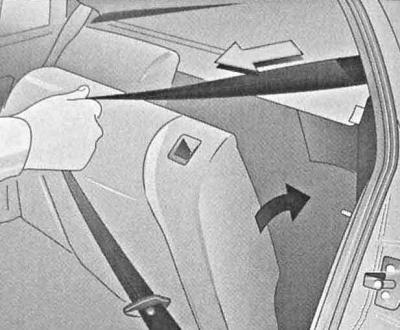
2. Track that seat belts of a back seat at the raised backs borrowed the regular positions.
3. Make sure that all objects located in the luggage compartment and protruding into the passenger compartment are securely fixed. Remember that sudden braking can cause an unsecured load to shift inadvertently.
4. Avoid operating the vehicle with the rear seatbacks folded down and the trunk lid open to prevent the entry of toxic carbon monoxide into the vehicle interior (SO) exhaust gases.
Headrests
On Convertible models, it is not possible to adjust and remove the rear seat head restraints.
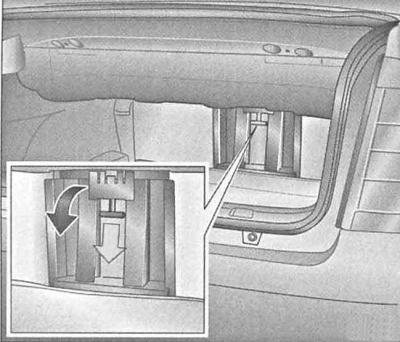
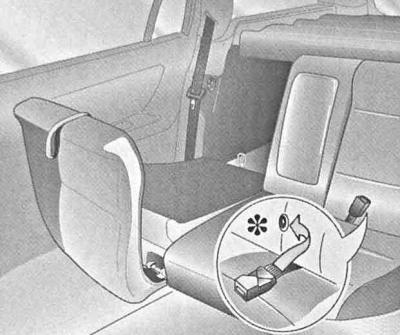
The rear seat is equipped with three head restraints, the left and right of which are of standard design (see above p. Seat adjustment — Head restraints). The middle headrest is compact and has two fixed working positions.
When folding the seats (see below), or to expand the rear view sector (with unoccupied rear center seat) the central head restraint should be lowered to its lowest position, after releasing the spring clips of its rods.
Seat folding
Folding the rear seat is made in order to maximize the expansion of the luggage compartment of the car when transporting bulky or multi-seat cargo.
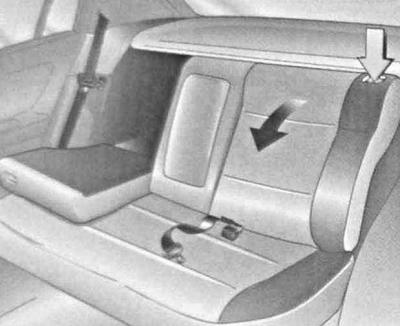
1. Remove the side head restraints, lower the center head restraint to its lowest position.
2. Raise the armrest.
2. Pulling on the special loops, fold the rear seat cushions to the vertical position, if equipped, fasten the seat belt buckles in the special latches on the backs, then release the upper latches and lower the backs.
3. When assembling the seat, do not forget to release the seat belt tapes from under the raised backrests.
Luggage compartment
Removable rear shelf / folding cover (Hatchback and Wagon models)
Removable rear shelves (foldable luggage covers) on Hatchback and Wagon models are not designed to carry heavy objects on them.
To remove the removable rear shelf on Hatchback models, remove the drive slings from the hooks on the tailgate, then release the shelf from the guides and remove it. Installation is in the reverse order.

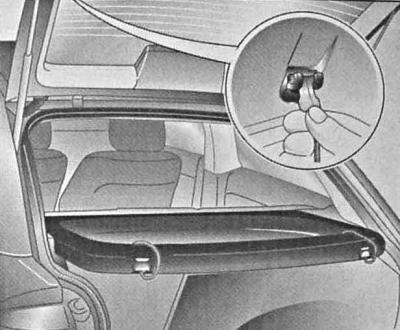
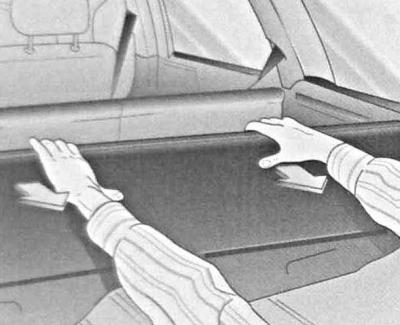
On Wagon models, the luggage compartment is covered from above by a folding casing fixed by two corner holders.
1. To provide access to the luggage compartment, the cover is released from the latches and moved forward (to the back of the rear seat).
2. To remove the casing, fold it, then, when folded, pull it back in the guide grooves and, overcoming the resistance of the springs, release it from the holders.
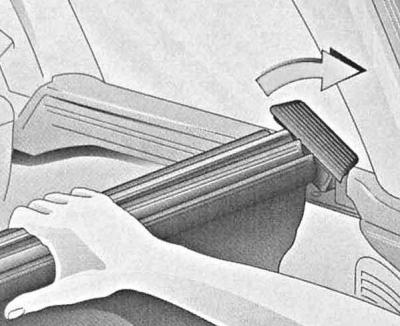
3. Installation of the curtain is carried out in the reverse order.
Glove boxes
In the upholstery of the left wall of the luggage compartment there is a cover equipped with swivel locks, after removing which access to the glove box is opened, designed to store such mandatory items as a first-aid kit for any car, such as a first aid kit and an emergency stop sign.

Under the floor covering of the luggage compartment there is a well for storing the spare wheel, wheelbrace and jack.
Eyelets for attaching a safety net
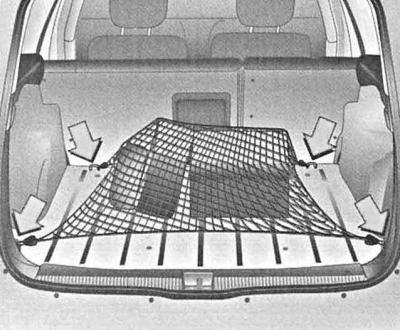
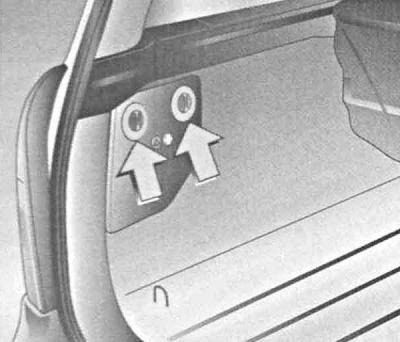
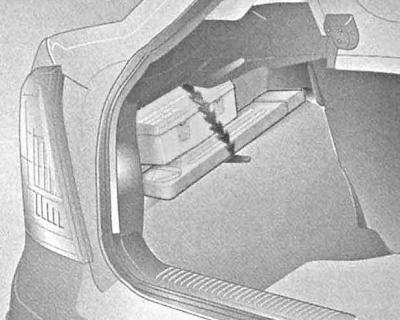
Metal eyelets are provided at the corners of the luggage compartment floor panel, allowing you to fix a safety net designed to secure the cargo being transported.
With the help of the same eyelets on the Universal models, the protective grille is also fixed (see below).
Guardrail (station wagon models)
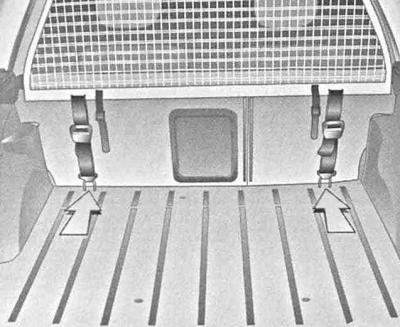
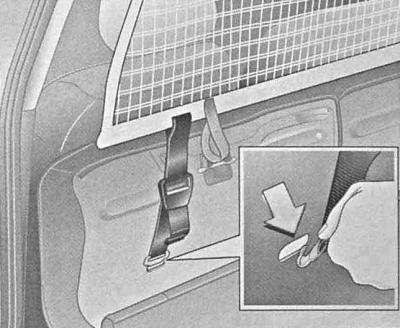
The guard rail can be mounted behind the back of the rear seat, or (with rear seat folded down), behind the backs of the front seat.
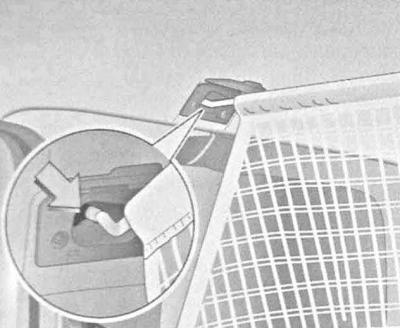
The roof frame also has two pairs of mounting holes into which the grid anchor rods are threaded.
Cigarette lighter/ on-board power outlet
Cigarette lighter
The cigarette lighter is located in the front section of the center console of the car and functions only with two key positions in the ignition lock: «ACC» (I) or «ON» (II), i.e., when the ignition is switched on or power is supplied to auxiliary consumers of electricity. To turn on the cigarette lighter, press the button until it clicks. After heating the spiral, the button will automatically return to its original position with a click.
To avoid the cigarette lighter failure, do not hold its button while heating the coil!
The cigarette lighter socket simultaneously acts as an on-board power outlet, into which any auxiliary car accessories can be connected (compressor, vacuum cleaner, mobile phone charger, etc.). To gain access to the outlet, remove the cigarette lighter from the socket.
The power consumption of devices connected to the onboard power supply should not exceed 50 W at a supply voltage of 12 V.
Ashtrays
Use ashtrays only for their intended purpose! To prevent fire, do not place pieces of paper, candy wrappers, or other combustible materials in ashtrays. Ignition of debris in ashtrays can cause damage to your vehicle.
The front ashtray is integrated into a single assembly with the cigarette lighter. To open the ashtray, press the top edge of the lid.
To empty the ashtray of cigarette butts, open the ashtray cover and, by pulling upwards, remove the receiving container from its seat by pulling it towards you.
The rear ashtray is integrated into the rear of the center console. To open the ashtray, flip up the lid. To empty the ashtray of cigarette butts, open it, then pull up and remove the ashtray from its slot in the console.
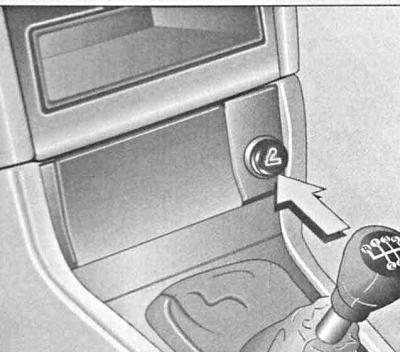
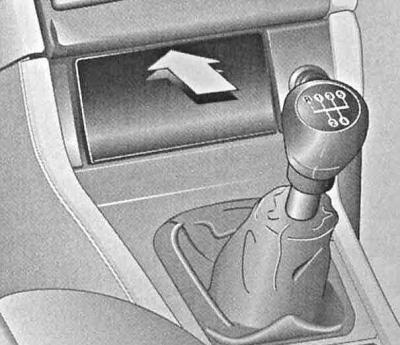
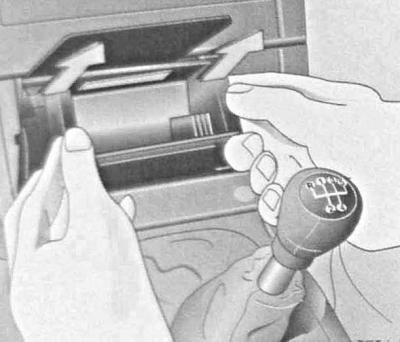
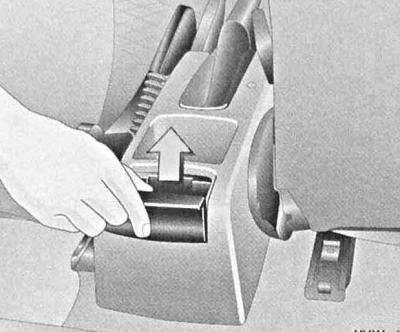
Main storage box
The glove box is located on the right side of the car's instrument panel and is equipped with a hinged lid. Opening the drawer with the ignition on automatically activates its illumination.
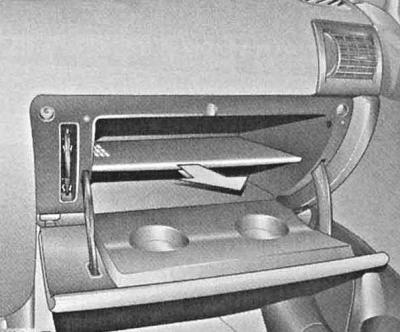
Inside the box there is a removable intermediate shelf, which is placed on the guide rails and fixed by means of the clamps installed on the rear wall of the box. On the left under the hinged lid of the drawer there is a panel with a lock for attaching a fountain pen (see ibid).
On the inside of the lid of the glove box, which is tilted to a horizontal position, two recesses are molded for fixing glasses.
Sun visors
Two sun visors are fixed to the left and right above the windshield in the passenger compartment. The visors can be lowered and turned sideways, providing protection for the eyes of the driver and front passenger from direct sunlight, directed both frontally and laterally.
Interior rear view mirror
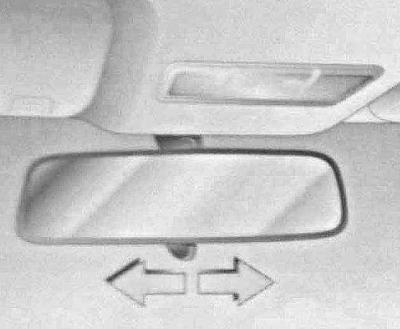
With its base, the internal rear-view mirror is glued to the inner surface of the windshield, from above to its central part. A lever is provided at the bottom of the mirror assembly, which allows switching the reflective surface to night mode, which protects the driver's eyes from being blinded by the light of vehicles moving behind in the same direction.
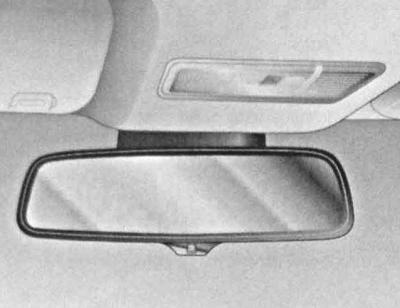
On some models, a mirror with an automatic switch to night mode is installed. Mirror dimming is deactivated when the ignition is switched off, reverse gear is engaged and interior lighting is switched on.
Heated front seats
The controls for turning on and controlling the functioning of the front seat heating are located in the front of the center console under the ashtray assembly and are marked with the
The heating is turned off by moving the regulator to the position «–».
Visitor comments