


Contents: Removal ⬇ Installation ⬇
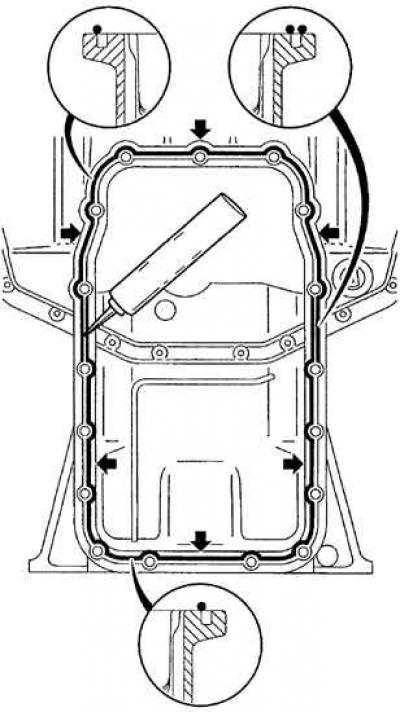
Places to apply sealant
Removal
Pallet
1. Disconnect the negative battery cable.
2. Raise and support the front of the vehicle.
3. Drain the engine oil.
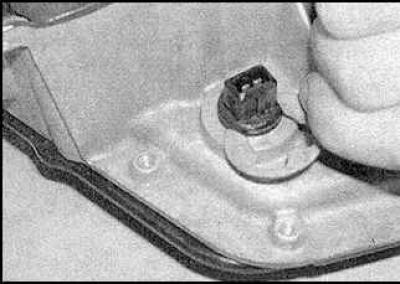
4. Disconnect the wire from the oil level sensor, remove the retaining ring and press the sensor connector inward.
5. Remove the bolts and the oil pan along with the gasket.
6. If necessary, unscrew the bolts and remove the oil intake pipe.
Cast part of the pallet
7. Disconnect the wire from the vehicle level control system sensor and disconnect the rod from the sensor arm pivot joint.
8. Remove the steering link rod.
9. Unscrew the bolts and remove the shock absorbers of the right and left engine mounts. Unscrew the nuts securing the left and right engine mounts to the body.
10. Secure the engine to the lift.
11. Loosen the front suspension crossmember bolts four turns. Secure the rear crossmember with a jack and loosen the rear bolts. Lower the rear crossmember approximately 10 cm.
12. Remove the bolts securing the cast pan to the gearbox and cylinder block. Remove the cast pan.
Installation
Pallet
1. Thoroughly clean the mating surfaces of both parts of the oil pan and the cylinder block.
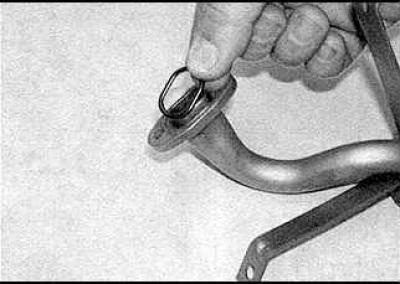
2. Before installing the oil pickup pipe, replace the sealing ring. Install the oil pickup pipe.
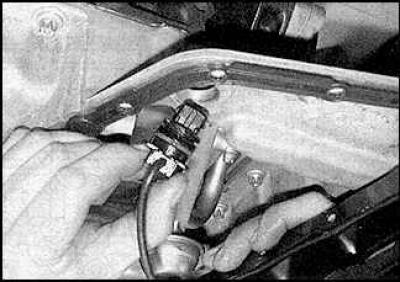
3. Install a new oil pan gasket, insert the oil level sensor connector into the oil pan hole and secure the connector with the retaining ring. Install the oil pan.
4. Insert and tighten the pan bolts.
Cast part of the pallet
5. Clean the mating surfaces of the casting and the cylinder block.
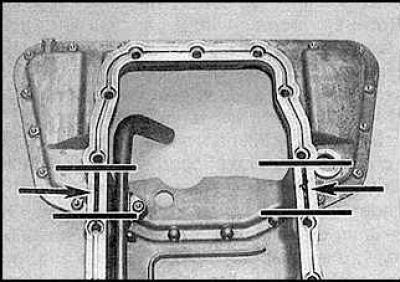
6. Apply sealant N15 03 295 to the areas shown in the figure.
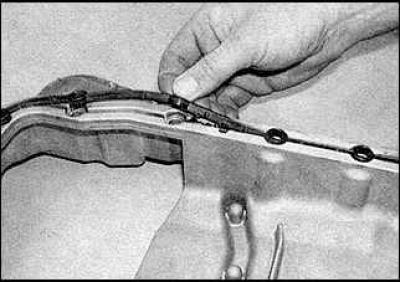
7. Place the gasket in the groove on the cast part of the pan and apply a 3 mm thick layer of sealant to the areas shown in the figure (see figure Places to apply sealant).
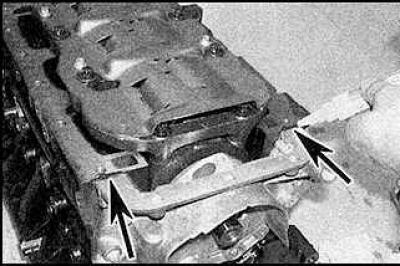
8. Apply sealant N15 10 298 to the joints (indicated by arrows) oil pump and cylinder block.
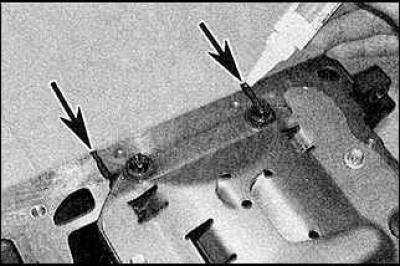
9. Apply sealant to the joints (indicated by arrows) rear main bearing and cylinder block caps.
10. Install the cast pan section, insert and tighten the bolts.
11. Install the remaining parts.
Visitor comments