


Contents: Removal ⬇ Installation ⬇
Removal
1. Move the front seats forward.
2. Unscrew the bolts securing the armrest to the center console (see arrows in the illustration).
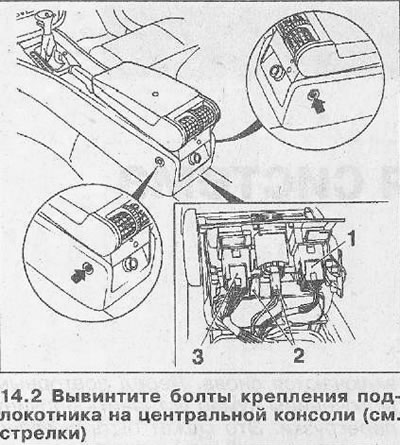
3. Disconnect plug 2 of the cigarette lighter and the rear air distribution flap actuator (see illustration 14.2).
4. Disconnect, if present, plugs 1 and 3 of the seat heater (see illustration 14.2).
5. Lift the armrest on the center console up and out of the guides A (see illustration).
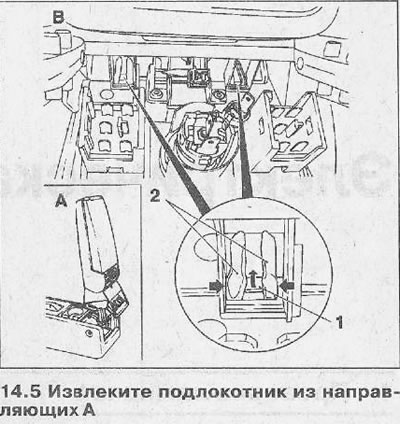
6. Remove the cover from the armrest by pushing up the stoppers 1 and squeezing the leashes 2 (see illustration 14.5).
7. Remove the cup holder and remove the parking brake lever boot.
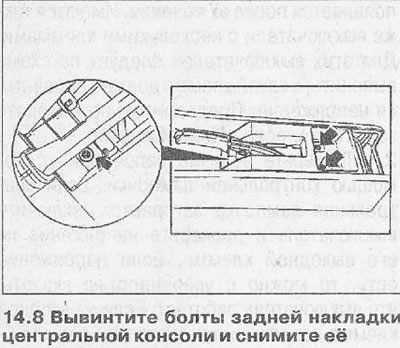
8. Unscrew the bolts of the rear trim of the center console and remove it by pushing it forward (see arrows in the illustration).
9. Cars with automatic transmission. Remove the gearshift lever cover and the mode switch, disconnect the plug and remove the lever boot.
10. Remove the gear shift boot from the console and secure it to the gear shift head.
11. Unscrew the center console mounting bolts (see arrows in the illustration).
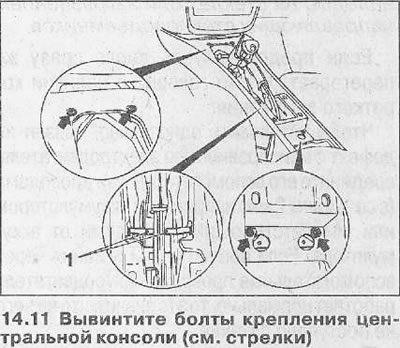
12. Unscrew the crossbar mounting bolts 1 and remove it (see illustration 14.11).
13. Remove the center console by pushing it back.
Installation
The installation of the center console is carried out in the reverse order of removal.
(Original article on the web portal: «opelbook.ru»)
Visitor comments