OpelBook.ru
Cars AvtoVAZ Cars Mitsubishi Cars BMW Cars Mercedes Cars Nissan Cars Toyota Cars Chevrolet
English Русский
Български
Беларускі
Український
Српски
Hrvatski
Română
Polski
Slovenský
Magyar
 |  Sitemap  |  Contacts  |    


Main Astra Corsa Insignia Kadett Omega Vectra Zafira Others Articles
Omega A (1986-1993) Omega B (1993-1999) Omega B2 (1999-2003)
  • Main
  • Omega
  • Omega A
  • Electrical equipment
  • Lighting and appliances
  • Lamps — replacement

Lamps — replacement (Opel Omega A)

            0

Contents: Headlight and side lights ⬇ Front turn signal lamp ⬇ Front fog lights ⬇ Front additional lamps ⬇ Rear combination light (Sedan) ⬇ Rear combination light (Station…⬇ License Plate Light (Sedan) ⬇ License Plate Light (Station Wagon) ⬇ Interior, luggage compartment,…⬇ Reading lamp ⬇ Side turn signal repeater lamp ⬇ Instrument panel lighting ⬇ Heater control panel illumination…⬇ Ashtray illumination ⬇
1. When replacing a lamp, always turn off the corresponding circuit and do not touch the glass bulb of the halogen lamp. If you accidentally touch it, wipe the bulb with pure alcohol.

Headlight and side lights


2. Loosen the spring clip, then turn the cover on the back of the headlight and remove it (photo).
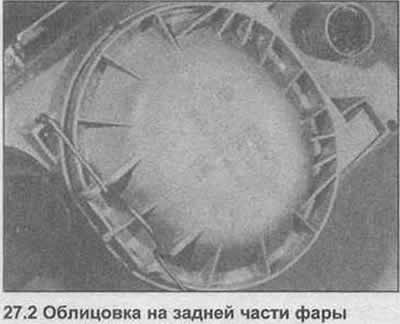
2. Loosen the spring clip, then turn the cover on the back of the headlight and remove it (photo).


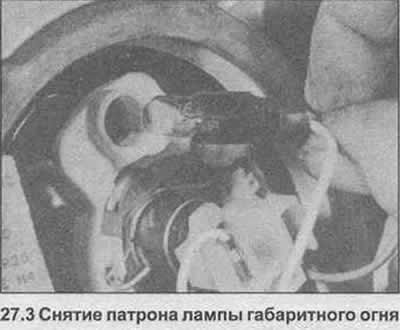
3. Pull out the parking light bulb socket and remove the bulb without turning it (photo).

3. Pull out the parking light bulb socket and remove the bulb without turning it (photo).

4. Release the wire connector from the headlight bulb clamps (photo).
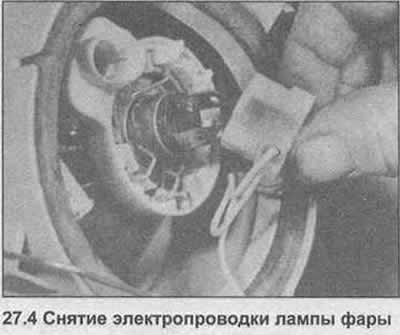


4. Release the wire connector from the headlight bulb clamps (photo).


5. Press the ends of the spring clip together and pull it out (photo).
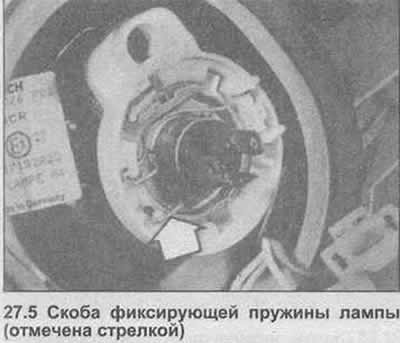
5. Press the ends of the spring clip together and pull it out (photo).


6. Remove the old lamp (photo).
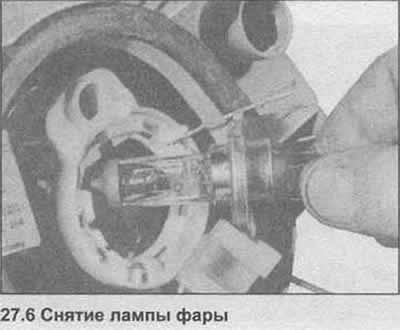
6. Remove the old lamp (photo).


7. Install the new bulb in reverse order, but make sure that the tab on the bulb fits into the recess.

Front turn signal lamp


8. Turn and remove the lamp socket on the back of the lamp.

9. Press and turn the lamp to remove it (photo).
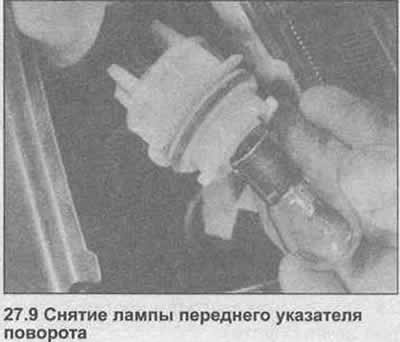


9. Press and turn the lamp to remove it (photo).


10. Install the new bulb and reconnect the socket.

Front fog lights


11. Under the bumper, remove the trim from the rear of the lamp by turning it counterclockwise.

12. Press the spring clip, remove the lamp and disconnect the wiring (photo).
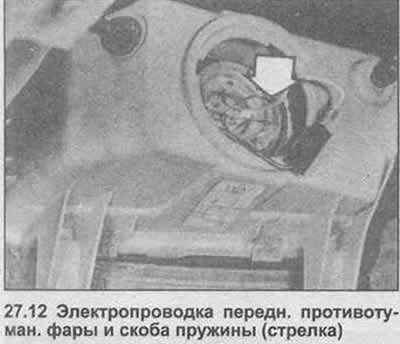
12. Press the spring clip, remove the lamp and disconnect the wiring (photo).


13. Install the new lamp in reverse order, making sure that the locking devices enter the recesses.

Front additional lamps


14. Remove the radiator grille (Section 11).

15. Press the spring clip and remove the trim (photo).
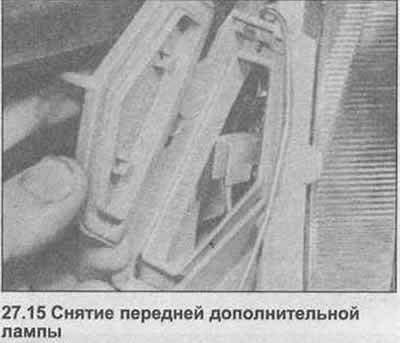
15. Press the spring clip and remove the trim (photo).


16. Remove the wire from the lamp clamp.


17. Release the spring clip and remove the lamp (photo).
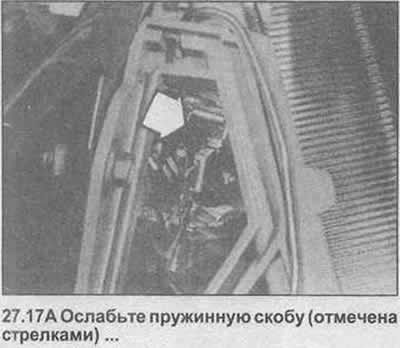
17. Release the spring clip and remove the lamp (photo).
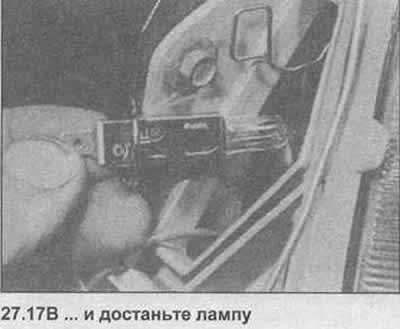

17. Release the spring clip and remove the lamp (photo).


18. Install the new lamp in reverse order.

Rear combination light (Sedan)


19. Unfasten the rear cover of the lamp.

20. Press the two locking devices and remove the lamp holder (photo).
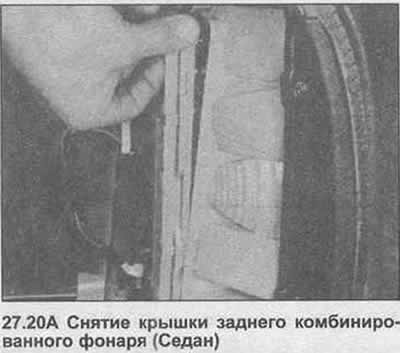
20. Press the two locking devices and remove the lamp holder (photo).
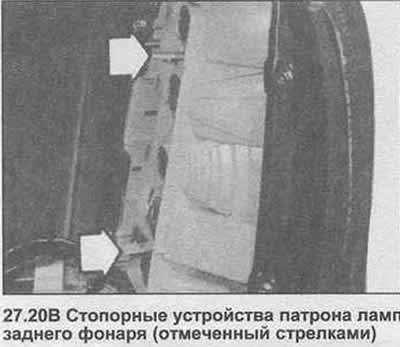

20. Press the two locking devices and remove the lamp holder (photo).


21. Press and rotate the corresponding lamp to remove it (photo).
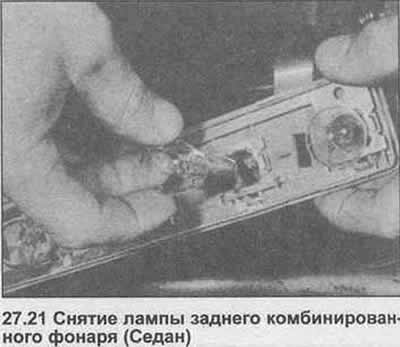


21. Press and rotate the corresponding lamp to remove it (photo).


22. The lamp holder can be removed by disconnecting the wire contact (photo).
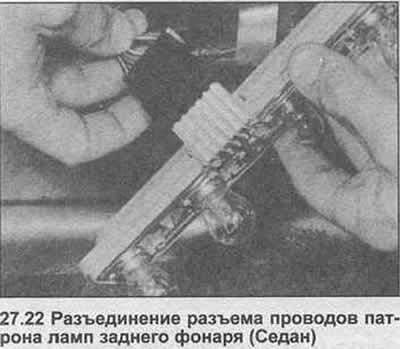
22. The lamp holder can be removed by disconnecting the wire contact (photo).


23. Install the new lamp in reverse order.

Rear combination light (Station wagon)


24. Turn the latch and open the trim cover.

25. Release the ledge and remove the lamp socket (photo).
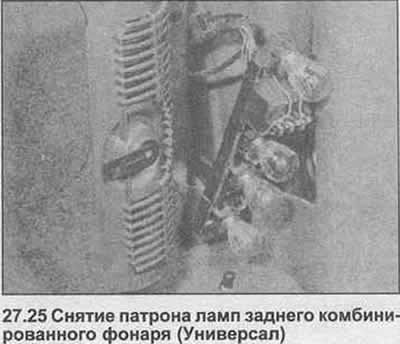
25. Release the ledge and remove the lamp socket (photo).


26. Press and turn the corresponding lamp to turn it on.


27. Install the new lamp in reverse order.

License Plate Light (Sedan)


28. Open the trunk lid and remove the backlight cover using a screwdriver (photo).
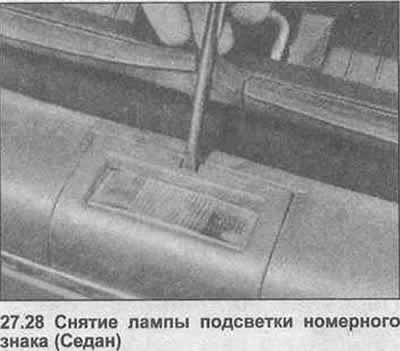
28. Open the trunk lid and remove the backlight cover using a screwdriver (photo).


29. Remove the lamp, then press the locking devices and take out the lens (photo).
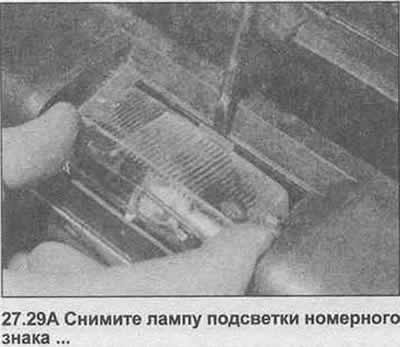
29. Remove the lamp, then press the locking devices and take out the lens (photo).
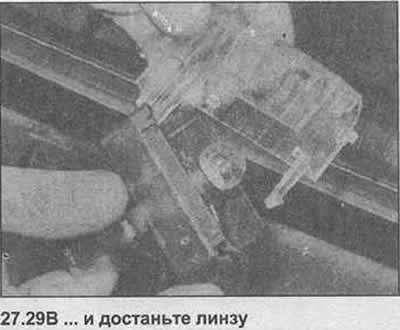

29. Remove the lamp, then press the locking devices and take out the lens (photo).


30. Press and twist the lamp to remove it.

License Plate Light (Station Wagon)


31. Open the back door. Remove the screws and take out the lens.


32. Pull the lamp out of the clamps.

33. Install the new bulb in reverse order.

Interior, luggage compartment, engine compartment and glove compartment lighting lamps


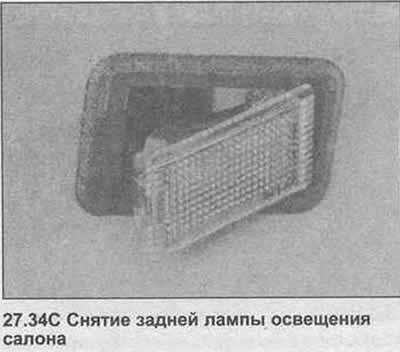
34. Using a small screwdriver, remove the lampshade and lens (photo).
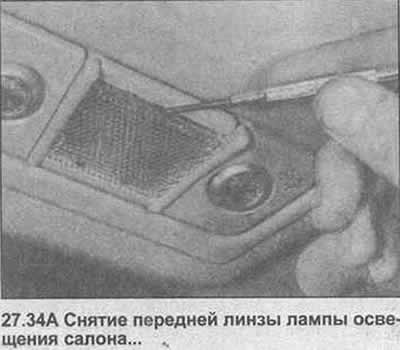
34. Using a small screwdriver, remove the lampshade and lens (photo).


[Material was taken from a resource: www.OpelBook.ru]
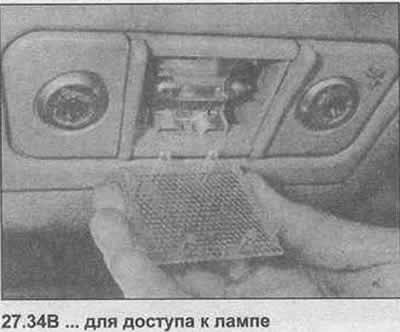
34. Using a small screwdriver, remove the lampshade and lens (photo).


34. Using a small screwdriver, remove the lampshade and lens (photo).


35. Pull the lamp out of the clamps.


36. Install the new lamp in reverse order.

Reading lamp


37. Using a small screwdriver, remove the entire lamp with lens and socket from the ceiling.

38. Pull out the lamp socket and remove the lamp (photo).
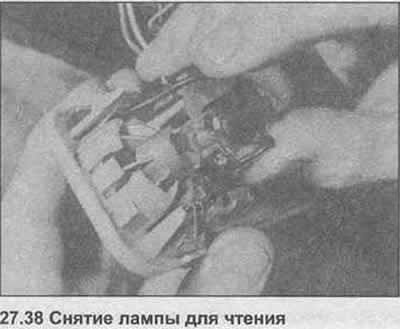
38. Pull out the lamp socket and remove the lamp (photo).


39. Install the new lamp in reverse order.

Side turn signal repeater lamp


40. Rotate and remove the lens (photo).
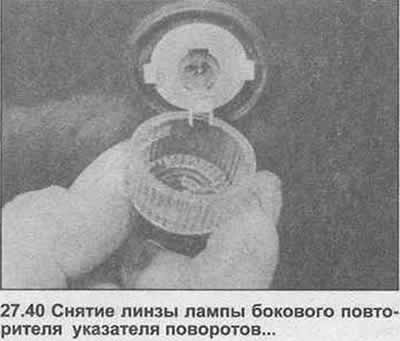
40. Rotate and remove the lens (photo).


41. Remove the lamp (photo).
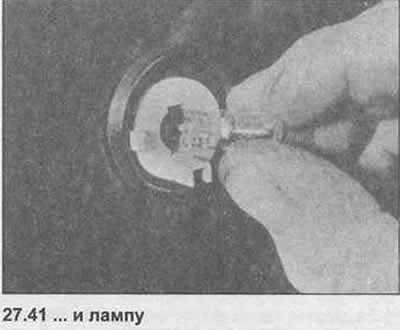
41. Remove the lamp (photo).


Instrument panel lighting


42. Remove the instrument panel (Chapter 24).

43. Turn and remove the lamp holder.
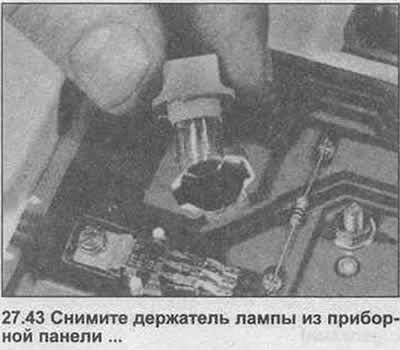
43. Turn and remove the lamp holder.


44. Remove the lamp (photo).
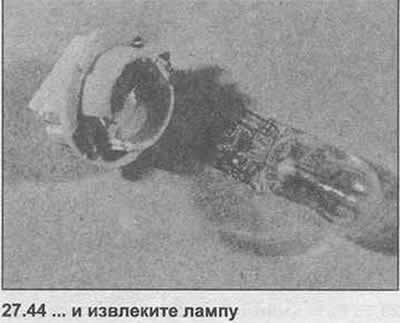
44. Remove the lamp (photo).


Heater control panel illumination lamp


45. Remove the heater panel as described in Section 11, Chapter 32.

46. Pull the bulb out of the bulb socket (photo).
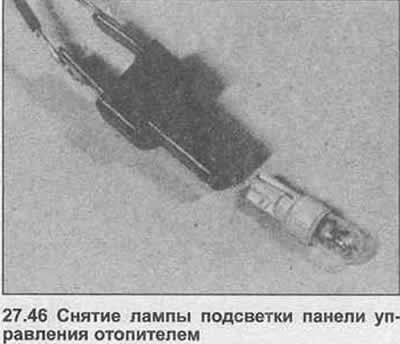
46. Pull the bulb out of the bulb socket (photo).


Ashtray illumination


47. Remove the front panel as described in Section 11.

48. Pull out the lamp holder and remove the lamp.


This article is available at russian, bulgarian, belarusian, ukrainian, serbian, croatian, romanian, polish, slovak, hungarian
Checking the article: Zinoviev Kirill

Share information:

Previous articles
Opel Omega A: Lighting and appliances
Next articles

Sound signal — removal and installation
Speedometer Drive Cable — Replacement
Instrument panel — removal and installation
Ignition switch — removal and installation
Heater Control Switch — Removal and Installation
Cigarette lighter illumination — removal and installation
Front Turn Signal Lamp — Removal and Installation
Headlight — removal and installation
Headlight — beam adjustment
Windscreen wiper blades and arms — removal and installation
Windscreen wiper motor and linkage — removal and installation
Windshield Washer Pump — Removal and Installation


See similar ones from other Opel car manuals:
▶ Checking lamps and fuses Opel Astra G (1998-2004, petrol)
▶ Replacement of incandescent lamps for outdoor lighting… Opel Corsa B (1993-2000)
▶ Replacing lamps Opel Insignia A (2008-2017)
▶ Removal and installation interior lighting lamps Opel Kadett D (1979-1984)
▶ Control lamps in the instrument cluster Opel Vectra A (1988-1995, petrol)
Link to this page in different formats

Visitor comments


No comments yet


How much will 38 + 45 =


Omega B2 (1999-2003) 
  • General information
  • User manual
  • Maintenance
  • Troubleshooting
  • Power unit
  • Petrol 4-cylinder
  • Petrol 6-cylinder
  • Engine overhaul
  • Diesel engines 2.0 l
  • Diesel engines 2.5 l
  • Cooling and heating
  • Injection system (gasoline)
  • Fuel system (diesel)
  • Fuel system
  • Exhaust system
  • Ignition system
  • Transmission
  • Clutch
  • Mechanical gearbox
  • Automatic gearbox
  • Main gear and shafts
  • Chassis
  • Brake system
  • Car suspension
  • Steering
  • Body
  • Body elements
  • Electrical equipment
  • Equipment and devices
  • Electrical circuits
Omega B (1993-1999) 
  • General information
  • User manual
  • Tips for the car owner
  • Maintenance (gasoline)
  • Maintenance (diesel)
  • Power unit
  • Petrol engine SOHC 2.0 l
  • Petrol engine DOHC 2.0 l
  • Petrol engines 2.5 and 3.0 l
  • Repair of gasoline engines
  • Diesel engine 2.0 l
  • Diesel engine repair 2.0 l
  • Diesel engine 2.5 l
  • Cooling and heating
  • Power system (petrol)
  • Emission reduction
  • Fuel system (diesel 2.0 l)
  • Fuel system (diesel 2.5 l)
  • Launch system
  • Ignition system
  • Transmission
  • Clutch
  • Mechanical gearbox
  • Automatic gearbox
  • Drive shafts
  • Chassis
  • Brake system
  • Wheel suspension
  • Steering
  • Body
  • Exterior
  • Interior
  • Doors and windows
  • Electrical equipment
  • Equipment and devices
  • Wiring diagrams (early)
  • Wiring diagrams (late)
Omega A (1986-1993) 
  • General information
  • User manual
  • Maintenance
  • Changes and additions
  • Troubleshooting
  • Power unit
  • Gasoline engines
  • Diesel engines
  • Cooling system
  • Fuel system (gasoline)
  • Fuel system (diesel)
  • Ignition system
  • Transmission
  • Clutch
  • Mechanical gearbox
  • Automatic gearbox
  • Cardan shaft
  • Drive shafts
  • Chassis
  • Brake system
  • Car suspension
  • Steering
  • Body
  • Exterior
  • Interior
  • Electrical equipment
  • Power devices
  • Lighting and appliances
  • Electrical circuits
OpelBook.ru © 2017–2026 · Mobile version · · Sitemap: EN BG BY UA RS HR RO PL SK HU · Feedback · Site search
Astra F, petrol · Astra G, petrol · Astra G · Astra H · Astra J, petrol · Corsa B · Corsa C, petrol · Corsa C · Insignia A · Kadett D · Kadett E · Omega A · Omega B · Omega B2 · Vectra A, petrol · Vectra A · Vectra B, petrol · Vectra B · Vectra C · Zafira A, petrol · Frontera A, petrol · Frontera B · Ascona C · Vivaro A ·
We want your visit to be comfortable 🤝! We use cookies 🍪 to make that happen.