OpelBook.ru
Cars AvtoVAZ Cars Mitsubishi Cars BMW Cars Mercedes Cars Nissan Cars Toyota Cars Chevrolet
English Русский
Български
Беларускі
Український
Српски
Hrvatski
Română
Polski
Slovenský
Magyar
 |  Sitemap  |  Contacts  |    


Main Astra Corsa Insignia Kadett Omega Vectra Zafira Others Articles
Omega A (1986-1993) Omega B (1993-1999) Omega B2 (1999-2003)
  • Main
  • Omega
  • Omega B
  • Power unit
  • Fuel system (diesel 2.0 l)
  • Air filter and air intake ducts

Air filter and air intake ducts (Opel Omega B)

            0

Contents: Removal ⬇ Installation ⬇

Removal


Removal


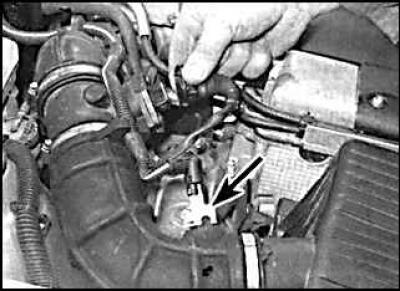
1. Remove the ground cable from the battery and disconnect the electrical connectors from the air flow meter and sensor (indicated by the arrow) incoming air temperature.
1. Remove the ground cable from the battery and disconnect the electrical connectors from the air…


2. Disconnect the crankcase ventilation hose from the intake duct, loosen the clamps and remove the air duct together with the air flow meter.

3. Remove the air filter cover and take out the filter element, noting its location. Unscrew the nuts and remove the air filter housing.

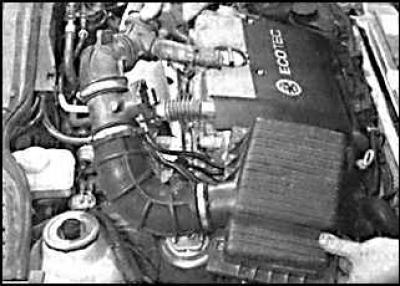
4. On low pressure turbo engines, to remove the air intake tubes that connect the turbocharger to the intake manifold, remove the screws and remove the plastic cover from the top of the engine.


4. On low pressure turbo engines, to remove the air intake tubes that connect the turbocharger to…


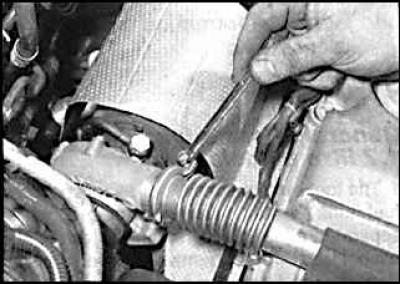
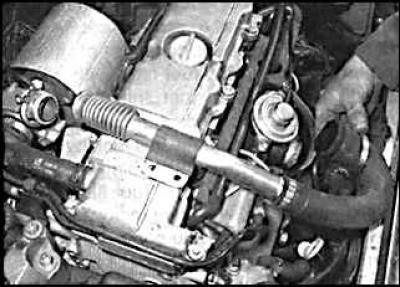
5. Loosen the clamp securing the air supply pipe to the manifold.
5. Loosen the clamp securing the air supply pipe to the manifold.


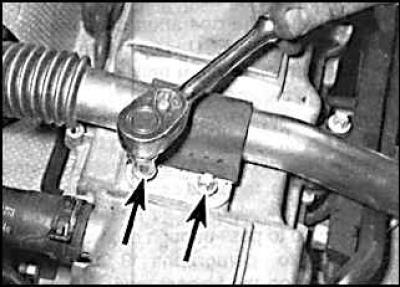
6. Unscrew the bolts (indicated by arrows), securing the air supply pipe to the head cover, then disconnect the air supply pipe from the turbocharger.
6. Unscrew the bolts (indicated by arrows), securing the air supply pipe to the head cover, then…


7. Remove the air supply pipe.

7. Remove the air supply pipe.


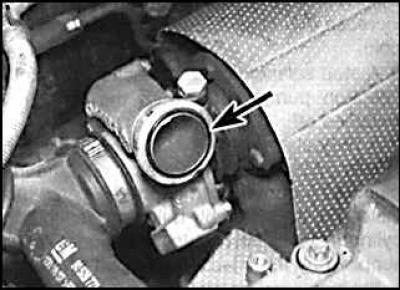
8. Remove the sealing ring (indicated by the arrow), which is installed between the pipe and the turbocharger.


9. On high pressure turbo engines, the pipes connecting the heat exchanger to the manifold and the turbocharger pipes can be removed after loosening the clamps. To remove the metal pipe, loosen the clamp and pull the pipe off the turbocharger.

10. Remove the sealing ring that is installed between the pipe and the turbocharger.

Installation


Installation is carried out in the reverse order of removal, and it is necessary to replace the sealing ring on the turbocharger.


This article is available at russian, bulgarian, belarusian, ukrainian, serbian, croatian, romanian, polish, slovak, hungarian
Checking the article: Fedorova Varvara

Share information:

Previous articles
Opel Omega B: Fuel system (diesel 2.0 l)
Next articles

Technical specifications
General information and precautions
Accelerator pedal — removal and installation
Filling and bleeding the fuel system
Fuel level sensor — removal and installation
Fuel tank — removal and installation
Checking and adjusting maximum speed
Electrical components of the injection system


See similar ones from other Opel car manuals:
▶ Air filter and intake ducts — removal and installation Opel Vectra B (1995-2002)
▶ Fuel filter — replacement Opel Astra F (1991-1998, petrol)
▶ Changing engine oil and oil filter Opel Corsa B (1993-2000)
▶ Oil filter replacement — 1.6 and 1.8L petrol engines Opel Insignia A (2008-2017)
▶ Oil filter Opel Kadett E (1984-1995)
Link to this page in different formats

Visitor comments


No comments yet


How much will 33 + 27 =


Omega B2 (1999-2003) 
  • General information
  • User manual
  • Maintenance
  • Troubleshooting
  • Power unit
  • Petrol 4-cylinder
  • Petrol 6-cylinder
  • Engine overhaul
  • Diesel engines 2.0 l
  • Diesel engines 2.5 l
  • Cooling and heating
  • Injection system (gasoline)
  • Fuel system (diesel)
  • Fuel system
  • Exhaust system
  • Ignition system
  • Transmission
  • Clutch
  • Mechanical gearbox
  • Automatic gearbox
  • Main gear and shafts
  • Chassis
  • Brake system
  • Car suspension
  • Steering
  • Body
  • Body elements
  • Electrical equipment
  • Equipment and devices
  • Electrical circuits
Omega B (1993-1999) 
  • General information
  • User manual
  • Tips for the car owner
  • Maintenance (gasoline)
  • Maintenance (diesel)
  • Power unit
  • Petrol engine SOHC 2.0 l
  • Petrol engine DOHC 2.0 l
  • Petrol engines 2.5 and 3.0 l
  • Repair of gasoline engines
  • Diesel engine 2.0 l
  • Diesel engine repair 2.0 l
  • Diesel engine 2.5 l
  • Cooling and heating
  • Power system (petrol)
  • Emission reduction
  • Fuel system (diesel 2.0 l)
  • Fuel system (diesel 2.5 l)
  • Launch system
  • Ignition system
  • Transmission
  • Clutch
  • Mechanical gearbox
  • Automatic gearbox
  • Drive shafts
  • Chassis
  • Brake system
  • Wheel suspension
  • Steering
  • Body
  • Exterior
  • Interior
  • Doors and windows
  • Electrical equipment
  • Equipment and devices
  • Wiring diagrams (early)
  • Wiring diagrams (late)
Omega A (1986-1993) 
  • General information
  • User manual
  • Maintenance
  • Changes and additions
  • Troubleshooting
  • Power unit
  • Gasoline engines
  • Diesel engines
  • Cooling system
  • Fuel system (gasoline)
  • Fuel system (diesel)
  • Ignition system
  • Transmission
  • Clutch
  • Mechanical gearbox
  • Automatic gearbox
  • Cardan shaft
  • Drive shafts
  • Chassis
  • Brake system
  • Car suspension
  • Steering
  • Body
  • Exterior
  • Interior
  • Electrical equipment
  • Power devices
  • Lighting and appliances
  • Electrical circuits
OpelBook.ru © 2017–2026 · Mobile version · · Sitemap: EN BG BY UA RS HR RO PL SK HU · Feedback · Site search
Astra F, petrol · Astra G, petrol · Astra G · Astra H · Astra J, petrol · Corsa B · Corsa C, petrol · Corsa C · Insignia A · Kadett D · Kadett E · Omega A · Omega B · Omega B2 · Vectra A, petrol · Vectra A · Vectra B, petrol · Vectra B · Vectra C · Zafira A, petrol · Frontera A, petrol · Frontera B · Ascona C · Vivaro A ·
We want your visit to be comfortable 🤝! We use cookies 🍪 to make that happen.