
OpelBook.ru
Cars AvtoVAZ Cars Mitsubishi Cars BMW Cars Mercedes Cars Nissan Cars Toyota Cars Chevrolet
English Русский
Български
Беларускі
Український
Српски
Hrvatski
Română
Polski
Slovenský
Magyar
 |  Sitemap  |  Contacts  |    


Main Astra Corsa Insignia Kadett Omega Vectra Zafira Others Articles
Omega A (1986-1993) Omega B (1993-1999) Omega B2 (1999-2003)
  • Main
  • Omega
  • Omega B
  • Body
  • Doors and windows
  • Window lifters and glass — removal and installation

Window lifters and glass — removal and installation (Opel Omega B)

            0

Contents: Window lifter ⬇ Front door drop-down glass ⬇ Tailgate drop-down glass ⬇ Fixed rear door glass ⬇

Window lifter


Removal


1. Lower the glass about 3/4 of the way.

2. Remove the interior door trim panel and protective film.

3. Remove the inside door handle.

4. Remove the impact sensor and mounting bracket.
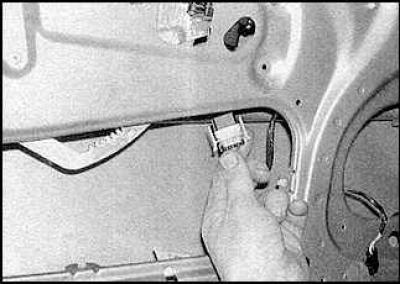
4. Remove the impact sensor and mounting bracket.


5. Disconnect the window regulator connection connector.
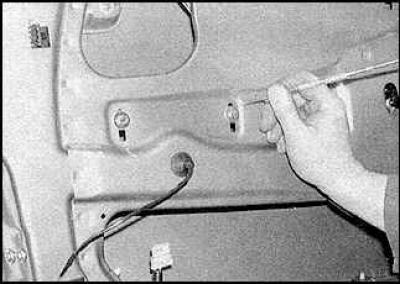
5. Disconnect the window regulator connection connector.


6. Mark the position of the guide mounting bolts and remove the bolts.
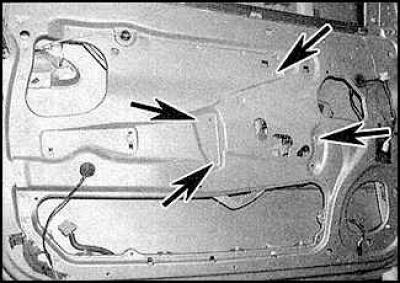
6. Mark the position of the guide mounting bolts and remove the bolts.


7. While holding the glass, drill out the mounting rivets (indicated by arrows) window lifter.
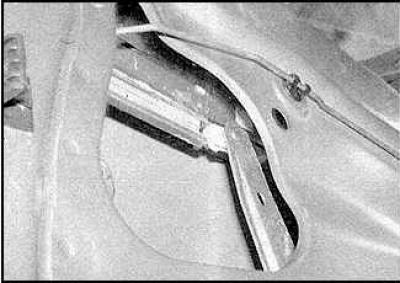


7. While holding the glass, drill out the mounting rivets (indicated by arrows) window lifter.


8. Remove the window lift arms.
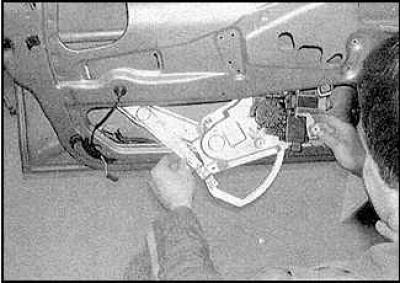
8. Remove the window lift arms.


9. Remove the window lift mechanism.

Installation


1. Installation is carried out in the reverse order of removal.
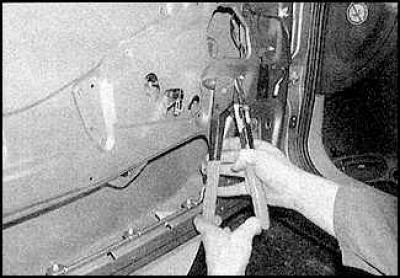
1. Installation is carried out in the reverse order of removal.


2. Secure the window regulator using new glass.

3. On models with power windows, after connecting the battery, raise the window fully and hold the control button down for 5 seconds.


Front door drop-down glass


Removal


1. Remove the window lift mechanism.

2. Remove the outside rearview mirror.

3. Remove the speaker.
3. Remove the speaker.


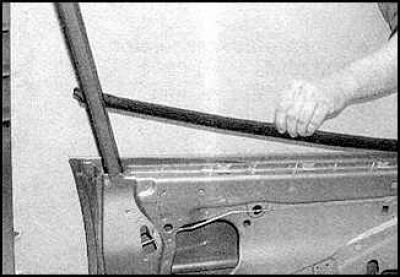
4. Remove the seals from the bottom edge of the window.
4. Remove the seals from the bottom edge of the window.


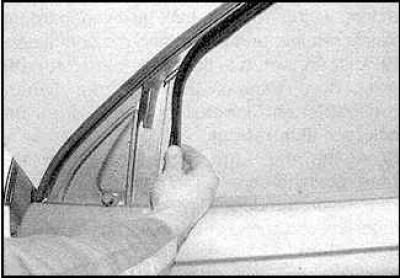
5. Remove the seal from the front edge of the window.
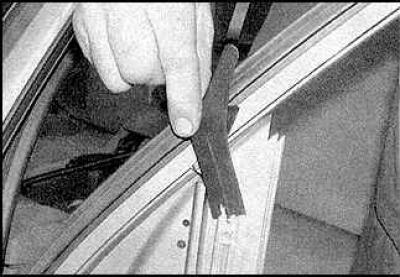
5. Remove the seal from the front edge of the window.


6. Remove the seal from the glass guide.
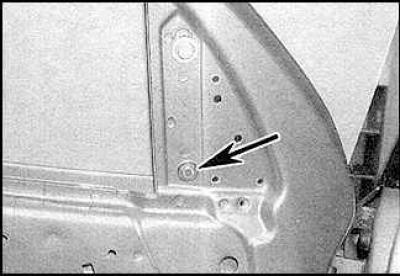
6. Remove the seal from the glass guide.


7. Unscrew the upper mounting bolt (indicated by the arrow) glass guide.


Material was taken from a resource www.OPELBOOK.ru
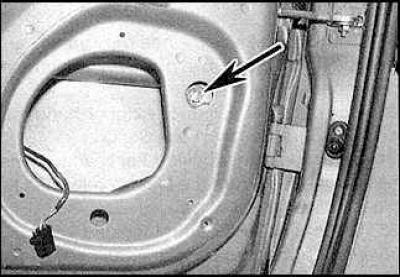
7. Unscrew the upper mounting bolt (indicated by the arrow) glass guide.

8. Unscrew the lower mounting bolt (indicated by the arrow) glass guide.

8. Unscrew the lower mounting bolt (indicated by the arrow) glass guide.


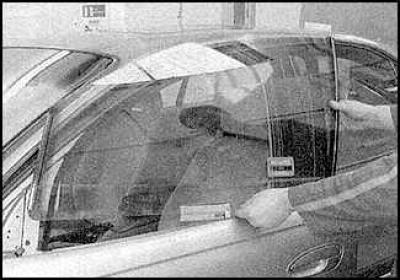
9. Tilt the glass forward and remove it from the door.

Installation


1. Installation is carried out in the reverse order of removal.
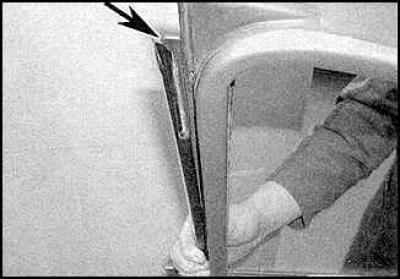
1. Installation is carried out in the reverse order of removal.


2. Check that the channel (indicated by the arrow) on the rear edge of the glass hit the rear edge of the door.
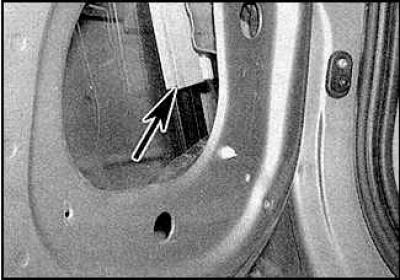


2. Check that the channel (indicated by the arrow) on the rear edge of the glass hit the rear edge…


3. Make sure the front edge of the glass fits into the guide (indicated by the arrow).
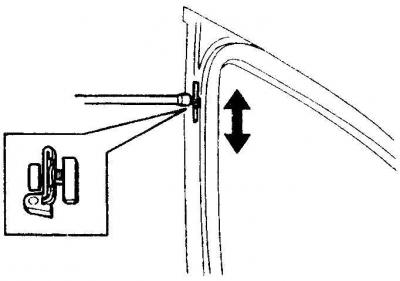
3. Make sure the front edge of the glass fits into the guide (indicated by the arrow).


4. A locking bolt is used to adjust the maximum glass lifting height.

Tailgate drop-down glass


Removal


1. Remove the window regulator.
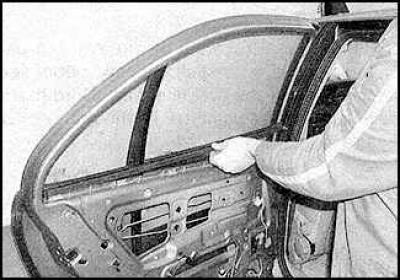
1. Remove the window regulator.


2. Remove the seal from the inside bottom edge of the window.
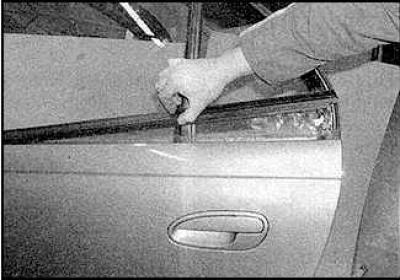
2. Remove the seal from the inside bottom edge of the window.


3. Remove the seal from the outer bottom edge of the window.
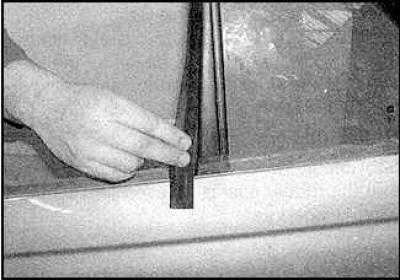


3. Remove the seal from the outer bottom edge of the window.


4. Remove the seal from the rear edge of the window.
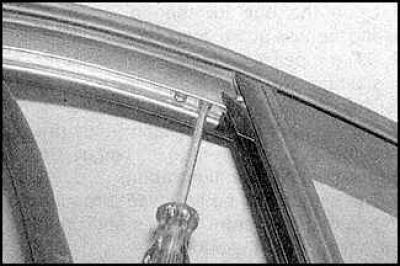
4. Remove the seal from the rear edge of the window.


5. Unscrew the top mounting bolt.
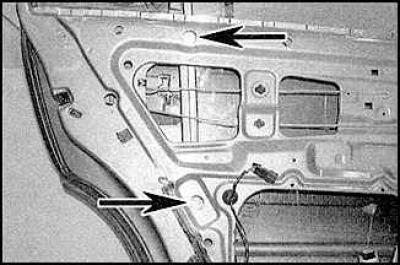
5. Unscrew the top mounting bolt.


6. Remove the center and bottom mounting bolts (indicated by arrows).

7. Remove the glass guide.
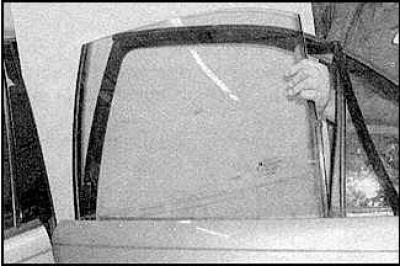
7. Remove the glass guide.


8. Lift the glass and remove it from the door.


Installation


1. Installation is carried out in the reverse order of removal.
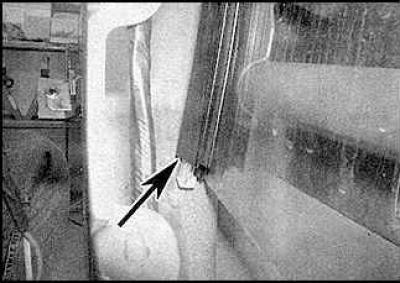
1. Installation is carried out in the reverse order of removal.


2. Check that the rear edge of the glass fits into the groove of the guide (indicated by the arrow).
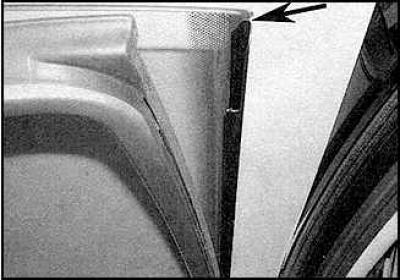
2. Check that the rear edge of the glass fits into the groove of the guide (indicated by the arrow).


3. Check that the guide (indicated by the arrow) on the front edge of the glass hit the front edge of the door.

4. To ensure maximum glass lifting height, locking bolts are used.
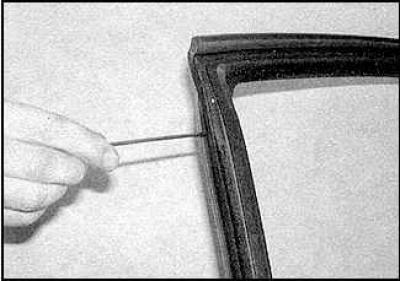
4. To ensure maximum glass lifting height, locking bolts are used.


5. Remove the front locking bolt.
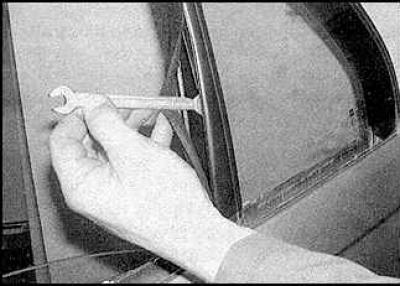


5. Remove the front locking bolt.


6. Remove the rear locking bolt.

Fixed rear door glass


Removal


1. Remove the rear door glass.
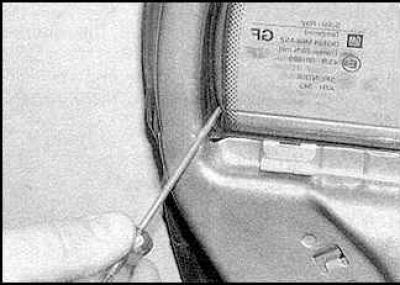
1. Remove the rear door glass.


2. Remove the rubber seal.
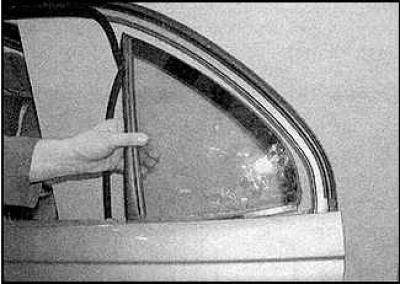
2. Remove the rubber seal.


3. Remove the glass.

Installation


Installation is carried out in the reverse order of removal.


This article is available at russian, bulgarian, belarusian, ukrainian, serbian, croatian, romanian, polish, slovak, hungarian
Checking the article: Fedorova Varvara

Share information:

Previous articles
Opel Omega B: Doors and windows
Next articles

Door handles and locks
Interior door trim panel
Doors — removal and installation
Rear side window (station wagon models)
Fuel tank flap lock and lock cable
Trunk lid and support pillars
Trunk lid lock elements
Rear door and support pillars
Rear door lock components


See similar ones from other Opel car manuals:
▶ Window glass doors and window lifters — removal and… Opel Astra F (1991-1998, petrol)
▶ Replacing the front door window glass guide Opel Corsa C (2000-2006, petrol)
▶ Removal and installation of window lifters Opel Vectra A (1988-1995)
▶ Rear window or rear door glass — removal and installation Opel Ascona C (1981-1988)
▶ Rear window wiper/washer Opel Insignia A (2008-2017)
Link to this page in different formats

Visitor comments


No comments yet


How much will 25 + 15 =


Omega B2 (1999-2003) 
  • General information
  • User manual
  • Maintenance
  • Troubleshooting
  • Power unit
  • Petrol 4-cylinder
  • Petrol 6-cylinder
  • Engine overhaul
  • Diesel engines 2.0 l
  • Diesel engines 2.5 l
  • Cooling and heating
  • Injection system (gasoline)
  • Fuel system (diesel)
  • Fuel system
  • Exhaust system
  • Ignition system
  • Transmission
  • Clutch
  • Mechanical gearbox
  • Automatic gearbox
  • Main gear and shafts
  • Chassis
  • Brake system
  • Car suspension
  • Steering
  • Body
  • Body elements
  • Electrical equipment
  • Equipment and devices
  • Electrical circuits
Omega B (1993-1999) 
  • General information
  • User manual
  • Tips for the car owner
  • Maintenance (gasoline)
  • Maintenance (diesel)
  • Power unit
  • Petrol engine SOHC 2.0 l
  • Petrol engine DOHC 2.0 l
  • Petrol engines 2.5 and 3.0 l
  • Repair of gasoline engines
  • Diesel engine 2.0 l
  • Diesel engine repair 2.0 l
  • Diesel engine 2.5 l
  • Cooling and heating
  • Power system (petrol)
  • Emission reduction
  • Fuel system (diesel 2.0 l)
  • Fuel system (diesel 2.5 l)
  • Launch system
  • Ignition system
  • Transmission
  • Clutch
  • Mechanical gearbox
  • Automatic gearbox
  • Drive shafts
  • Chassis
  • Brake system
  • Wheel suspension
  • Steering
  • Body
  • Exterior
  • Interior
  • Doors and windows
  • Electrical equipment
  • Equipment and devices
  • Wiring diagrams (early)
  • Wiring diagrams (late)
Omega A (1986-1993) 
  • General information
  • User manual
  • Maintenance
  • Changes and additions
  • Troubleshooting
  • Power unit
  • Gasoline engines
  • Diesel engines
  • Cooling system
  • Fuel system (gasoline)
  • Fuel system (diesel)
  • Ignition system
  • Transmission
  • Clutch
  • Mechanical gearbox
  • Automatic gearbox
  • Cardan shaft
  • Drive shafts
  • Chassis
  • Brake system
  • Car suspension
  • Steering
  • Body
  • Exterior
  • Interior
  • Electrical equipment
  • Power devices
  • Lighting and appliances
  • Electrical circuits
OpelBook.ru © 2017–2026 · Mobile version · · Sitemap: EN BG BY UA RS HR RO PL SK HU · Feedback · Site search
Astra F, petrol · Astra G, petrol · Astra G · Astra H · Astra J, petrol · Corsa B · Corsa C, petrol · Corsa C · Insignia A · Kadett D · Kadett E · Omega A · Omega B · Omega B2 · Vectra A, petrol · Vectra A · Vectra B, petrol · Vectra B · Vectra C · Zafira A, petrol · Frontera A, petrol · Frontera B · Ascona C · Vivaro A ·
We want your visit to be comfortable 🤝! We use cookies 🍪 to make that happen.