
OpelBook.ru
Cars AvtoVAZ Cars Mitsubishi Cars BMW Cars Mercedes Cars Nissan Cars Toyota Cars Chevrolet
English Русский
Български
Беларускі
Український
Српски
Hrvatski
Română
Polski
Slovenský
Magyar
 |  Sitemap  |  Contacts  |    


Main Astra Corsa Insignia Kadett Omega Vectra Zafira Others Articles
Zafira A (1999-2005, petrol)
  • Main
  • Zafira
  • Zafira A
  • Electrical equipment
  • Lighting and signaling
  • Astra headlight unit — removal and installation

Astra headlight unit — removal and installation (Opel Zafira A)

            0

Contents: Removal ⬇ Installation ⬇

Removal


1. Prepare the car for work (see "Preparing the car for maintenance and repair").

2. Remove the front bumper cover (see "Front bumper - replacement").

3. Using an 8 mm wrench, unscrew the three headlight mounting bolts.
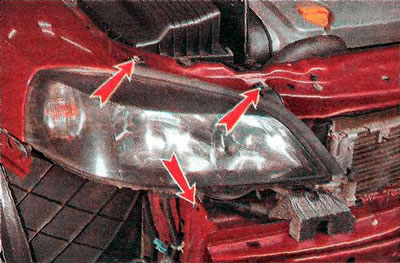
3. Using an 8 mm wrench, unscrew the three headlight mounting bolts.


4. Move the headlight away from the car body.
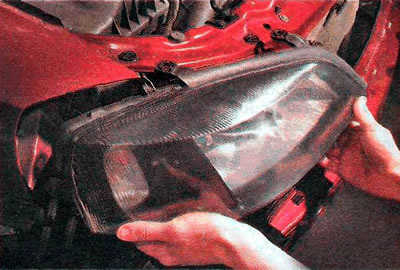
4. Move the headlight away from the car body.


5. Disconnect the wiring harness connector from the parking light bulb socket.
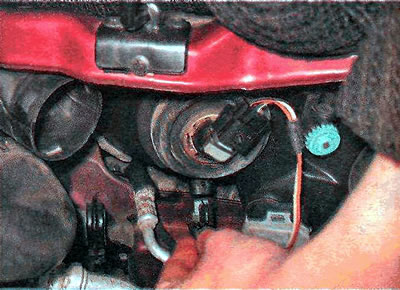
5. Disconnect the wiring harness connector from the parking light bulb socket.


6. Disconnect the wiring harness from the headlight corrector.
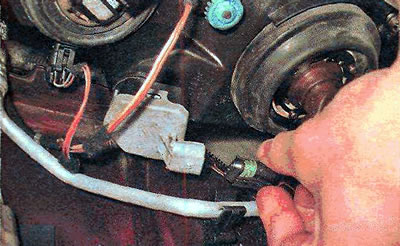


6. Disconnect the wiring harness from the headlight corrector.


7. Disconnect the wiring harness connector from the turn signal.
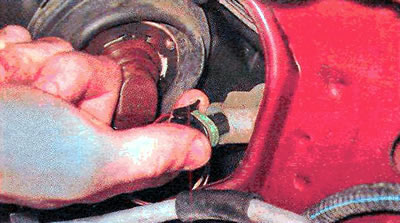
7. Disconnect the wiring harness connector from the turn signal.


8. Disconnect the wiring harness connectors from the low and high beam lamp sockets (see above).

9. Finally remove the headlight.

Installation


We install the headlight unit on the car in the reverse order. We check and, if necessary, adjust the direction of the light beam of the headlight unit (see "Headlight adjustment").


This article is available at russian, bulgarian, belarusian, ukrainian, serbian, croatian, romanian, polish, slovak, hungarian
Checking the article: Chernov Alexander

Share information:

Previous articles
Opel Zafira A: Lighting and signaling
Next articles

Headlight — bulb replacement
Maintenance of outdoor lighting and light signaling devices
Headlight adjustment
Checking the serviceability of outdoor lighting fixtures
Description of the design
Reference data
Headlight unit model Zafira — removal and installation
Headlight Corrector — Replacement
Fog Light — Bulb Replacement
Fog light — replacement
Side turn signal — removal, bulb replacement and installation
Astra model rear light — removal and installation


See similar ones from other Opel car manuals:
▶ Removal and installation the electric motor for adjusting… Opel Astra H (2004-2009)
▶ Removal and installation of the headlight unit Opel Corsa C (2000-2006)
▶ Headlight unit — removal and installation Opel Vectra A (1988-1995, petrol)
▶ Windshield and headlight washer Opel Insignia A (2008-2017)
▶ Checking the electronic control unit Opel Kadett E (1984-1995)
Link to this page in different formats

Visitor comments


No comments yet


How much will 31 + 49 =


Zafira A (1999-2005, petrol) 
  • General information
  • Governing bodies
  • User manual
  • Maintenance
  • Power unit
  • Engine repair
  • Control system
  • Cooling system
  • Exhaust system
  • Transmission
  • Clutch
  • Mechanical gearbox
  • Automatic gearbox
  • Front wheel drives
  • Chassis
  • Hubs, wheels and tires
  • Front suspension
  • Rear suspension
  • Steering
  • Brake system
  • Body
  • Maintenance and care
  • Exterior
  • Side doors
  • Climate control
  • Electrical equipment
  • Equipment and devices
  • Power devices
  • Lighting and signaling
  • Windshield wipers and washers
  • Electrical circuits
OpelBook.ru © 2017–2026 · Mobile version · · Sitemap: EN BG BY UA RS HR RO PL SK HU · Feedback · Site search
Astra F, petrol · Astra G, petrol · Astra G · Astra H · Astra J, petrol · Corsa B · Corsa C, petrol · Corsa C · Insignia A · Kadett D · Kadett E · Omega A · Omega B · Omega B2 · Vectra A, petrol · Vectra A · Vectra B, petrol · Vectra B · Vectra C · Zafira A, petrol · Frontera A, petrol · Frontera B · Ascona C · Vivaro A ·
We want your visit to be comfortable 🤝! We use cookies 🍪 to make that happen.